


You notice it after watering. The water rushes through the drainage holes, the foliage looks tired, and roots may be pressing against the pot or emerging below it. The instinct is to trim immediately, but bonsai tree root pruning rewards preparation and restraint. The right cut at the right time can restore a compact, functional root system. The wrong cut, made during heat or after allowing exposed roots to dry, can turn a routine maintenance task into a recovery problem.
Why Your Bonsai Needs Root Pruning and When to Do It
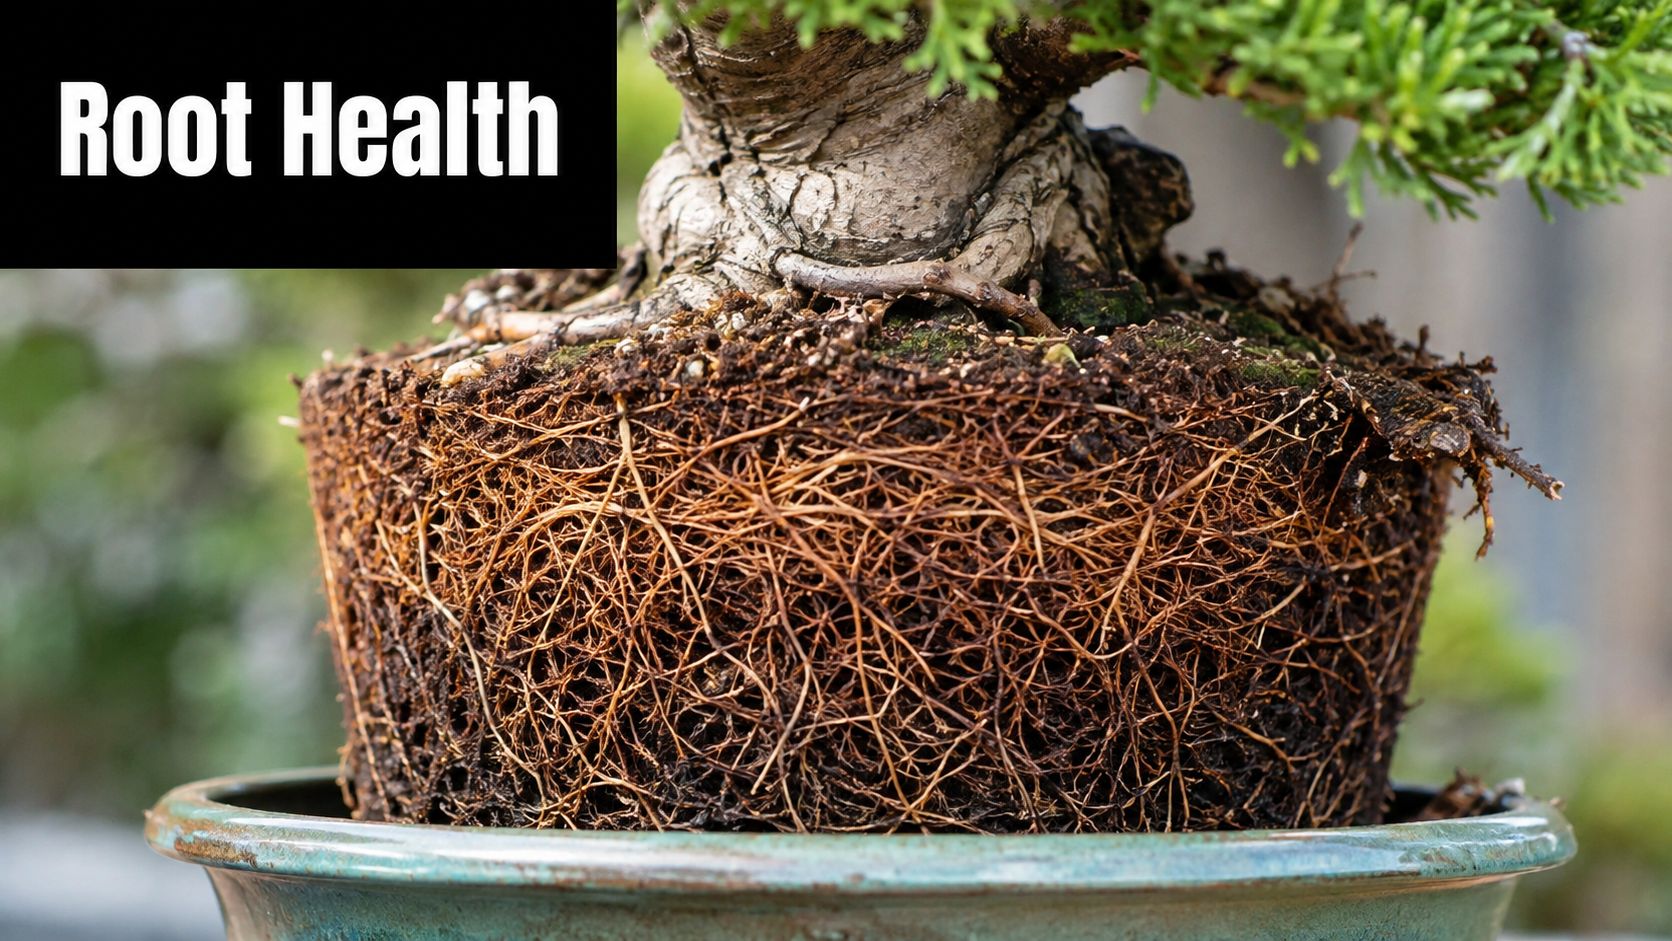
A bonsai's roots eventually fill the container. As the root mass becomes crowded, long roots circle the pot, downward-growing roots occupy the lower space, and old compost loses its useful structure. Water may run through channels instead of spreading evenly, while the tree's growth becomes less vigorous. Roots pushing from drainage holes are another clear sign that the tree has outgrown its available space.
Root pruning isn't cosmetic. It controls the tree's size while preserving the fine roots responsible for water and nutrient uptake. The practical objective is a compact, flat, circular root ball that fits the container and encourages fine-root development. The Royal Horticultural Society describes root pruning as part of repotting, alongside loosening spent compost, untangling long roots, trimming the root ball, and firming fresh compost around it. RHS guidance on bonsai repotting and root pruning explains why this maintenance keeps container-grown trees functional rather than merely small.
Read the tree before reaching for scissors
Routine root work is commonly carried out at two- to three-year intervals, but the tree's species and vigor matter more than the calendar alone. The Royal Horticultural Society notes that slow-growing pines may need attention every three to five years, while fast-growing birch may need annual work. A practical guide to when to repot a bonsai can help you compare the timing with the condition of your own tree.
Look for several signals together:
- Water behavior: Water refuses to enter the soil or races through the pot.
- Root congestion: Roots circle tightly around the container or push through drainage openings.
- Growth changes: New growth is weak or the tree seems unable to maintain its usual vigor.
- Compacted medium: The soil no longer drains and breathes evenly.
Spring is the safest general window, ideally before new growth resumes. The tree is preparing for active growth, and the timing gives it a better chance to replace damaged roots before the demands of summer. Avoid treating spring as a rigid date, though. Local climate, species, and the tree's current condition determine whether the buds are truly at the right stage.
Practical rule: If the tree is healthy and the roots are crowded, schedule the work for the appropriate spring window. If the tree is already weak, solve the cause of that weakness before removing a substantial part of its root system.
Essential Tools and Preparation Before You Start
Root pruning goes badly when the tree is out of the pot and the grower is still looking for a tool. Set up the entire procedure before lifting the tree. Exposed roots can begin drying within 10 to 15 minutes, so speed is part of the technique, not an optional refinement. Bonsai Bench's root-pruning workflow connects that short exposure time with the need for a fast, staged operation.
Build the workspace first
Use a clean, stable surface where spilled soil won't disappear into grass or floorboards. Place the empty pot, drainage mesh, securing wire, fresh bonsai soil, water, and every cutting tool within reach. Pre-moisten the new soil so it settles around the roots without forcing you to pause halfway through the repot.
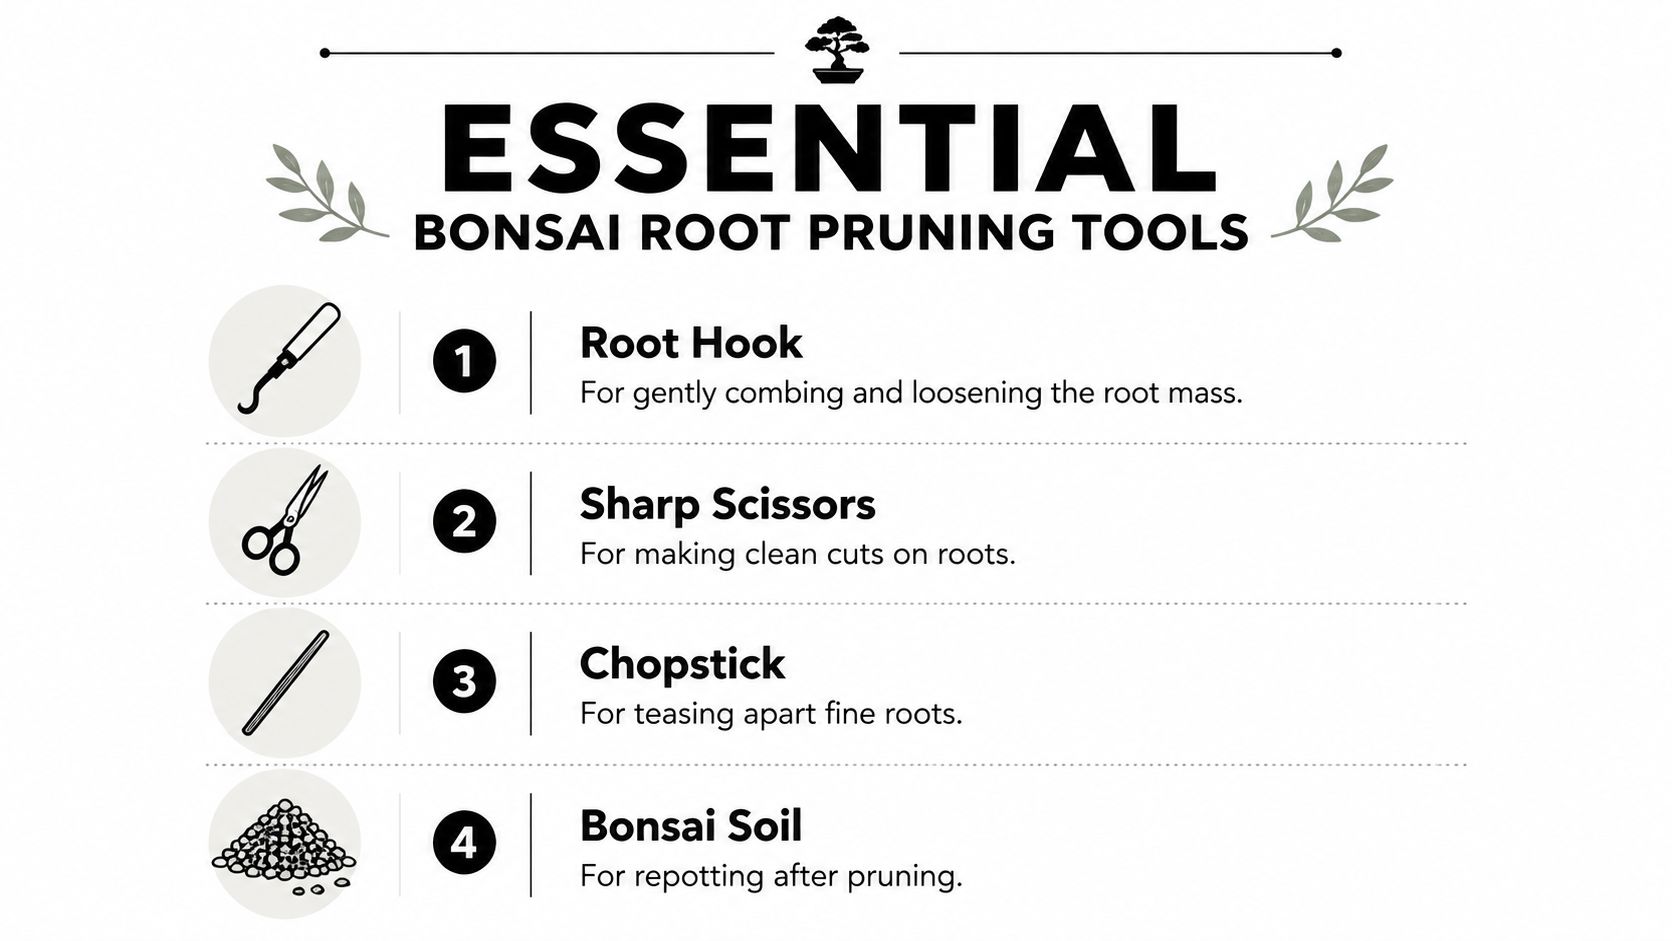
The basic tool set is simple:
- Root hook: Loosens the outer root mass and separates circling roots.
- Chopstick: Teases soil from finer roots with less force than a metal tool.
- Sharp root scissors: Make controlled cuts without crushing the root tissue.
- Concave cutters: Useful when removing larger roots and reducing awkward stubs.
- Mesh and wire: Keep drainage openings clear and anchor the tree securely.
- Brush and water: Clear loose soil and keep the work area manageable.
A clean blade matters. Wipe soil from tools during the job, and disinfect them before moving between trees when disease is a concern. A blunt cutter makes you push harder, which can tear roots that should have received a clean cut.
Prepare the tree and the pot
Water the bonsai thoroughly before the planned work, preferably allowing the root ball to become evenly hydrated rather than bone dry. Don't prune a tree that's already suffering from severe drought, heat stress, or unexplained decline unless you're addressing an urgent root problem.
Before cutting, test the pot and planting angle. The tree should sit at the intended height without forcing the roots into a cramped bend. This bonsai tool and care guide covers the role of pruning tools and accessories, while the actual choice should follow the tree's size and root structure.
Keep the time between removing the tree and covering the roots as short as possible. If the root ball is difficult to remove, slide a chopstick around the inside edge of the pot and check for hidden anchoring wire instead of pulling hard on the trunk.
The Root Pruning Technique From Start to Finish
The safest method works from observation to light cleaning, then from outer roots toward the center. Don't begin by chopping the bottom of the root ball. First learn where the structural roots, feeder roots, and problem roots are located.
Lift and inspect
Remove the tree from its container by loosening the edges and supporting the root ball. Never use the trunk as a handle. Once the tree is out, remove enough old soil to see the direction of the roots, but avoid stripping every particle from a delicate or fine-rooted system.
Use the root hook around the outside of the root ball, working inward gradually. A chopstick is better for teasing apart fine roots near the trunk. Identify the thick roots that provide structure, the roots circling the container, the roots growing straight down, and the fine feeder roots that form the active outer network.
Make deliberate cuts
On a healthy, established tree, a widely used guideline is to remove about one-quarter to one-third of the root mass. The Royal Horticultural Society's bonsai advice describes shaping the remaining root ball into a flat, circular form, while a specialist root-pruning reference places routine work around 20% to 30%, with heavier reductions reserved for severe cases.
Start with obvious long, circling, and downward-growing roots. Shorten them back to lateral roots where possible rather than leaving long stubs. Preserve a broad spread of fine roots around the trunk. If one large root dominates the system, don't automatically remove it all at once. Reducing it in stages can protect stability and give the tree time to produce replacement roots.
Work around the root ball evenly. Removing a large section from one side can destabilize the tree and leave an uneven root pad. Stop when the remaining roots form a tidy, shallow structure that fits the pot without folding, crushing, or forcing them into a tight coil.
The operation should be efficient, but not frantic. Set the tree down on a damp cloth if you need to pause briefly, keep it out of direct sun, and cover the roots as soon as the inspection and cutting are complete. For broader pruning context beyond bonsai, this complete pruning guide from Central Coast offers useful background on clean cuts and deliberate removal.
Watch the embedded demonstration for a visual reference, but judge your own tree by its roots, vigor, species, and season rather than copying every cut.
How Much to Prune by Species Age and Season
There isn't one safe cutting line for every bonsai. The decision depends on species, age, vigor, season, pot size, and climate. A vigorous young tree with a dense, healthy root system usually gives you more room to work than an old tree with sparse feeder roots. A slow-growing conifer also demands more restraint than a fast-growing deciduous or tropical species.
The broad routine range is about one-quarter to one-third of the root mass, but that figure is a starting point, not permission to remove the same amount from every tree. Bonsai Outlet's discussion of species, vigor, and repotting intervals emphasizes that timing varies with growth rate and microclimate, which is why a calendar-only approach often fails.
Use the tree's condition as the deciding factor
Ficus and other vigorous tropicals can often recover well from routine root work when they're actively healthy and growing in suitable warmth. Still, a houseplant bonsai kept in a hot, dry apartment isn't automatically strong. If the foliage is already stressed or the roots are sparse, reduce the intensity.
Elms and other vigorous deciduous trees often produce dense root systems and may need more frequent attention than slow conifers. Young development trees can be handled more actively when the objective is to build a radial root spread, but an older refined tree deserves measured cuts that protect its established feeder-root network.
Pines and junipers generally call for greater caution. Their slower growth means recovery can take longer, and a sparse root system gives you less margin for error. Pine guidance from the Royal Horticultural Society places repotting and root pruning at three- to five-year intervals, depending on growth rate and condition. Don't combine heavy root work with other major stress, such as drastic styling, unless you have a compelling reason.
| Species group | Root mass removal | Repotting interval |
|---|---|---|
| Ficus and vigorous tropicals | Routine work around one-quarter to one-third when healthy | Varies with growth and growing conditions |
| Elm and vigorous deciduous species | Often around one-quarter to one-third, adjusted for age and vigor | Faster growers need attention more often |
| Pine and other slow-growing conifers | Conservative routine reduction, especially on old trees | Slow-growing pines may need three to five years, according to the RHS |
| Juniper and mature conifers | Preserve fine roots and avoid aggressive reductions without strong reason | Longer intervals are common, based on root congestion |
Adjust for age and season
Young trees in active development can tolerate purposeful root correction because you're still building the nebari and planting position. Mature trees need preservation more than correction. If the root ball contains few fine roots, remove only what's necessary to restore drainage and fit the container.
Spring before new growth resumes is the preferred general window. Dormant-season work may allow stronger intervention in suitable species and climates, but dormancy doesn't make a weak tree safe to prune. During active summer growth, heat and water loss increase the cost of every mistake, especially for indoor bonsai placed near hot glass or on exposed balconies.
Decision rule: Strong tree plus crowded roots plus suitable spring timing supports routine reduction. Weak tree, sparse feeder roots, extreme weather, or an old conifer calls for lighter work or postponement.
Repotting and Aftercare for a Strong Recovery
A carefully pruned root system still needs stable conditions. Place the prepared tree into fresh, well-draining bonsai soil, spreading the roots outward rather than allowing them to fold beneath the trunk. The root ball should sit at the intended depth, with the trunk stable and the soil making full contact with the roots.
Work the soil into gaps with a chopstick, moving from the outer edge toward the trunk. Don't tamp aggressively. Firm the medium enough to remove major air pockets, then secure the tree so movement won't break newly cut roots. Water thoroughly until it runs from the drainage holes and carries loose particles away.
Manage the first recovery window
Keep the repotted tree out of direct sun for 7 to 14 days, and withhold fertilizer for 4 to 6 weeks, following the aftercare guidance summarized by Bonsai Bench. The roots need time to seal damaged surfaces and re-establish contact with the soil. Fertilizer won't repair a damaged root system, and applying it too soon can add unnecessary stress.
Indoor conditions create a different set of problems. A sunny window can heat the pot while dry air pulls moisture from foliage. A balcony can expose the tree to wind before the roots are functioning normally. Use a bright but sheltered position, keep the pot away from heating vents and hot glass, and monitor the soil rather than watering by habit.
Check moisture at the root zone. The surface can look damp while the interior drains poorly, or it can look dry while the lower pot remains wet. Water thoroughly when the medium needs it, then allow excess water to drain completely. Don't leave the container standing in a tray of water.
This guide to repotting bonsai without damaging roots provides additional handling guidance for keeping the root system supported during the transition.
Increase light gradually
After the shelter period, return the tree to stronger light in stages rather than moving it directly into harsh exposure. New growth is a useful sign that the tree is resuming normal function, but don't treat a single flush as permission to resume every aspect of the old routine immediately.
For a climate-stressed home, the priorities are simple: stable temperature, protection from drying drafts, careful watering, and no fertilizer during the defined recovery period. Humidity can help reduce foliage water loss, but a sealed, stagnant enclosure can encourage fungal problems. Air movement should remain gentle, not forceful.
Common Mistakes and How to Troubleshoot Problems
The most common mistake is treating the guideline as a target. Removing one-third from a healthy, vigorous tree may be reasonable, but removing the same amount from a weak pine, an old bonsai, or a tree already exposed to heat can be excessive. Root mass matters, but so does the quality of the remaining feeder-root network.
Working slowly is another avoidable error. Roots left exposed in sun, wind, or dry indoor air can start drying within 10 to 15 minutes, according to Bonsai Bench's practical root-pruning guidance. Prepare the pot and soil first, keep tools close, and protect the root ball whenever your attention has to move away from the tree.
Diagnose the warning signs
- Wilting with damp soil: The roots may be damaged, compacted, or unable to supply the foliage. Move the tree to sheltered light, improve airflow gently, and avoid adding more water until you've checked drainage.
- Leaf drop: Some stress-related shedding can follow root work, but continued decline means the tree needs stable conditions and close observation rather than fertilizer.
- Brown leaf tips: Check wind, heat, direct sun, and inconsistent moisture before assuming the soil needs nutrients.
- Persistent sogginess: A water-retentive medium or blocked drainage can deprive the recovering roots of oxygen. Confirm that water exits freely and don't let the pot sit in runoff.
- Loose trunk: The tree may not be anchored. Secure it carefully so fresh roots aren't torn by movement.
If you pruned too aggressively, reduce stress instead of trying to stimulate growth. Provide sheltered light, protect the tree from wind, maintain even moisture without saturation, and avoid fertilizer during the recovery period. A temporary humidity enclosure can reduce foliage water loss, but it needs ventilation and regular inspection so condensation doesn't remain stagnant.
Bonsai tree root pruning becomes reliable through measured decisions. Inspect first, preserve fine roots, cut only what the tree and container require, and let the season guide the intensity. A modest operation performed cleanly is more useful than an ambitious reduction followed by emergency care.
Leaves & Soul offers bonsai soils, fertilizers, glazed ceramic pots, wiring kits, and bundled bonsai sets for growers preparing for root work and repotting. Visit Leaves & Soul to choose the soil and accessories that fit your tree, workspace, and recovery plan.