


Most beginner pages answer how do you start a bonsai tree for beginners with two shortcuts: pick an "easy" species, then water on a fixed schedule. That advice looks tidy, and it is how a lot of first trees stall. A small plant in a shallow pot is not a finished bonsai, and a calendar does not know your room, your wind, or your mix. The useful start is a lifestyle choice among seed, a cutting, and healthy nursery stock, then one first-year system that ties drainage, the pot, and a daily moisture check together.
"A Small Tree Is Not a Finished Bonsai"
A supermarket bonsai often arrives already tired. The trunk is thin, the soil is dense, and the pot is more souvenir than growing space. Buying that weak little tree and trying to "style" it the same weekend is the move that stalls the most first projects. You are looking at a miniature, so it feels finished. It usually isn't.
A display tree you admire at a show has already spent seasons building roots, a trunk, and branches. Your project starts much earlier. Virginia Tech notes that growing from seed is slow, while seedlings planted outdoors may need two to five years before development in a bonsai container. That range is the honest clock, not a failure on your part.
Three real starts sit behind that small look:
- Seed gives you the whole life of the tree, and it also gives you the longest wait before anything looks like a design.
- A cutting can move faster for species such as olive, willow, cotoneaster, firethorn, azalea, and boxwood. Those names are examples of quicker material, not a shopping encyclopedia.
- Healthy nursery stock suited to your region is the practical tree you can train first, because it already has a root system and some trunk.
The same Virginia Tech guidance says layering and grafting are generally not recommended for beginners. Those methods ask for timing and aftercare you don't need yet.
Why the windowsill fantasy stalls
Outdoor trunk development can matter for years. A seedling kept forever in a heated room often stays thin because many trees need real light, seasonal change, and room to thicken before a shallow container makes sense. "Indoor bonsai from seed" sounds cozy. For a lot of homes it is an unrealistic timeline dressed up as a houseplant.
Fit check: Match the start to your patience, your climate, the space you can give the tree, and the result you actually want.
If you want a first styling project, begin with healthy nursery stock or a rooted cutting. Keep seed as a parallel lesson you can watch across seasons, not as the tree you expect to wire before the year is out.
Choosing Seed Cuttings or Nursery Stock
Pick one primary path. Trying seed, cuttings, and a nursery tree all at once splits your attention, and beginners lose trees when every pot is an experiment.
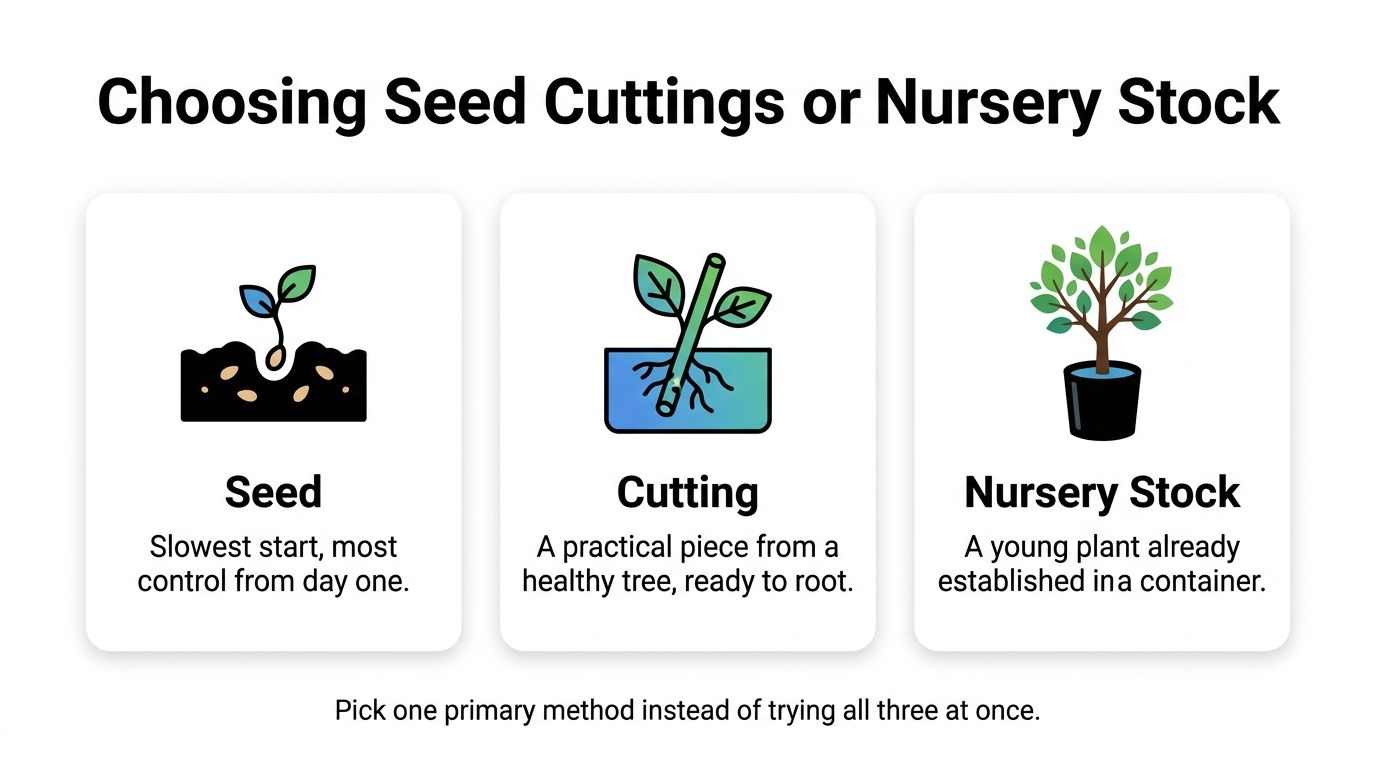
Beginner propagation guidance indicates that it can take at least 5 years before a seed-grown plant becomes a reasonably developed bonsai. Germination is only the doorway. A sprout is not automatically a good specimen. You still select, build a trunk, establish roots, and train slowly. That same guidance notes that cuttings preserve the genetic characteristics of the parent plant and can begin with a thicker stem, while seed allows greater variation and a longer educational timeline.
What each path actually teaches
Seed teaches sowing, germination, and patience. You see every stage, including the awkward years when the plant is just a stem in a pot. Early work stays conservative. The young plant needs vigor before anyone reaches for wire. If you want that long lesson, a bonsai from seed walk-through is the companion project, not the tree you style first.
A cutting teaches propagation and early watering. You start closer to a usable stem, and you keep the parent's traits, which matters if you already like a specific tree. A rooted cutting is still a young plant. Serious shaping waits until the roots and trunk can take it.
Nursery stock teaches potting and design sooner, if the plant is healthy and suited to your climate. Skip the weak mall tree. A sturdy nursery plant in ordinary soil can move into a proper mix and become your first styling tree while a seed pot grows in the background.
| Method | Typical pace | Best first use | Main trade-off |
|---|---|---|---|
| Seed | Slowest | Learning germination over many years | A long wait before it looks like a bonsai |
| Cutting | Faster than seed | Propagation practice and a thicker start | Still years from major shaping |
| Nursery stock | Soonest styling | First design project | You inherit someone else's early growth |
There is no single success rate that covers every species and every piece of wood. Fresh, flexible growth is a kinder first cutting than a thick old branch. For the tree you intend to style, nursery stock or an already rooted cutting fits most lives. Seed stays the slow class you take on purpose.
Picking Soil Pots and Starter Tools
The method only survives if the pot can breathe. Fine, compact potting soil is the wrong default. It holds water against the roots and squeezes out air.

Bonsai basics guidance says to plant in a shallow container with drainage holes using a coarse, granular, fast-draining substrate, and to sift out excessive fines, because compacted particles reduce air-filled pore space and increase root-rot risk. A shallow pot is correct only when water can leave. A pretty bowl with no holes is a bowl, not a bonsai pot.
Secure the root ball so the tree cannot wobble. Movement tears the fine feeder roots that are trying to grip new mix. That single tie-down prevents a quiet failure that looks like "the tree just declined."
A short kit, matched to the start
You don't need a cabinet of tools on day one.
- Mix: a coarse bonsai soil, sifted so dust doesn't pack the pot. A deeper look at the best soil for indoor bonsai helps if the tree will live near a window for a while.
- Pot: shallow, with real drainage holes, plus mesh or another simple screen so the mix stays in.
- Anchor: wire to hold the root ball still.
- Watering rose or fine spray: so you wet the whole mass instead of blasting soil out of the pot.
- Cutters: sharp or concave cutters can wait until you are pruning. Don't buy them as a reason to cut a weak tree.
Leaves & Soul is one place that bundles those pieces: purpose-built bonsai soil, 18-6-8 slow-release bonsai pellets, glazed ceramic pots, wiring kits, and sets that pair soil, fertilizer, and a color-matched container. Treat the pellets as later food. The same basics guidance says to avoid fertilizer right after repotting, and one extension source recommends waiting 3–4 weeks so damaged roots recover before salts go on.
A short clip on the first setup makes the drainage point easier to picture than a product photo does.
Buy for the path you chose. A cutting needs a small, sterile, airy pot of mix. Nursery stock needs a draining container and anchor wire. Seed needs a clean free-draining medium and patience, not a styling kit.
Planting the Tree and Protecting New Roots
Planting is a root job. The silhouette can look plain. Success is a stable root system, not a show tree.
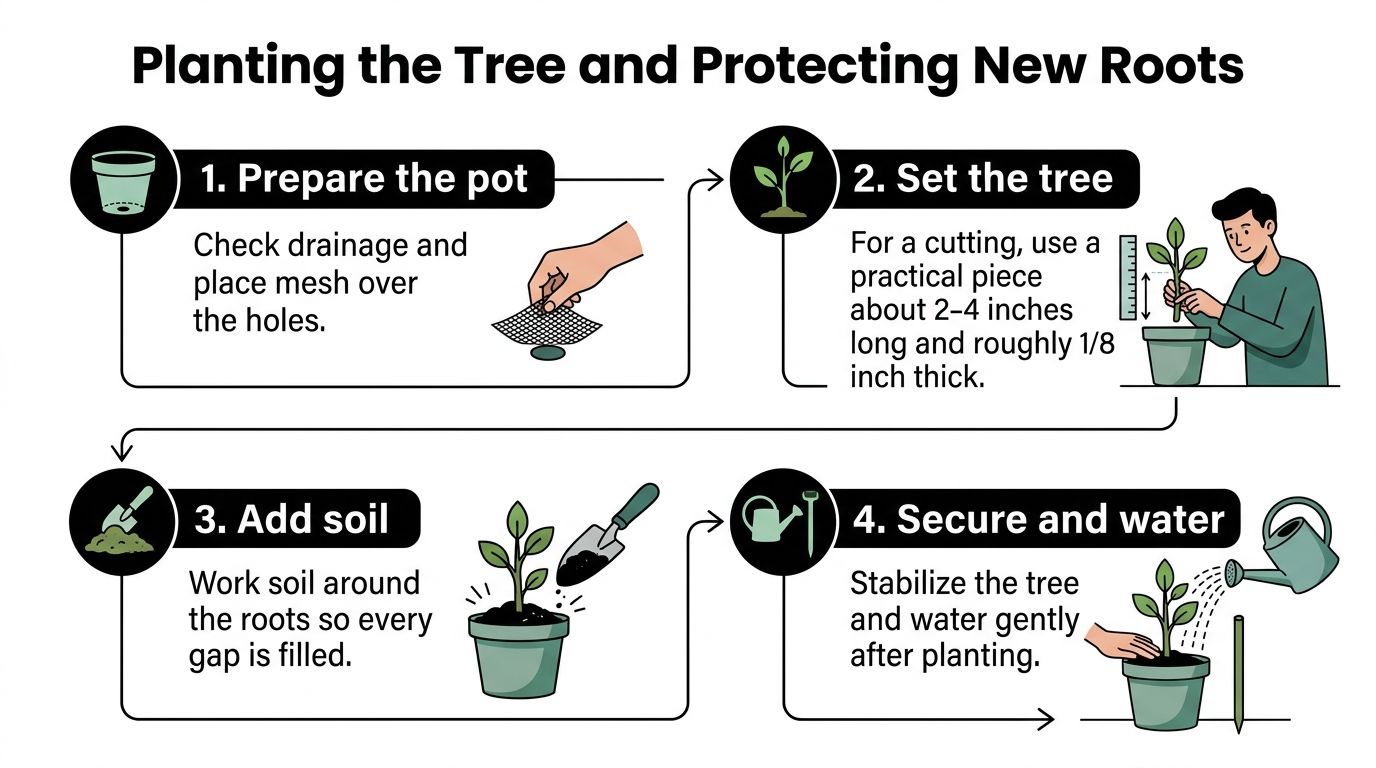
Bonsai cultivation guidance describes a practical beginner protocol: take several healthy cuttings during the species' growth window, make clean cuts below a node, remove excess foliage, and insert them into a sterile, evenly moist but aerated medium. Keep bright indirect light and high humidity without saturating the mix. Younger, thinner cuttings generally root more readily than thick mature branches. Take more than one. One cutting is a gamble. Several cuttings are a class.
Cuttings, then a later repot
For the cutting itself, use a short, slender piece of healthy growth, not a woody branch you forced off an old limb. Strip the lower leaves so buried foliage doesn't rot. Set the base into the mix so it stands on its own, then firm the medium without packing it into mud. Slightly moist is the target. Waterlogged mix pushes oxygen away from the cut, and that is how cuttings blacken instead of rooting.
Nursery stock, or a cutting you repot after it has rooted, wants a different moment. Work in early spring, just before active growth. Keep as many fine feeder roots as you can. Shorten only roots that are congested or circling. Set the tree for the light that species wants, then tie the root ball so it cannot rock. Water slowly until water exits the holes. A splash on the surface is not a watering.
Keep a newly handled tree shaded or otherwise protected until growth resumes. Fresh roots are doing repair work, not posing for a sunny ledge.
That cultivation guidance also notes that repotting intervals commonly range from two to four years, depending on vigor and age. Don't lift the tree every spring out of habit. Repot when the pot is packed and the tree is strong, not because the calendar flipped.
Stop here. No trunk wire, no hard cut, no "while I'm in there" root prune. The planting worked when the tree sits still, the mix drains, and new growth returns. Styling is a later season.
Watering Pruning and Early Training
After the pot is stable, the daily skill is judgment. A Monday and Thursday schedule ignores species, pot size, mix, heat, light, wind, and season. Indoor heat and air conditioning dry a pot differently from outdoor sun and wind. You check conditions. You don't obey a universal clock.
A moisture check you can repeat tomorrow
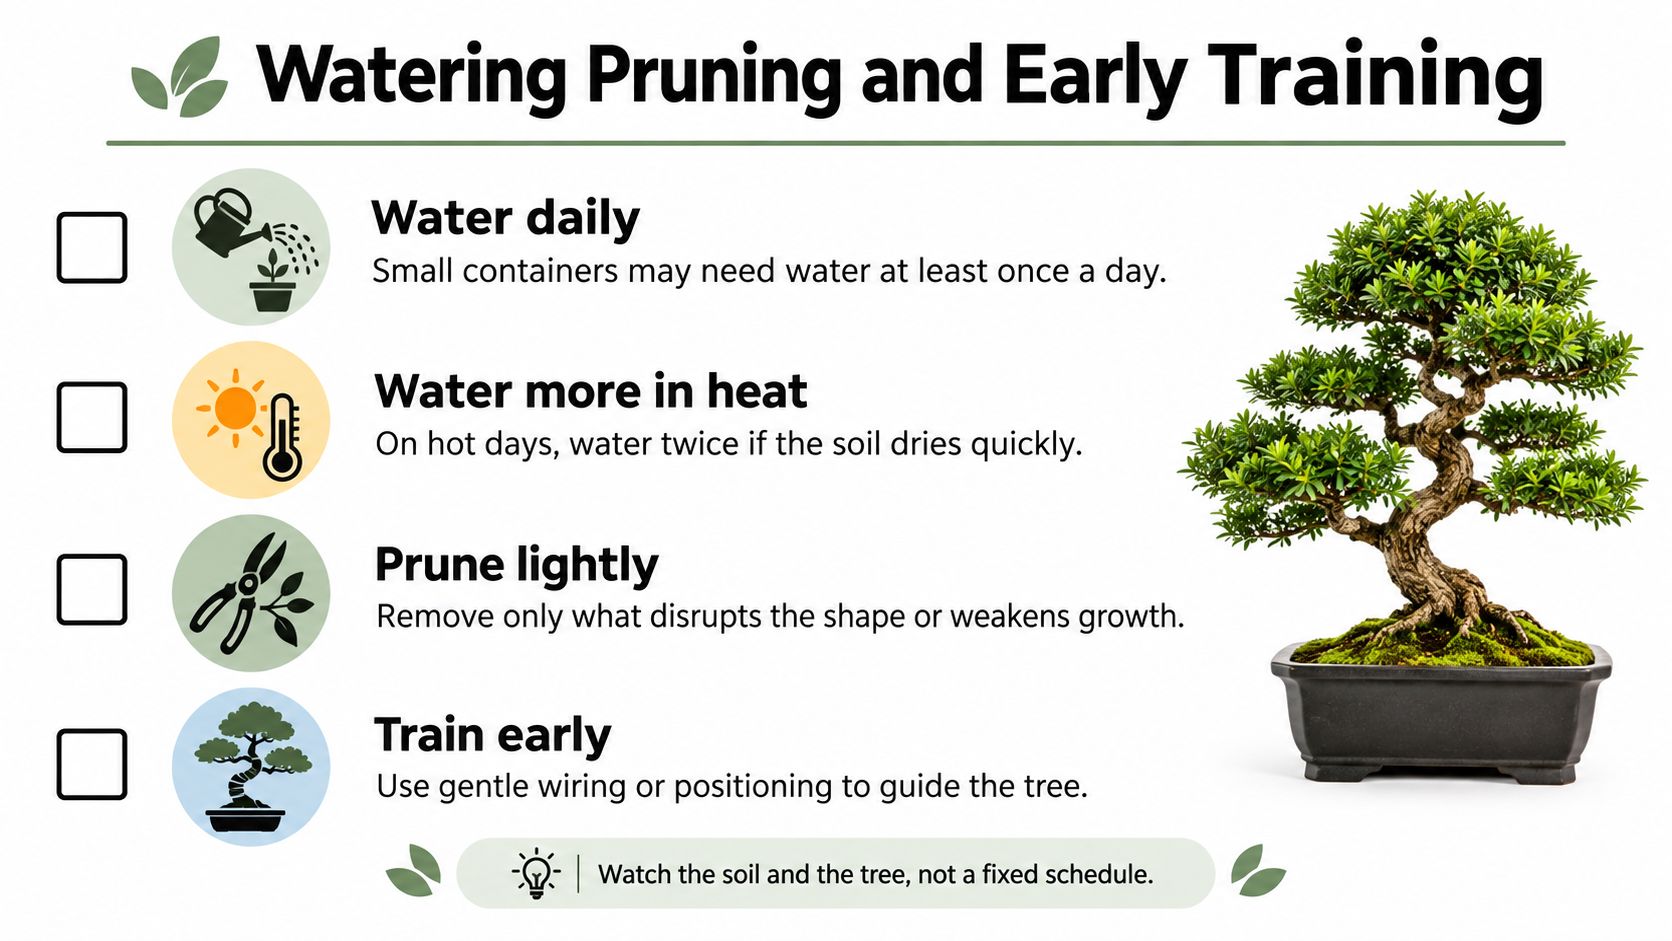
Popular bonsai care notes pass on a simple rule: check moisture daily after repotting, and water only when the surface begins to feel slightly dry. Newly handled trees should stay protected for several days. The same point is easy to miss: frequent watering can still coexist with overwatering if the substrate stays saturated and airless.
Run the check in this order:
- Look under the surface. The top crumb can lie. Scratch a little and see if the mix below is still cool and dark.
- Lift the pot. A light pot is drying. A pot that stays heavy day after day is not "well watered." It is airless.
- Soak the whole root ball until water runs from the holes, then empty the saucer. Fast drainage is not the same thing as dryness. A gritty mix still needs a thorough drink when it is ready.
- Change the check with the room. A windy balcony and a heated apartment are different plants even in the same pot.
A deeper pass at how often you should water a bonsai tree is worth reading once you know your own pot's weight. Small containers dry faster than you expect, and a hot afternoon can ask for a second look. That is still not a schedule. It is a response to a dry upper layer.
Training that waits for vigor
A cutting that has only just rooted is not ready for major wiring or a hard prune. Early trunk wire and severe root pruning are common setbacks. Let the plant grow freely so the trunk can thicken. When you do cut, keep it light and purposeful: a shoot that crosses, a tip that is racing away, nothing that strips the tree of energy.
If the tree looks weak, the correct design move is to do less.
Watch new growth, leaf color, and whether the pot is drying in a familiar rhythm. Style the tree after it is vigorous. The first year is roots, water, and restraint.
Building Habits for the First Few Years
The first year is a rhythm, not a second planting lesson. One primary tree carries the styling project. Seed, if you sowed it, stays the long side project. The draining mix stays in the pot. Your eye checks moisture instead of a weekday alarm.
Published cutting guidance reports typical rooting periods of about 2–6 weeks, though some species take several months. New growth is only the start. A rooted cutting is not a finished bonsai. That beginner-oriented source notes that cuttings can require several years before they are ready for shaping. The trunk and the root system still have to earn the wire.
Keep a short seasonal note, not a diary novel. Once a month, write three lines: how fast the pot dried, where the light actually fell, and whether you were tempted to cut a tree that wasn't pushing growth. Those notes beat a new tool.
Three quiet failures show up before the tree looks dramatic:
- A constantly heavy pot means the mix is staying wet and airless, even if you water "on schedule."
- A wobbling root ball means new feeder roots are getting torn every time the pot is moved.
- Styling cuts on a weak tree spend energy the plant needed for roots and trunk.
The next move is supply, not a new technique. Set aside a drainage-first soil, a pot with a real drainage path, wiring you will not use until the tree is strong, and slow-release pellets that stay in the cupboard until roots have recovered. Expert-looking trees come from repeating those small correct habits across seasons. The miniature arrives late. The habit starts now.
Leaves & Soul carries the drainage-first soil, glazed pots, wiring, and bonsai fertilizer that a first tree uses, so the start matches the method you picked instead of a fixed watering myth. If you're ready to set up that first-year system, visit Leaves & Soul and choose the bundle that fits nursery stock, a cutting, or a long seed project.