


“Give it cooler nights” is the most popular orchid reblooming advice, but it leaves out an essential detail: a hot windowsill during the day can undo that effort. More fertilizer won't solve the problem either if the plant doesn't receive enough light to support a flower spike.
The practical answer to how to get orchids to rebloom indoors is a seasonal plan: rebuild leaves and roots after flowering, check light and temperature, then provide sustained cooling. Start with a min-max thermometer and a look through the pot, not a stronger bottle of feed.
Rebloom Calendar and Start Date from Autumn to Spring
Use this calendar for a common indoor moth orchid, Phalaenopsis. The seasons describe the plant's progression rather than fixed deadlines, so shift them to match your local autumn and the condition of your orchid.
The American Orchid Society's orchid-care guidance describes recovery days around 75–85°F (24–29°C), followed by several weeks of cooler nights near 55°F (13°C) while avoiding sustained daytime temperatures above approximately 82°F (28°C) during induction. Treat the warm end of the recovery range as a growing condition, not a flowering target.
Rebloom calendar by phase
| Phase | When | Day temperature | Night temperature | Care focus |
|---|---|---|---|---|
| Post-bloom recovery | Late spring to summer | Normal indoor warmth, without hot glass | Comfortable room temperature | Bright filtered light, water as the mix approaches dry, dilute feed during active growth |
| Cool-night induction | Early to mid autumn, after recovery | Cool enough to avoid daytime overheating | Sustained cool-room conditions | Keep conditions steady and draft-free; pause feeding as a simple management routine |
| Spike elongation | Late autumn into winter | Maintain the induction setting | Continue the established cool pattern | Watch the leaf base; resume dilute feed when the spike appears |
| Flowering | Winter to early spring | Mild room conditions, away from heaters | Stable, comfortably cool conditions without cold shocks | Support the spike, monitor humidity, keep away from heating vents |
The feeding pause is a practical way to simplify care while growth slows. It isn't the flowering trigger, and withholding fertilizer won't compensate for a dim window or overheated leaves.
Choose the start date by plant condition
Induction only makes sense after recovery. If your orchid is still flowering in October, don't force it onto an autumn schedule just because the calendar says so. Wait for the flowers to finish and look for active roots or a developing leaf.
Before choosing a start date, run these checks:
- Confirm recovery. Look for firm foliage, firm roots and fresh growth. A plant with collapsing leaves or mushy roots needs rehabilitation rather than a flowering treatment.
- Work backward without promising a deadline. Allow a sustained induction period plus time for the spike to develop and buds to open. For a hoped-for February display, early autumn is a planning example, not a guaranteed appointment.
- Measure the actual location. Put a min-max thermometer at leaf height and record the room through ordinary heating, sunshine and nighttime conditions. A thermostat across the room won't reveal a hot patch beside the glass.
- Settle the light first. If the plant sits in a dim corner with unusually dark foliage, improve its placement before starting induction. Don't keep moving it between unsuitable spots while waiting for a spike.
Calendar rule: Start when the orchid has recovered, not when you're tired of looking at an empty flower stem.
This week, write down the flowering date you'd like and a provisional induction start date. Beside it, note the condition that must be met first: active roots and firm leaves.
Post-Bloom Care Before the Next Spike
Handle the old flower spike first. If it's green, you can leave it intact or cut just above a healthy dormant node to encourage a possible side branch. If it's brown and dry, remove it near the base without cutting into the crown.
A side branch isn't the same as a fresh spike from the plant's base. On an orchid with weak foliage or poor roots, I'd remove the old spike and prioritize recovery rather than try to extend the display.
Reset water, feed and the root zone
Water thoroughly, then let the pot drain completely before returning it to a decorative container. Water again when the medium is approaching dry, not because the same weekday has arrived. In a clear pot, roots becoming silvery and the disappearance of condensation are useful clues, but check the medium inside the pot too.
Cooler conditions usually slow drying. If the bark remains wet while the roots turn brown and soft, reduce watering and inspect the root system. This guide to how often to water orchids indoors helps you build a routine around the potting medium rather than a rigid schedule.
Use a diluted, balanced orchid fertilizer during active recovery. Pause your routine during induction if that makes watering easier to manage, then resume gently when the spike is growing; don't treat the pause itself as a bloom treatment.
Repot when bark becomes crumbly, the center stays persistently wet, or roots have crowded out usable medium. Fresh root tips are a better timing cue than a calendar deadline. Use airy orchid bark, a draining pot and clean snips, removing only roots that are hollow, dead or mushy.
Don't repot a sound orchid merely because you've started its cool period. Disturb the roots when there's a root-zone problem to fix.
Before induction, check that you've completed the basics:
- Spike handled. Keep healthy green tissue only if the plant can support it.
- Roots checked. Firm roots stay; decayed roots come out.
- Watering adjusted. The pot drains and the center doesn't remain saturated.
- Feeding organized. Recovery feeding and the induction pause are clearly separated.
Light That Gives Your Orchid Enough Energy
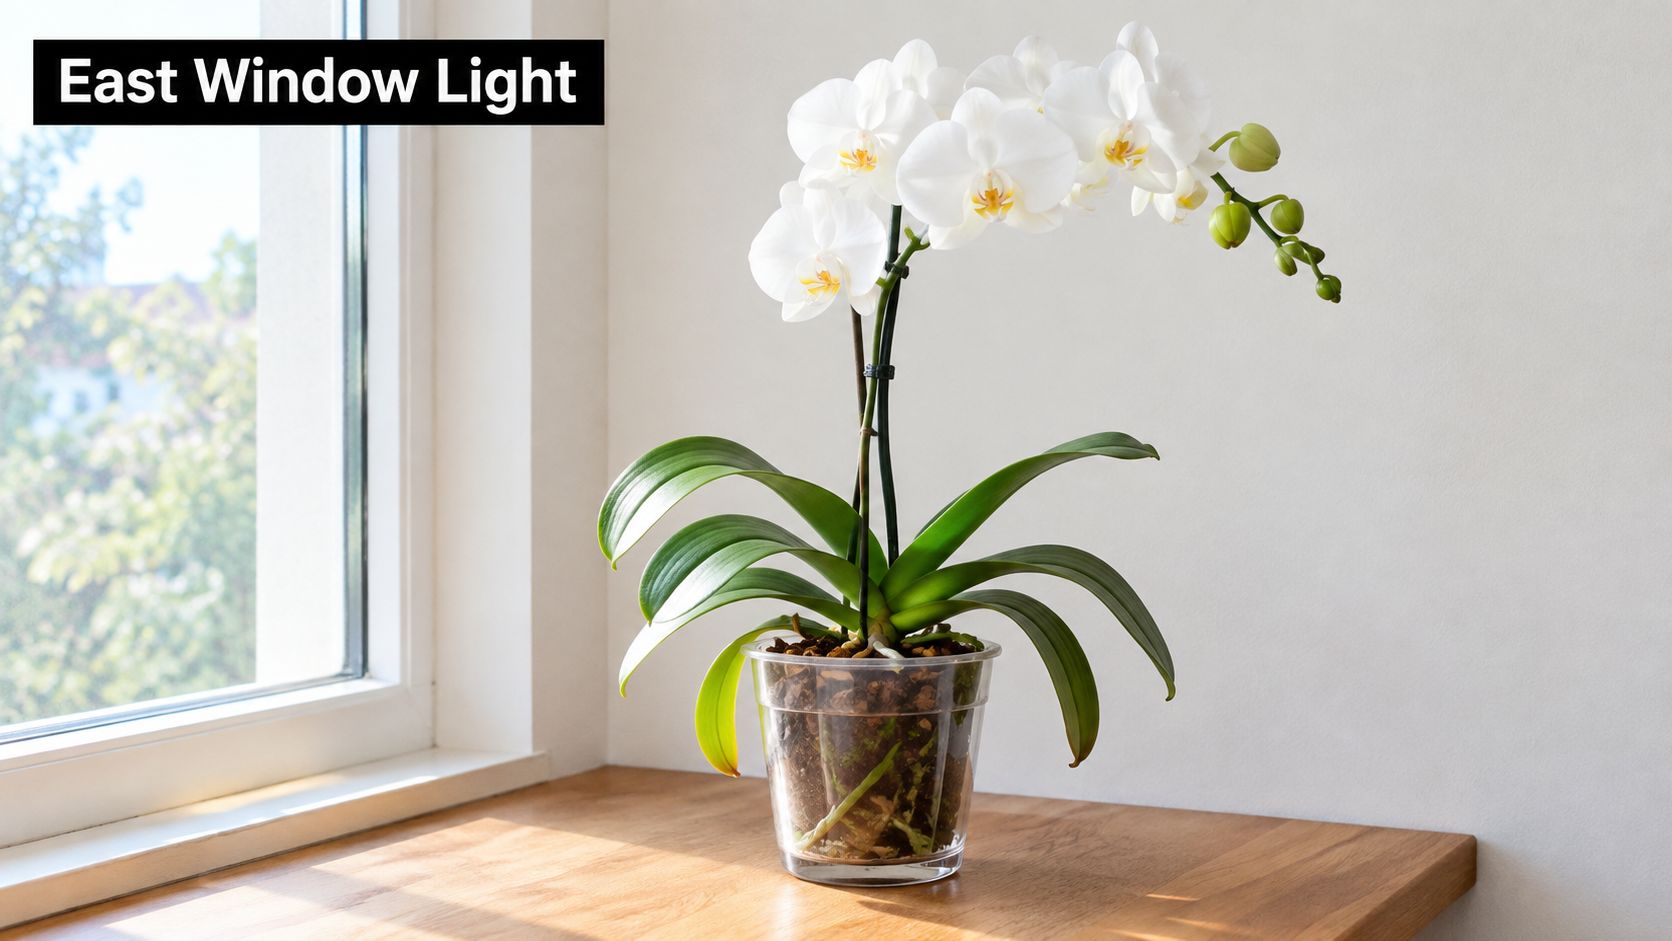
Read the leaves, but don't diagnose by color alone. Firm, medium-green to yellow-green foliage can suit a healthy moth orchid; unusually dark leaves with little productive growth suggest checking light. Soft leaves can also indicate root trouble, while bleaching or sharply defined scorched patches point toward excessive exposure.
The American Orchid Society's Phalaenopsis culture guide gives approximately 1,000 foot-candles as sufficient light and recommends an east-facing window or filtered south- or west-facing exposure. Use a light meter at leaf level if window descriptions leave you guessing.
A window is a useful starting point, but the plant's response determines whether the position works.
Window placement and what the leaves show
| Placement | Light character | What the leaves show | What to do |
|---|---|---|---|
| East window | Morning sun, gentler afternoon conditions | Firm, medium-green or yellow-green leaves | Keep it there while growth remains sound |
| South window with sheer curtain | Strong filtered light | Healthy green foliage without bleaching | Increase shade or pull back if exposed areas pale |
| West window with sheer curtain | Bright afternoon light, potentially warm glass | Healthy foliage or signs of heat stress | Check leaf-level temperature during afternoon sun |
| South or west glass, no curtain | Concentrated direct sunlight | Bleached or scorched patches, sometimes reddening | Shade or relocate promptly |
| North window or dim room | Often limited light | Unusually dark foliage and weak growth | Measure light, then improve exposure or supplement |
Separate brightness from heat
Don't press leaves against glass to gain more light. Move the plant into a brighter position gradually, watching the exposed leaf surfaces for discoloration and checking whether the thermometer rises sharply during sunshine.
Existing dark leaves may not change color quickly, so judge new growth as well. Firm new leaves, active root tips and an absence of scorch tell you more than a single color comparison.
The houseplant lighting guide can help you assess exposure beyond the window's compass direction. Recheck placement as daylight changes; a position that supports summer growth may become inadequate during winter.
How to Trigger a New Flower Spike
A cool-night treatment should be sustained and measurable, not a cold shock from an open window. Prepare a healthy plant, establish its position, and change temperature without sacrificing light.
Use the visual sequence as an overview, then follow the measured temperature choices below.
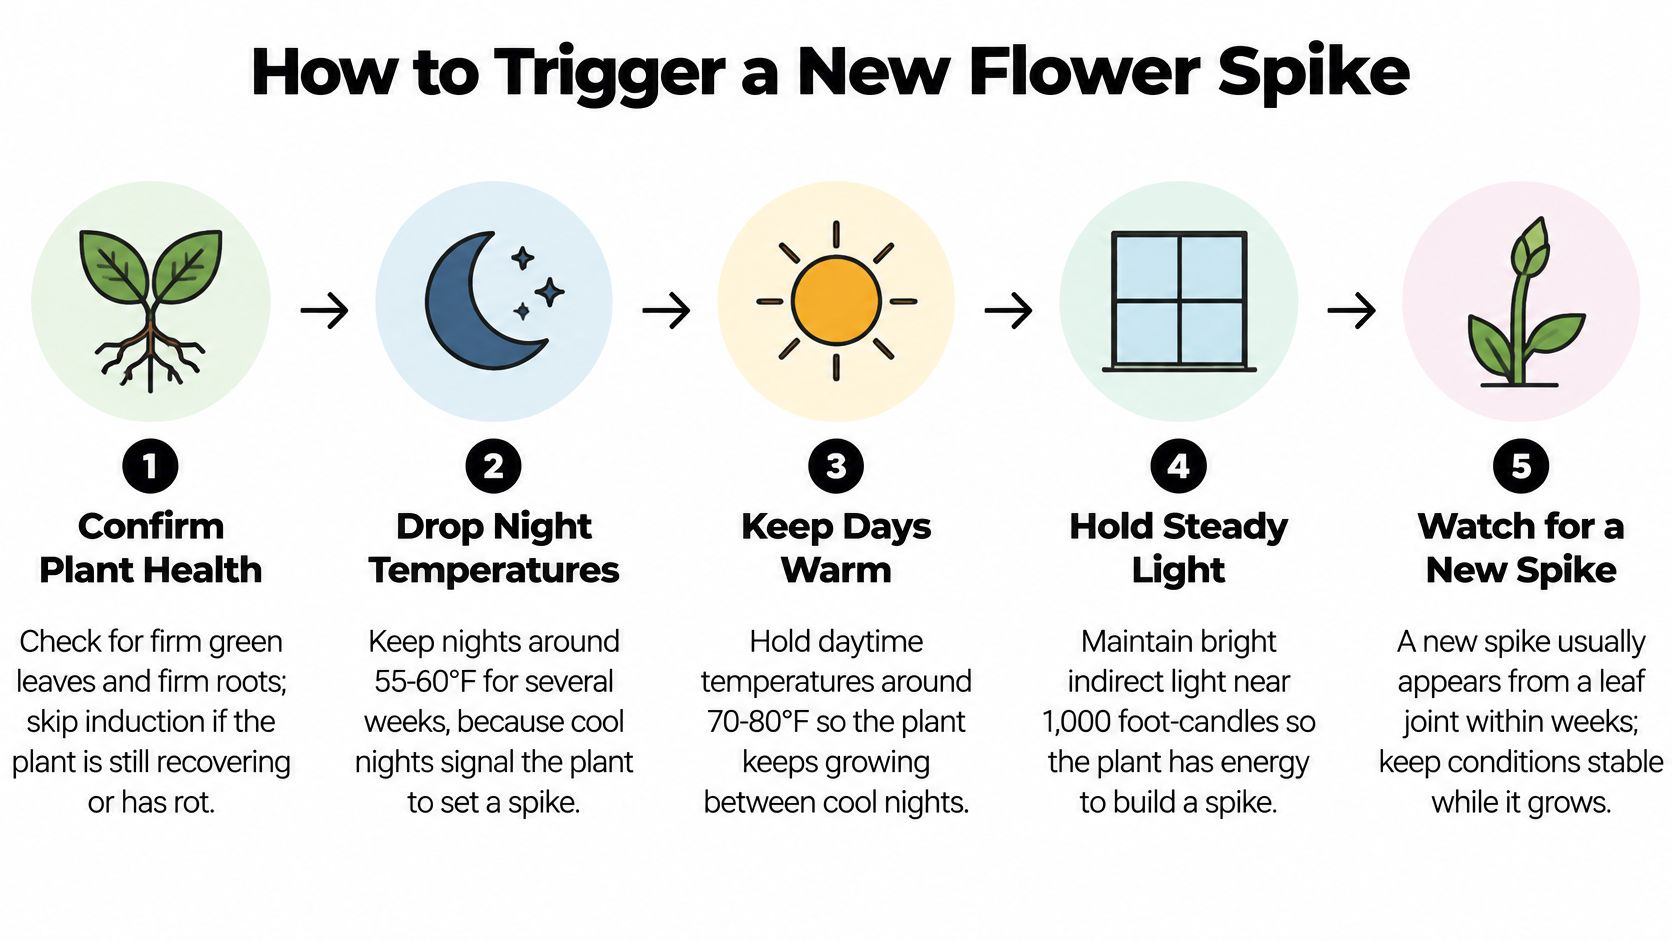
Establish the conditions and hold them
- Confirm the plant is ready. Choose a mature orchid with firm leaves and firm roots, ideally showing fresh growth. Skip induction if the crown is soft, the roots are rotting or the foliage is progressively collapsing.
- Put it in bright filtered light where the leaves won't bake against glass. Check the position during direct sunshine, because a room that feels comfortable can still contain an overheated windowsill.
- Measure at leaf height. Place a min-max thermometer beside the foliage, away from direct contact with glass or a radiator. Record representative days and nights before adjusting the room, rather than assuming the thermostat tells the whole story.
- Choose a sustained, attainable temperature pattern. Michigan State University's orchid-flowering guidance reports uniform spike initiation with day/night temperatures of 77/68°F (25/20°C) or 68/59°F (20/15°C) for four to five weeks, and notes that most Phalaenopsis species and hybrids need exposure below 82°F (28°C) for spike elongation.
- Protect the plant from abrupt exposure. Use a cooler room rather than a drafty sill or an open exterior door. The goal is a stable growing environment, not chilled leaf tissue followed by a return to an overheated room.
- Watch the leaf axils for a new projection. A developing flower spike commonly has a flattened, mitten-like tip; a root usually has a smoother, rounded growing tip, so don't stake or redirect an unidentified nub.
- Once the spike is unmistakable, keep the position stable. Add support as it lengthens, using a loose orchid clip rather than fastening the tender tip, and avoid unnecessary repotting.
Protect the developing spike
Keep checking daytime conditions after the spike appears. Excessive warmth after induction can favor a keiki, or plantlet, instead of the flowers you intended to encourage.
Resume a modest feeding routine when growth is underway, but don't suddenly increase concentration because you can see a spike. The guide to when to fertilize orchids helps separate nutrient support from the environmental cue that initiates flowering.
For a visual demonstration of orchid reblooming care, watch the video below.
Species Triggers Beyond Phalaenopsis
Applying a moth orchid routine to every orchid can mean keeping a resting cane orchid too wet or chilling a slipper orchid unnecessarily. Identify the plant before choosing its treatment; a shared orchid label doesn't mean shared seasonal requirements.
The orchid-care overview published by Thursd highlights differences among Phalaenopsis, Cattleya, Dendrobium and Paphiopedilum. It also summarizes Michigan State findings that Phalaenopsis exposed to 84°F days failed to spike even when nights cooled to 63°F, illustrating why a nighttime drop alone isn't a complete prescription.
Growth habit offers useful clues, although the plant label remains more reliable than appearance alone.
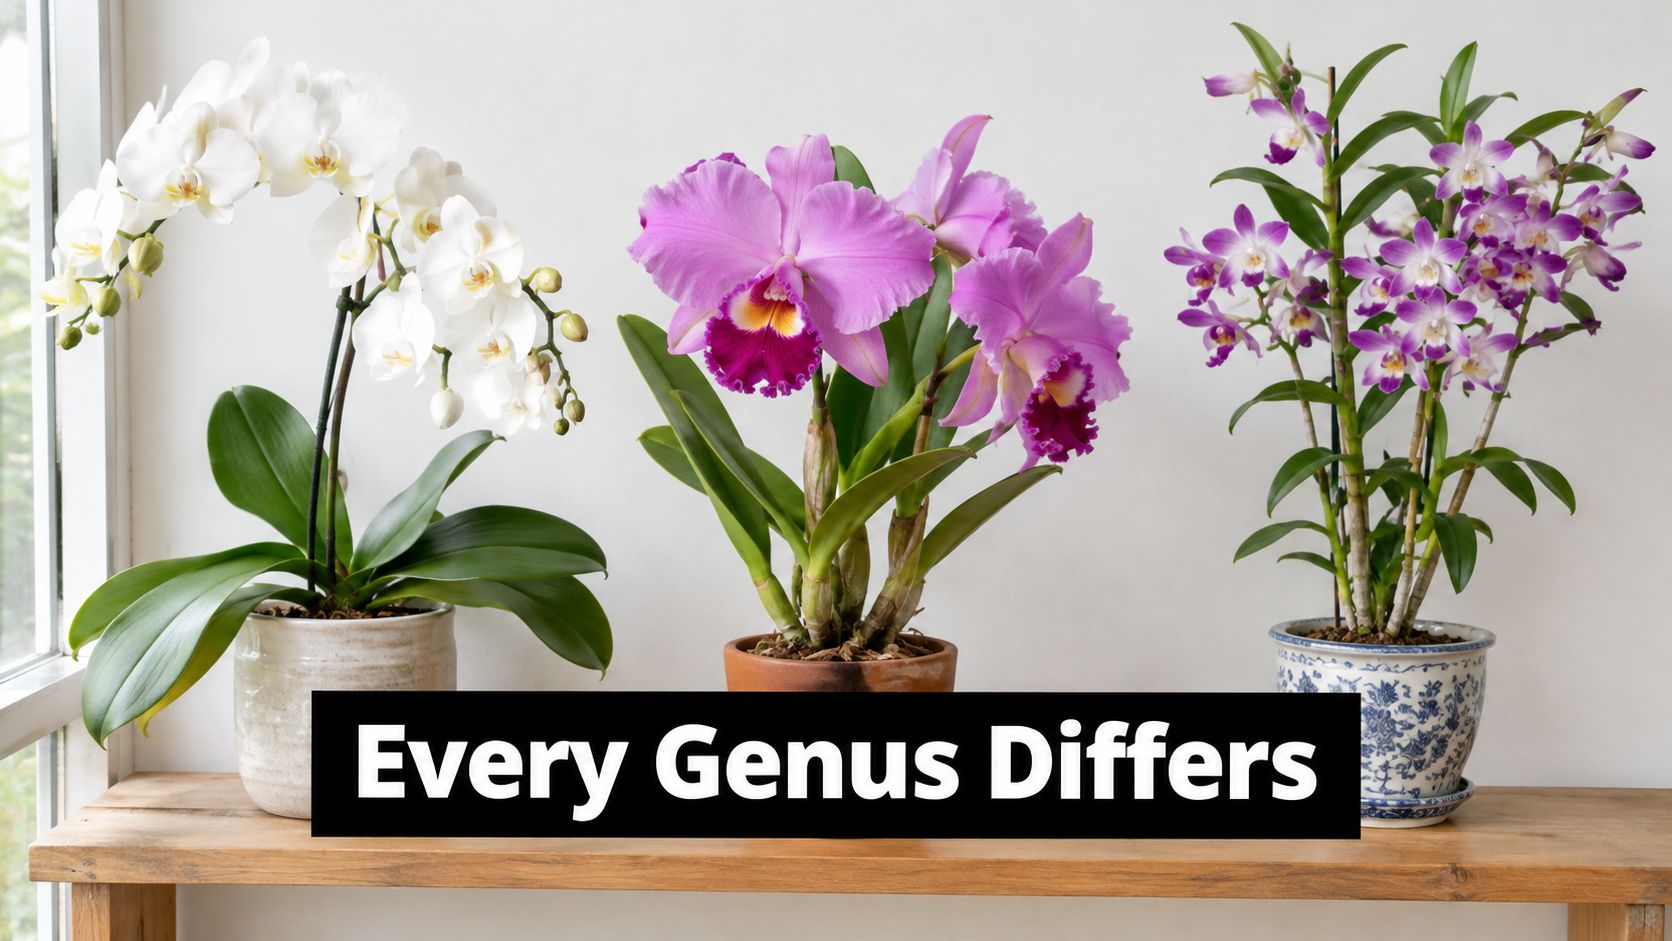
Rebloom triggers by orchid type
| Orchid | Main trigger | Cue to watch | Common mistake |
|---|---|---|---|
| Phalaenopsis, moth orchid | Sustained suitable cooling with adequate light | Spike emerging at a leaf base | Providing cool nights but hot daytime exposure |
| Cattleya | Adequate light and completion of mature growth; seasonal rest requirements differ by hybrid | Plump, mature pseudobulbs and a developing sheath or buds | Assuming every hybrid needs identical autumn watering |
| Dendrobium nobile | Cooler, drier rest after cane maturation | Flower buds along mature canes | Maintaining growth-season watering throughout the rest |
| Paphiopedilum, lady slipper | Newly matured growth under conditions suited to its group | A bud developing from a mature leaf fan | Chasing a sharp cold snap instead of growing a strong fan |
Match the treatment to the growth
A cattleya with shriveled pseudobulbs isn't asking for an aggressive dry rest. Check roots and hydration before reducing water further. Likewise, don't apply a nobile-type rest to an unidentified dendrobium just because it has canes.
Slipper orchids need a different reading of progress: watch the developing fan rather than waiting for a moth-orchid-style spike at a broad leaf base.
Identification first: Broad overlapping leaves, swollen pseudobulbs, jointed canes and leaf fans suggest different care paths. Confirm the genus and hybrid group before changing temperature or watering.
Troubleshooting When the Spike Never Comes
Check light, nighttime temperature, daytime temperature, then roots. Start with evidence: foliage condition, a light reading where possible, recorded temperature extremes and the state of the medium inside the pot.
If winter exposure is inadequate, Iowa State Extension's indoor-orchid guide recommends supplemental full-spectrum LED or fluorescent lighting positioned roughly 6–12 inches above foliage for at least 14 hours daily. Check the lamp's instructions and leaf response too, because fixture output and heat differ.
Diagnose before changing the feed
Once the light is suitable, use the symptoms below to choose your next action. Don't change fertilizer, watering, location and temperature together, or you won't know which adjustment helped.
Symptoms, causes and fixes when reblooming stalls
| Symptom | Likely cause | First fix |
|---|---|---|
| Healthy leaves, but no spike after a sustained induction attempt | Insufficient cooling or excessive daytime warmth | Record both temperature extremes and correct the unsuitable period |
| Plantlet forms on the spike | Excessive warmth after induction is a possibility | Reduce daytime overheating; leave the attached plantlet supported |
| Feed increased but still no spike | Nutrition wasn't the limiting factor | Return to dilute feeding and verify light and temperature |
| Limp leaves, mushy roots | Root damage or a persistently wet medium | Remove decayed roots, repot appropriately and pause induction |
Healthy foliage without a spike doesn't automatically mean the plant needs more food. Check whether the room actually cooled, whether afternoon sunshine heated the foliage, and whether the orchid had recovered before treatment began.
A keiki isn't proof of a single mistake, but it's a reason to inspect the temperature record. Don't detach it just because it has leaves; it needs an adequate root system before it can live independently.
Use this checklist to keep the diagnosis focused.
Give a sound plant time after correcting its conditions. Watch for active roots, stable foliage and movement at the leaf axils instead of declaring failure on an arbitrary date. If the leaves deteriorate, stop pursuing flowers and address plant health.
Leaves & Soul offers purpose-built growing media, fertilizers and indoor plant-care guidance, including options for orchids. Visit Leaves & Soul to choose supplies for healthy roots and measured feeding once you've checked your orchid's light and temperature.