


You’re probably standing over a bonsai that still looks fine from above, yet something about it feels off. Water runs through too fast, or hangs around too long. Growth has slowed. The tree may even sit a little high in the pot, as if the roots are slowly lifting it out of its home. That’s often the moment when transplanting bonsai trees stops being an abstract task and becomes a real decision.
Repotting is one of those jobs that makes beginners nervous for good reason. You’re disturbing the one part of the tree you can’t casually replace. But done well, transplanting isn’t damage. It’s correction. It restores air to the root zone, resets the soil structure, and gives the tree room to build the fine feeder roots that support health and refinement.
A good repot also teaches you how to read a tree with your hands, not just your eyes. The soil tells you whether it’s breaking down. The root ball tells you whether the tree is vigorous or merely surviving. The trunk’s stability tells you whether the tree has anchored or just endured. That feel matters. It’s the difference between following steps and practicing bonsai.
The Why and When of Transplanting Bonsai
You lift the pot after watering and hesitate. Last month the tree drank evenly. Now the top dries by afternoon, but the core stays heavy, or the water slips straight through one side and leaves dry pockets behind. From above, the bonsai may still look presentable. In the root zone, it is already asking for help.
That is why repotting matters. Bonsai do not live in open ground where roots can keep searching for air, moisture, and space. They live in a shallow, controlled environment that slowly degrades. Soil particles break down, drainage channels collapse, and roots begin to circle, mat together, and crowd out the very oxygen they need. Left alone too long, the tree loses vigor first. Visible decline comes later.
A good grower learns to read the warning signs before the tree is forced to show them dramatically. Watch how water behaves. Feel how firmly the tree sits in the pot. Check the drainage holes for dense root growth. Notice whether spring growth is strong for that species, or merely adequate. Those small signals tell you more than the calendar by itself.
Read the tree before the calendar
Species and age set the rough rhythm. Young Chinese elms often need repotting far more often than mature pines because they produce roots aggressively and fill a pot quickly. Older conifers usually prefer a longer cycle, especially once they are refined and no longer being pushed for fast development.
Still, fixed schedules create mistakes. I have seen beginners repot a tree "on time" even though the soil was still open, the root ball still healthy, and the tree not ready to be disturbed. I have also seen people wait because the tree looked fine above the soil line while the root mass underneath had already turned into a hard, exhausted pad. The tree decides. The calendar only tells you when to look carefully.
Use this as a working guide, not a rulebook:
| Bonsai Species | Typical Repotting Rhythm | Best Window |
|---|---|---|
| Chinese elm | Every 1 to 2 years, often sooner in active training | Early spring |
| Japanese maple | More often when young, less often as it matures | Early spring |
| Pine | Often 4 to 6 years once mature and stable | Early spring |
| Juniper | Usually less often than fast deciduous species | Early spring |
| Mature conifers | Often 4 to 6 years | Early spring |
The table gives you a baseline. The tree gives you the answer.
Early spring gives you the widest margin for error
For most temperate bonsai, the safest repotting window comes in early spring, just as buds swell and before new growth fully extends. Bonsai Empire’s repotting guide explains that timing clearly, and the reason is practical. The tree is beginning to wake up, but the canopy has not yet placed its full demand on the roots.
That balance matters. If you cut roots after leaves have opened hard or candles are extending strongly, the top of the tree keeps pulling water at a rate the reduced root system may not meet. Wilting, weak push, and a full season of lost strength often follow. Repot too early, while the tree is still fully dormant in cold conditions, and recovery can stall because root activity has not yet started.
The right moment has a feel to it. Buds look full rather than tight. The tree seems poised, not asleep and not rushing. Once you see that stage a few times, you stop relying on dates alone.
If you want a second reference point while learning that timing, this guide on when to repot a bonsai is useful. Check it against what your own tree is showing you.
Why repotting improves the bonsai, not just its survival
Repotting is root work, but the result shows everywhere. Fine, well-distributed roots support finer branching, steadier growth, and more predictable watering. A tree with a healthy root system can eventually move into a shallower, more refined pot because it has earned that reduction. A tree with a congested, uneven root ball usually has not.
You also gain information each time you repot. Fresh, pale root tips tell you the tree had energy to spare. Sour-smelling, dark, compacted areas tell you moisture stayed trapped too long. A root ball packed with long coarse roots but few fine feeders tells you the tree has been surviving more than thriving. That is the deeper value of transplanting bonsai. It teaches judgment.
Repotting on time keeps the tree healthy. Repotting with attention teaches you how the tree lives.
Assembling Your Bonsai Repotting Toolkit
A repotting session usually goes wrong before the tree ever leaves the pot. You reach for wire that is still in the drawer, realize the mesh was never cut, then leave roots exposed while you scramble. That is how clean work turns rough. Set up first. Then touch the tree.
That quiet preparation does more than save time. It helps you stay observant. When tools are ready, you can pay attention to the root ball, the moisture level in the old soil, and the small signs that tell you how boldly or gently to proceed.
Choose the pot with restraint
The pot should match the tree you have now, not the image you want six months from now. A tree still building strength often does better in a slightly more forgiving training pot. A refined tree with a dense, even root pad can move into a shallower or more finished container.
The trade-offs are practical, not just aesthetic.
- Unglazed ceramic suits many conifers and older-looking trees because the surface feels quiet and grounded.
- Glazed ceramic often works well for deciduous, flowering, and fruiting bonsai where the pot can support the tree’s seasonal character.
- Deep pots give more room for moisture and root recovery, which can help weaker trees or species that resent drying.
- Shallow pots improve proportion and visual tension, but they ask more from both the root system and the grower’s watering habits.
Drainage holes are required. If water cannot leave the pot freely, the roots sit in stale conditions and the tree pays for it later.
Also check the pot before repotting day. Make sure the tie-down wire fits the holes, the mesh sits flat, and the pot is the right size once you look at the current root mass. I have seen beginners choose a beautiful shallow pot, then discover halfway through that the nebari and root pad need another cycle in a training container. The tree decides that, not the shelf appeal.
Build a soil that breathes
Good bonsai soil holds moisture and air at the same time. That balance is what keeps roots active after repotting, when they need oxygen just as much as water. Dense, fine soil closes those spaces too quickly, especially in shallow pots.
A dependable working mix often includes akadama, pumice, and lava rock in equal parts or close to it. The exact ratio can shift with species, climate, and how you water, but the job of each particle stays much the same:
- Akadama holds moisture and helps roots settle against the mix.
- Pumice keeps water available while preserving air space.
- Lava rock adds structure so the mix stays open longer.
Use your hands here. Dry particles should feel hard and distinct, not dusty or mushy. When you wet a sample, it should absorb water without turning pasty. If it collapses into a heavy mass after a few squeezes, it will likely compact in the pot too.
That judgment matters as much as the recipe. A grower in a hot, windy climate may keep a little more water retention in the mix. A grower in a cool, wet area may need a sharper, faster-draining blend. If you want a closer look at handling roots safely while matching soil and timing to the tree’s condition, this guide on repotting bonsai without damaging roots is a useful companion.
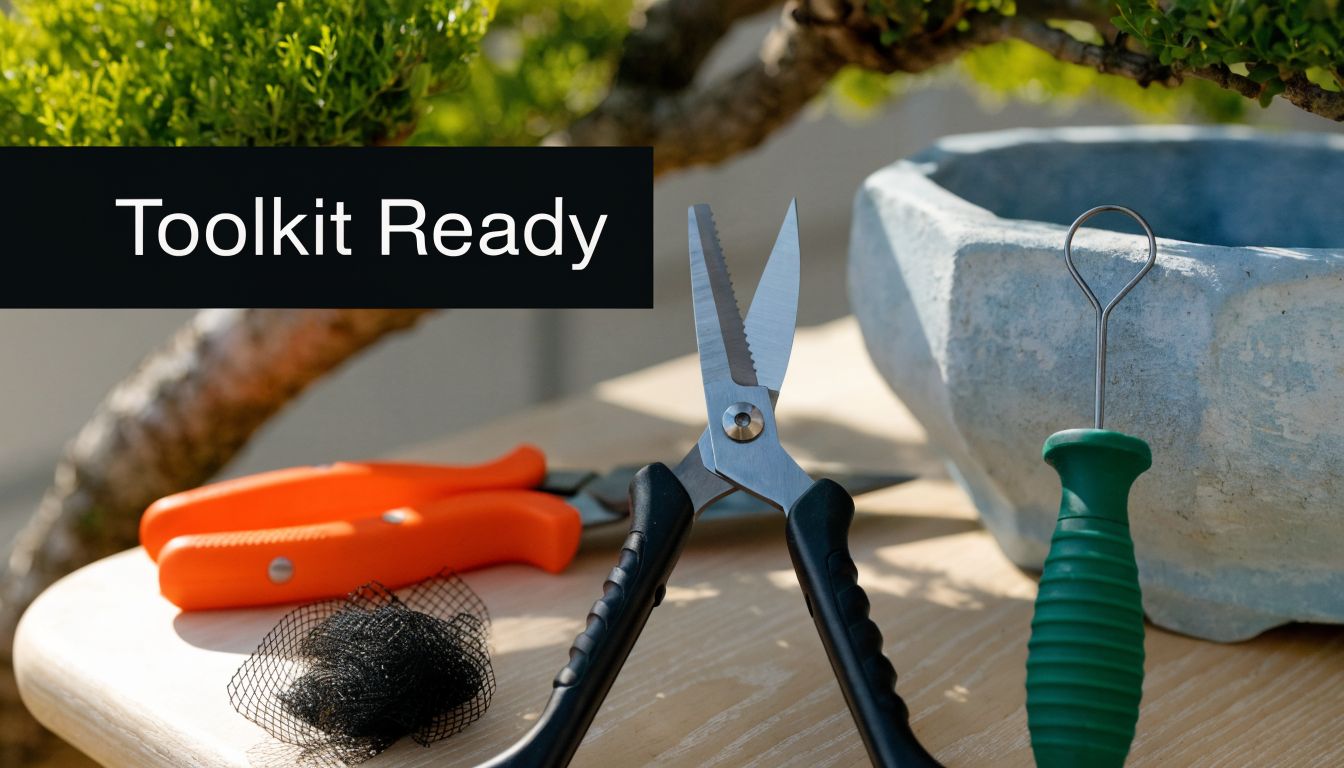
The core tools to keep within reach
A good toolkit is small, clean, and ready.
- Root rake or soil hook loosens the outer root pad and lifts old soil in controlled passes.
- Sharp bonsai shears make clean cuts on fine roots. Dull blades crush tissue and slow recovery.
- Concave cutters help when a thicker root needs a precise removal near the base.
- Drainage mesh keeps the soil in place without blocking water flow.
- Bonsai wire secures the tree so new root tips are not broken by movement after planting.
- Chopsticks work fresh soil into air pockets around the roots.
- A spray bottle keeps exposed roots from drying while you work.
Keep water, premixed soil, mesh, wire, and tools in one working area. Add a towel or tray for the old soil. Small habits like that make a difference. A rushed bench leads to rushed cuts, and rushed cuts are usually the ones you regret.
The Gentle Art of Unpotting and Root Pruning
This is the point where nerves usually show up. That’s healthy. You should feel some caution before opening a root ball. But caution isn’t hesitation. Your tree needs steady hands, not timid ones.
The best repotting sessions have a quiet rhythm. Lift. Loosen. Inspect. Trim. Mist. Recheck. You’re not ripping the tree out of a prison. You’re releasing it from a pot that has stopped serving it well.
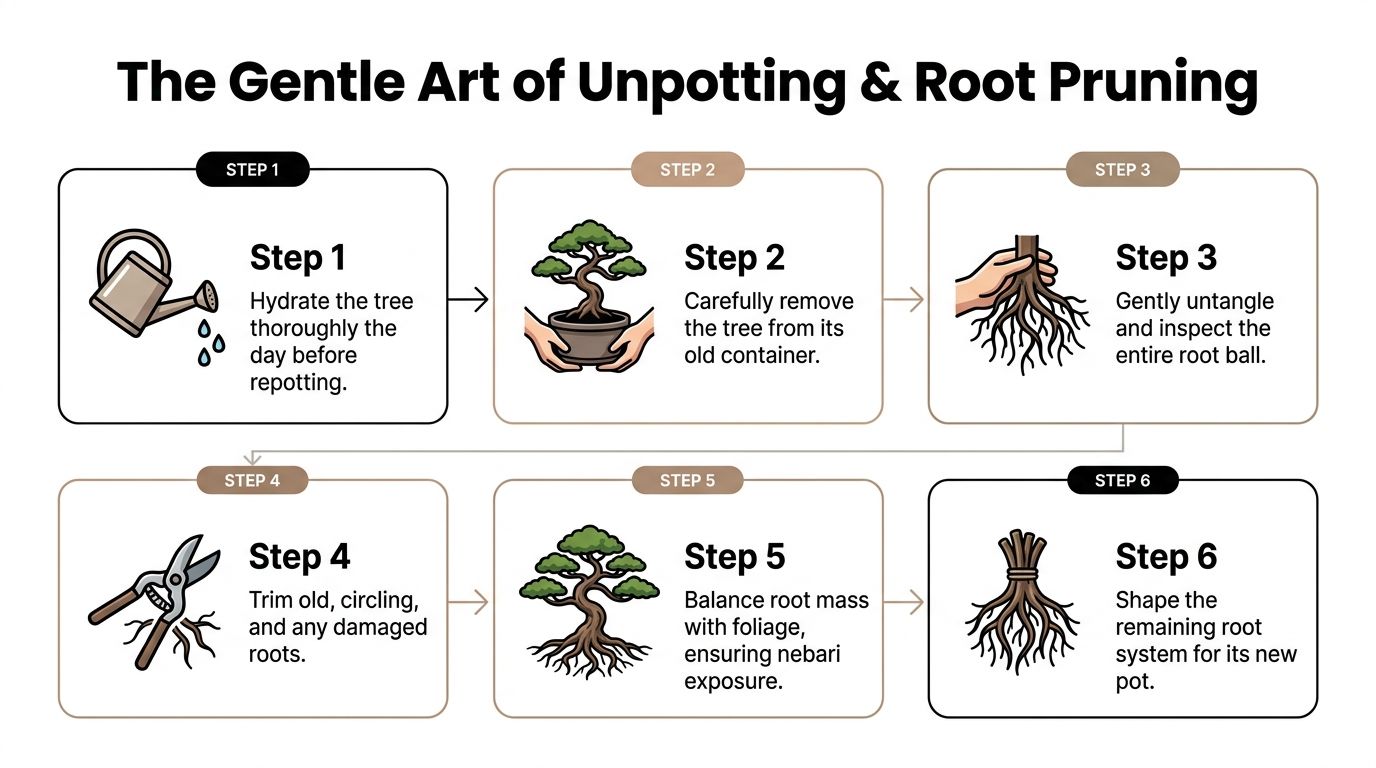
A visual walkthrough helps before your hands take over:
Getting the tree out without forcing it
Water the tree before repotting so the root mass isn’t brittle. Moist roots flex. Dry roots snap.
Start by removing any anchoring wires from the underside of the pot. Then run a root knife or soil knife around the inside edge if the mass is stuck. Lift from the base of the trunk and root ball together, never by the trunk alone. If the tree resists, don’t yank. Work the perimeter again.
A root-bound tree has a distinct feel. It often comes out as one solid piece, holding the pot’s shape like a cast. That tells you the roots have replaced much of the usable soil volume.
What healthy and unhealthy roots look like
Once the tree is out, begin combing from the underside and outer edges inward. The sound is subtle but familiar once you’ve done it a few times. Dry granules scratch loose. Old compacted areas drag and resist. The rake should persuade, not tear.
Look for contrast in the roots:
- Healthy fine roots are usually supple and fibrous.
- Thick circling roots may be structurally useful in moderation, but too many of them create congestion.
- Dark, mushy, or sour-smelling sections suggest root trouble and need removal.
- Dry, brittle dead roots can be pruned away cleanly.
Mist the roots regularly while you work. Verified guidance from Bonsai Trader notes that expert bonsai practitioners remove no more than one-third of the root mass during repotting, and pruning beyond 50% can cause severe shock even in hardy species like ficus. The same guidance also stresses regular spraying to prevent desiccation stress during root combing in their repotting article.
A root mass should feel increasingly open as you work through it. If it still feels like a hard sponge that won’t separate, slow down and comb from another angle.
For a deeper look at technique, this guide on repotting bonsai without damaging roots is worth studying before your first major root job.
The one-third rule and why it matters
The easiest mistake in transplanting bonsai trees is overconfidence after the first few cuts. You remove one thick root, then another, and suddenly the root pad looks cleaner. That can tempt you into taking too much.
Don’t.
The one-third rule exists because the tree still needs enough fine roots to reestablish quickly. Thick, coarse roots mainly anchor and transport. Fine feeder roots do the delicate work of uptake. If you remove too many of those, you’ve reduced the tree’s ability to support itself right when stress is highest.
A practical order helps:
- Remove dead or clearly damaged roots first.
- Reduce heavy circling roots that distort the root spread.
- Shorten overly long roots that won’t fit the new pot properly.
- Preserve as many fine feeder roots as possible.
- Reassess the whole root pad before making more cuts.
Match the roots to the stage of the tree
Not every bonsai needs the same level of root reduction. A nursery tree on its first serious repot often needs more structural correction. A refined tree may only need selective thinning and old soil replacement. The more mature the bonsai, the less dramatic the intervention usually becomes.
That’s where intuition starts to form. You stop asking, “How much can I remove?” and start asking, “What does this tree need to function better in the next pot?”
This demonstration can help you visualize the pace and handling involved:
What beginners usually get wrong
Most failed repots don’t fail because of one catastrophic cut. They fail because of several small errors grouped together.
- Working too slowly leaves roots exposed too long.
- Cutting randomly removes useful roots while leaving underlying problems untouched.
- Ignoring moisture lets root tips dry during the operation.
- Keeping all the old soil preserves the very compaction you were trying to solve.
- Taking too much off the top and bottom at once overbalances the tree.
If you’re unsure, prune less. You can always revisit the root system at the next cycle. Bonsai rewards continuity more than heroics.
Pot Preparation and Re-Planting Your Tree
The root work may be the most intimate part of the repot, but this stage decides whether the tree can recover without disturbance. A beautifully pruned root system means little if the tree rocks in the pot every time you water.
Movement after repotting breaks fresh root tips and opens tiny gaps where roots should be making contact with the new soil. Stability is not a finishing detail. It’s structural care.

Prepare the pot before the tree arrives
Cover the drainage holes with mesh so soil stays put while water exits freely. Then thread your tie-down wires through the drainage holes before adding soil. Do this first, not after the tree is in place and your hands are full of roots.
Add a base layer of coarse material if your mix and pot depth call for it. Then make a small mound of bonsai soil where the trunk base will sit. That mound matters because roots need to radiate over something, not collapse into a flat dead zone.
If you’re coming to bonsai from general gardening, it helps to understand that standard topsoil logic doesn’t transfer neatly into shallow bonsai containers. For a useful grounding in broader soil basics, this article on buying and using topsoil gives good context on how soil choices affect drainage and structure in larger-scale planting, which makes the contrast with bonsai soil easier to grasp.
Set the front and the height
Before tying anything in, look at the tree from all angles. Choose the front based on trunk movement, nebari, branch placement, and visual balance. Then decide the planting angle.
Small shifts matter. A slight rotation can reveal a stronger root flare. A subtle lean can make a static trunk feel alive. But don’t chase drama for its own sake. If the tree looked stable and believable before, preserve that honesty.
The planting height should expose the nebari without leaving the upper roots stranded and dry. If the tree sits too deep, the base loses character and airflow. Too high, and the roots desiccate and the composition feels perched.
Set the tree down, step back, and look again before wiring. The pot remembers every rushed decision.
Wire for immobility, not just support
Once the tree is positioned, bring the wires over the root mass and tighten them so the tree is firmly anchored. The pressure should secure the root ball without crushing surface roots. In many cases, crossing the wires over strong sections of the root base gives better hold than trying to cinch a single point.
After that, add soil gradually. Use a chopstick to work the mix into every pocket around the roots. Don’t jab. Settle. The goal is full contact, not compaction.
A simple sequence keeps this clean:
- Position the tree on the soil mound.
- Adjust angle and front.
- Tighten tie-down wires.
- Add soil in layers.
- Work soil into gaps with a chopstick.
- Top off lightly and recheck the planting line.
Use the wiggle test
When the pot is filled, hold the pot in one hand and nudge the trunk gently with the other. The trunk should not shift independently of the container. If it does, tighten the wire or revisit how the root mass is seated.
That test tells you whether the newly cut roots can begin recovery in peace. If the tree wiggles, every breeze and watering session turns into repeated micro-trauma.
This part of transplanting bonsai trees often feels mechanical compared with root pruning, but it’s where many good repots are either secured or undermined. The tree should sit like it belongs there.
Aftercare The First Six Weeks Are Critical
The repot is finished, but the tree is not safe yet. Many bonsai are lost after a technically good transplant because the grower keeps treating the tree as if the hard part is over. In reality, the next six weeks decide whether those pruned roots reconnect to the soil or stall.
Water once thoroughly, then read the soil
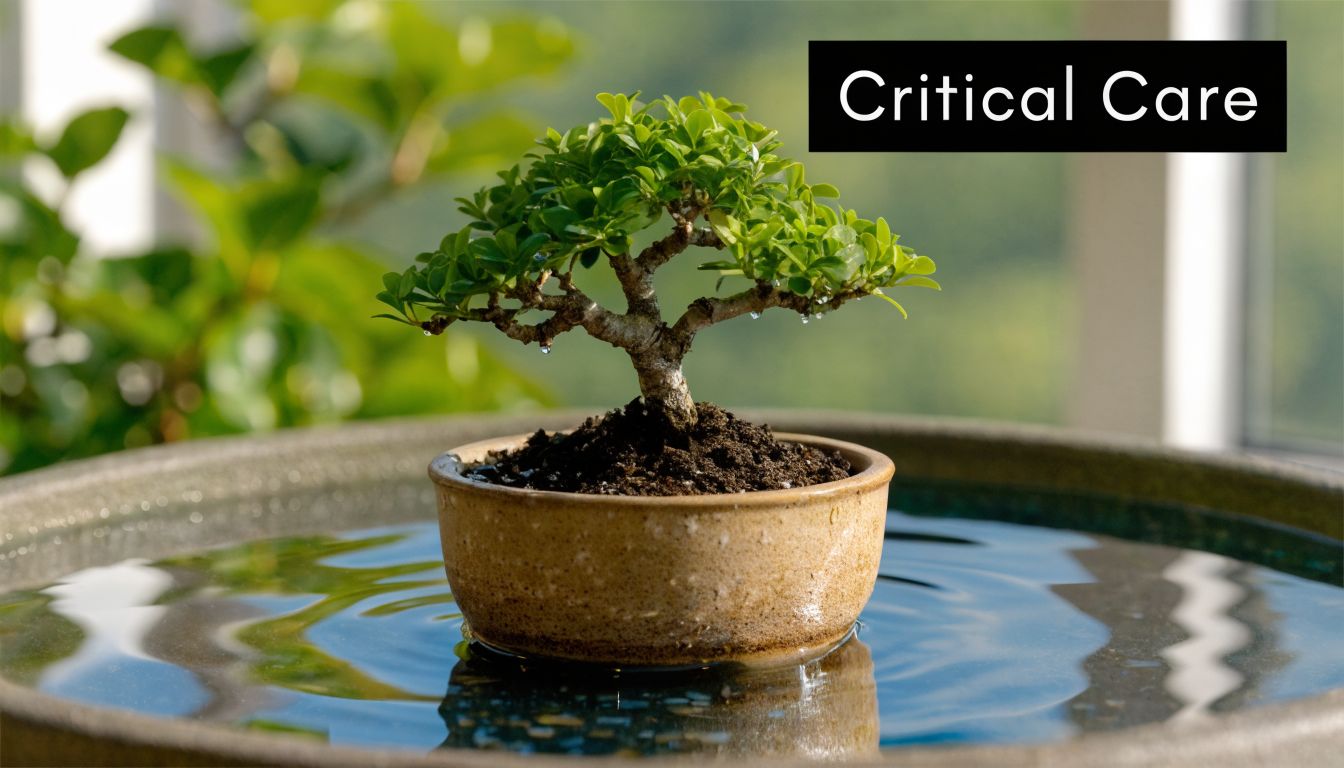
The first watering should settle the entire root mass and remove remaining air pockets. A full top watering works well. Some growers use immersion for the first soak, especially if the root ball was dry or the new mix is slow to wet. Either method is fine if the result is the same. The soil is evenly moist from top to bottom, and the tree stays firmly seated.
After that first watering, stop following a fixed schedule.
Freshly repotted trees often use less water for a short time because the root system has been reduced. If you water by habit instead of checking the soil, you can keep the lower root zone wet long enough to slow recovery or start rot. Touch the surface, check below it with a chopstick or skewer, and learn the weight of the pot when it is moist versus when it is ready again. This is where feel matters. A tree in recovery rarely wants extremes.
If you are selective about water quality for sensitive species, especially where mineral buildup is already a problem, it helps to understand the key differences between deionised water and distilled water before changing your routine.
Reduce demand above the soil line
Place the tree where it gets bright light without hard afternoon exposure. Morning sun is usually safe for many species. Strong wind is not. Wind strips moisture from foliage and pushes a weakened root system to supply more water than it can manage.
The goal is balance. Too much shade slows recovery. Too much sun forces transpiration before the roots have started working again.
Watch the foliage during the day. Leaves that stay taut and calm are coping. Leaves that soften, curl, or wilt by midday are telling you the top of the tree is asking for more than the roots can give. If your tree struggles in dry indoor air, this guide on why humidity drops after repotting and how to fix it can help you correct the environment around the canopy.
Hold fertilizer until the tree answers back
Do not rush fertilizer onto cut roots. New growth pushed too early can drain stored energy faster than the recovering root system can replace it. That is how a tree looks active for a week or two, then fades.
Wait for a clear sign that the tree has resumed normal function. On deciduous trees, that may be steady leaf extension and normal water use. On conifers, it may be firmer color, stable tips, and a gradual increase in moisture draw. Once you see that response, start lightly. Mild, steady feeding is safer than trying to force a rebound.
Know what healthy recovery looks like
A tree recovering well is often quiet. That silence makes beginners nervous, but it usually means the work is happening where you cannot see it.
Look for these signs:
- The soil begins to dry at a predictable pace. That usually means roots are active again.
- Buds stay plump or foliage holds its color. The canopy is still being supported.
- The tree remains firm in the pot. New root tips can establish without being torn.
- New growth appears measured, not explosive. Steady recovery is more reliable than a sudden flush.
Restraint is the skill here. Check the tree every day, but do not keep adjusting, feeding, rotating, or moving it unless the tree gives you a reason. Good aftercare is quiet, observant work.
Troubleshooting Common Transplanting Issues
A repotted bonsai often looks slightly unsettled before it looks better. The key is learning the difference between normal stress and a genuine problem.
Are the leaves yellowing?
A little yellowing can follow root disturbance, especially if the tree was repotted at the edge of its comfort window. If the soil is staying wet for too long, back off watering frequency and improve airflow. If the yellowing is mild and the buds still look alive, give it time.
Is the tree wilting during the day?
Temporary daytime wilt can happen while the roots reestablish. Move the tree into gentler light and protect it from wind. If the soil is evenly moist and the tree recovers by evening, that’s a stress response, not necessarily a decline.
Are leaves dropping?
Minor leaf drop after transplanting bonsai trees can be a reaction to root work. Worry more if the drop is rapid, heavy, and paired with blackening stems, foul soil smell, or a tree that remains loose in the pot. That points to a root-zone issue, not just adjustment.
Is water still behaving badly?
If water races through instantly, you may have left channels or gaps in the root ball. If it sits stubbornly on the surface, the soil may have settled poorly or become too compacted. In both cases, resist the urge to keep poking at the tree. Adjust watering carefully and observe. Most corrections in the first weeks come from environment and restraint, not repeated disturbance.
Leaves & Soul makes it easier to set up a bonsai for success with purpose-built soils, slow-release fertilizers, pots, and accessories that support good technique from the first repot onward. If you want reliable materials for transplanting bonsai trees without piecing everything together yourself, explore the curated bonsai range at Leaves & Soul.