


Choose aluminum wire at about one-third the diameter of the branch you're bending, so a 6 mm branch takes roughly 2 mm aluminum wire and a 3 mm branch takes about 1 mm. Copper does the same structural job at a thinner gauge because it's stiffer, which is why a pine can carry wire that looks almost dainty against a heavy limb.
That ratio sets the working range of bonsai tree training wire, from about 1 millimeter for delicate twigs and miniature growth to 4 millimeters or more for heavier structural work, as the Institute of Agriculture guide to training bonsai trees sets out. Go under that range and the branch springs back the moment you release it. Go over it and the wire becomes a press, forcing a spiral into bark that can take years to grow out.
Wire is the least glamorous purchase in this craft and the one that decides whether a bend holds. Metal choice, gauge, wrap angle and removal week all interact with one specific tree: its species, its bark, and how fast it's growing this season.
Wire Gauge Chart by Branch Diameter
Wire diameter of about one-third of the branch or trunk diameter is the benchmark most growers work from, and the BonsaiList wiring guide frames it as a stiffness-to-flexibility ratio rather than a matter of taste. Undersized wire lets the branch spring back. Oversized wire forces you to push harder during application, and that push is what compresses bark.
Copper changes the arithmetic. Annealed copper at the same diameter is stiffer than aluminum and work-hardens as you install it, so a thinner copper wire often does the same structural job, as the same BonsaiList guide explains. Treat the copper column as a starting point rather than a formula.
| Branch or trunk diameter | Aluminum wire (about one-third) | Copper wire (about one-quarter) | Typical use |
|---|---|---|---|
| 3 mm | 1 mm | About 0.75 mm, so 1 mm in practice | Delicate twigs and miniature growth |
| 6 mm | 2 mm | 1.5 mm | Medium branches |
| 9 mm | 3 mm | About 2.25 mm, so 2.5 mm in practice | Medium-heavy structural branches |
| 12 mm and up | 4 mm | 3 mm | Heavy structural work |
Read the chart by measuring the branch at its base, where it meets the parent limb or trunk, not out at the tip where it tapers. Divide by three for aluminum, round to the nearest size you own, and go one size down if the result lands between two.
The four diameters that cover a whole tree
A starter inventory of 1, 1.5, 2.5 and 4 mm wire lets you wire primary, secondary and fine branches progressively from coarse to fine, which is the order to work in, according to the BonsaiList guide. Start at the trunk and the main structural limbs, then work outward to twigs.
One more size, one less scar. When a single wire feels marginal, lay a second wire of the same gauge alongside it instead of jumping two sizes up. Two thin wires wrap neatly around a tight curve and spread pressure over more bark than one thick one.
The chart is a starting point because wood varies. Species, wood maturity, branch length and bend severity can shift the requirement, so the only test that matters is whether the wired branch stays where you put it without the wire pressing into the bark.
Choosing the Metal
A soft metal and a hard one behave like two different tools on the same branch. Aluminum gives way under your fingers. Copper fights back, then locks the bend in place. Match the metal to that branch's bark and stiffness.
| Factor | Aluminum | Copper |
|---|---|---|
| Ease of bending | Softer, easier to bend | Stiffer, work-hardens as it is bent |
| Holding power at the same gauge | Lower | Higher, so a thinner wire can do the job |
| Removal | Easier to remove | Harder; needs closer monitoring |
| Best for | Beginners and tender-barked deciduous trees | Conifers and stiff or heavy branches |
| Main risk | Springs back if undersized | Bites into expanding bark faster |
The whole trade-off fits on one card.
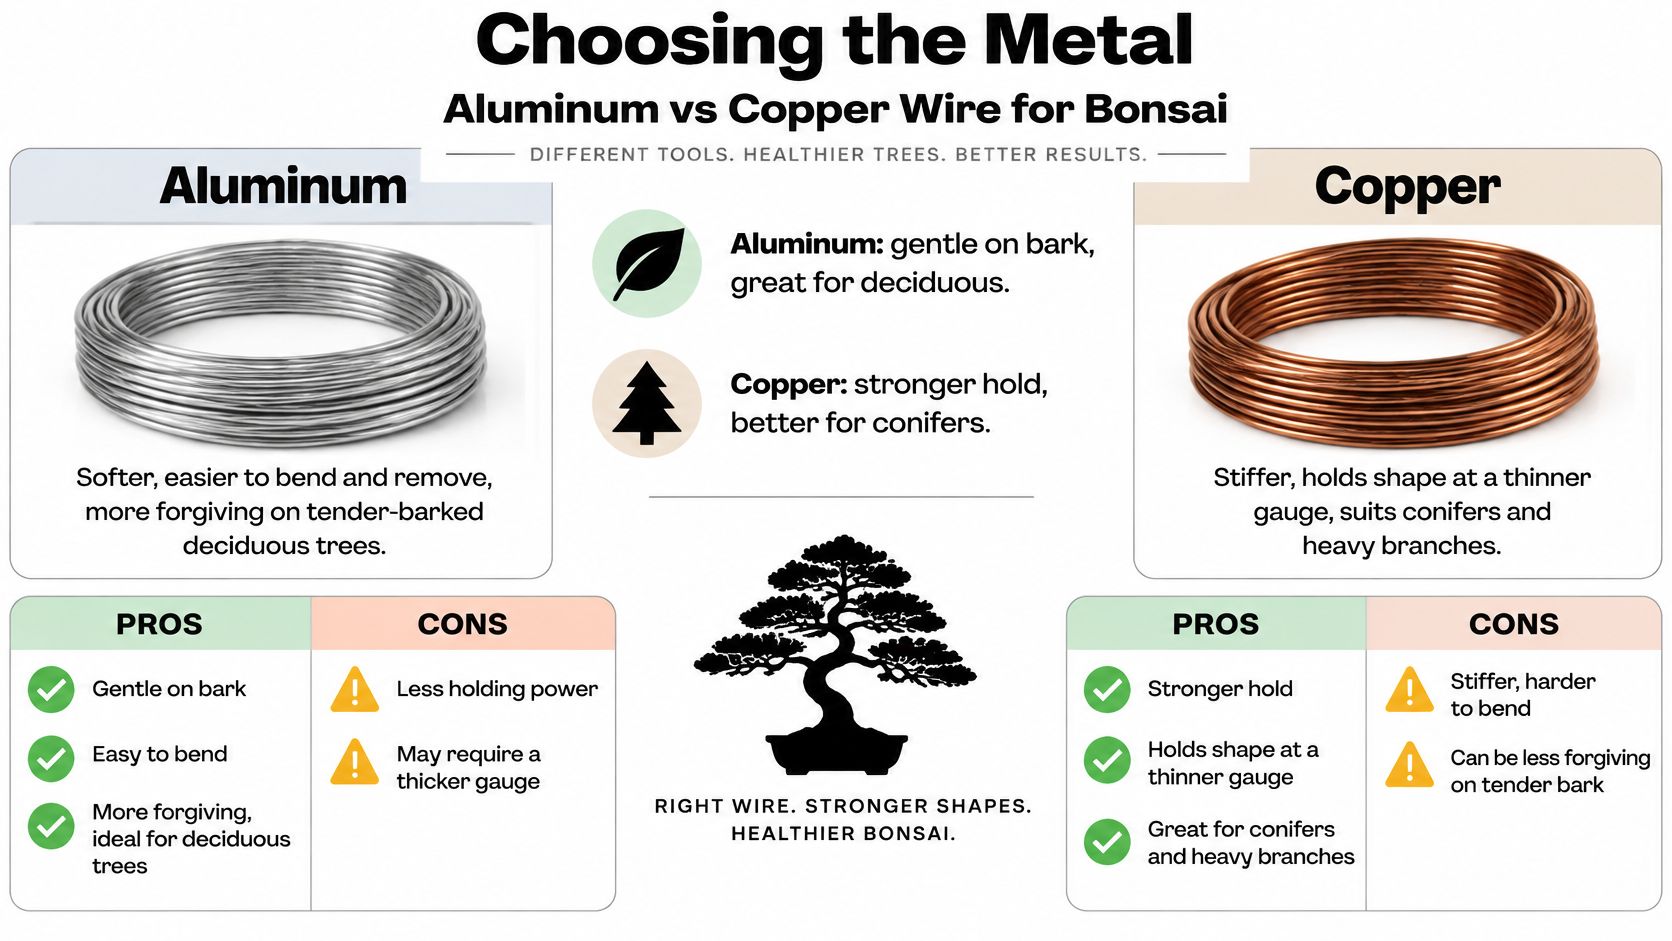
Work-hardening is the part that confuses people. Copper starts annealed, soft enough to wrap. Each bend stiffens it, the way a paperclip grows rigid after you flex it a few times. That stiffness is why a thinner copper wire can hold a limb that would need thicker aluminum. It is also why the coil presses harder as the branch thickens. Watch the bark rather than a calendar. If the wire starts to seat into the surface, it has already stayed too long.
If you're moving a stiff pine onto copper, annealed copper wire is the grade to buy, since the annealing is what makes it workable in your hands before it hardens on the branch.
Gauge runs the opposite direction from hardness. A thicker, softer aluminum wire can hold a branch with less pressure per coil than a thin copper wire you have to seat firmly. Oversized aluminum is clumsy and heavy on a fine branch. Undersized aluminum springs back. In general, aluminum is softer and easier to apply, while copper holds more strongly when the branch needs firmer support.
The test is simple. Wire two comparable branches on the same tree, one in aluminum and one in copper, leave both for a week, and keep whichever held the bend with the least force on the bark.
Pick the metal that holds the bend with the least bark pressure, not the metal that holds hardest.
Choosing Wire and Timing by Tree Type
Four kinds of tree, four different answers.
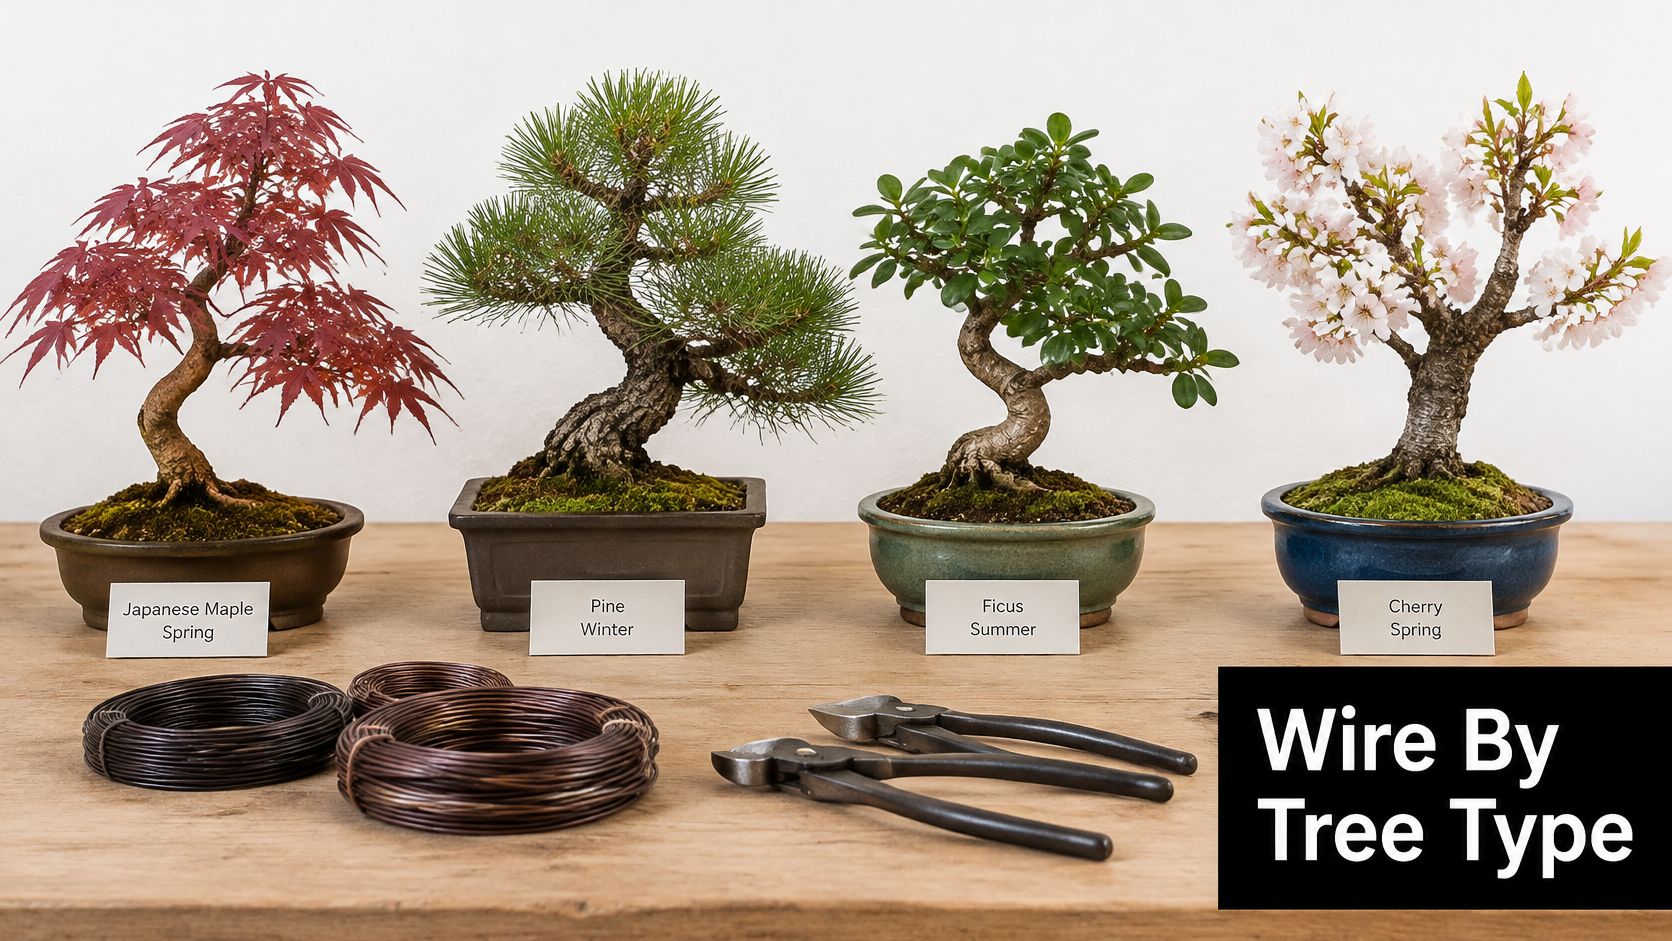
There isn't one correct wiring season, and the sources that disagree aren't wrong. They're optimizing for different things: whether you can see the branch, whether the wood is brittle, how much sap is moving, and how fast the tree is thickening. The BonsaiToday guide to basic wiring skills notes that some guidance favors spring or late summer while other material points to winter for deciduous trees, and both can be right depending on which factor dominates on your tree.
| Tree type or condition | Suggested wire | Season to wire | Why |
|---|---|---|---|
| Deciduous trees | Aluminum for most branches | Late winter or early spring | Branches are bare and visible, and thickening is limited |
| Conifers | Copper for stiff branches | Growing season, when branches are flexible | Stiff branches need holding power |
| Indoor tropical bonsai | Aluminum on tender bark | Any time growth is active, with frequent checks | Warm rooms grow fast and close wire quickly |
| Young or recently repotted trees | Aluminum, thinner gauge | After roots recover | Weak or stressed trees heal slowly |
Deciduous trees reward late winter work because you can finally see the structure you're shaping and the tree isn't thickening fast enough to swallow a coil. Use aluminum for most branches and save copper for the one heavy limb that refuses to hold.
Wiring a tree for the first time? Watch the sequence before you cut a length.
Conifers are the opposite case. Their branches are stiff and their wood is dense, so copper earns its place during the growing season when limbs still have some give. Tropicals kept indoors in warm rooms grow year round and close wire quickly, which means aluminum on young bark and the shortest inspection interval you can manage.
Weak trees and freshly repotted trees wait. Roots recover before branches get bent, and when you do start, a thinner aluminum gauge does the work without loading a plant that has no reserves to spend.
For species whose bark marks easily, three habits help: use the thinnest wire that holds, add a second wire rather than wrapping tighter, and plan a shorter wiring period. If you're still choosing what to grow, this guide to types of trees to consider for bonsai covers how bark and growth habit differ by species.
How to Wrap Wire Without Scarring Bark
Geometry decides both holding strength and injury. Wrap at roughly a 45-degree angle with even spacing, snug against the bark but not tight enough to indent it; the Virginia Bonsai Society guide to bonsai wire explains that a near-vertical coil has less holding power while a shallow coil wastes material and can fail to control the bend.
- Cut long, not short. Choose the gauge from the chart, then cut a length that gives you several coils plus a spare end. Running out of wire halfway along a branch means restarting with a new piece and a new anchor point.
- Anchor before you coil. Fix the wire at the base of the branch or on the trunk so the first coil starts under control. A loose anchor lets the whole spiral slide the moment you bend.
- Keep the spiral even at 45 degrees. Spacing should be consistent the full length. Coils that bunch in one place and gap in another hold unevenly and press hardest where they bunch.
- Wrap in the direction the bend tightens. Orient the wire so the intended bend pulls the coil tighter against the branch instead of unwinding it. Get this backwards and the bend loosens your own work.
- Support the branch and bend slowly. Hold the branch near the point of pressure and move gradually, distributing the load along its length. Fast, forceful bends snap brittle wood, especially in cold conditions.
- Check the spiral, then trim. Look along the branch for even spacing and no indenting, then cut the spare end clean rather than leaving a spike near your hand.
That process unfolds in four steps.
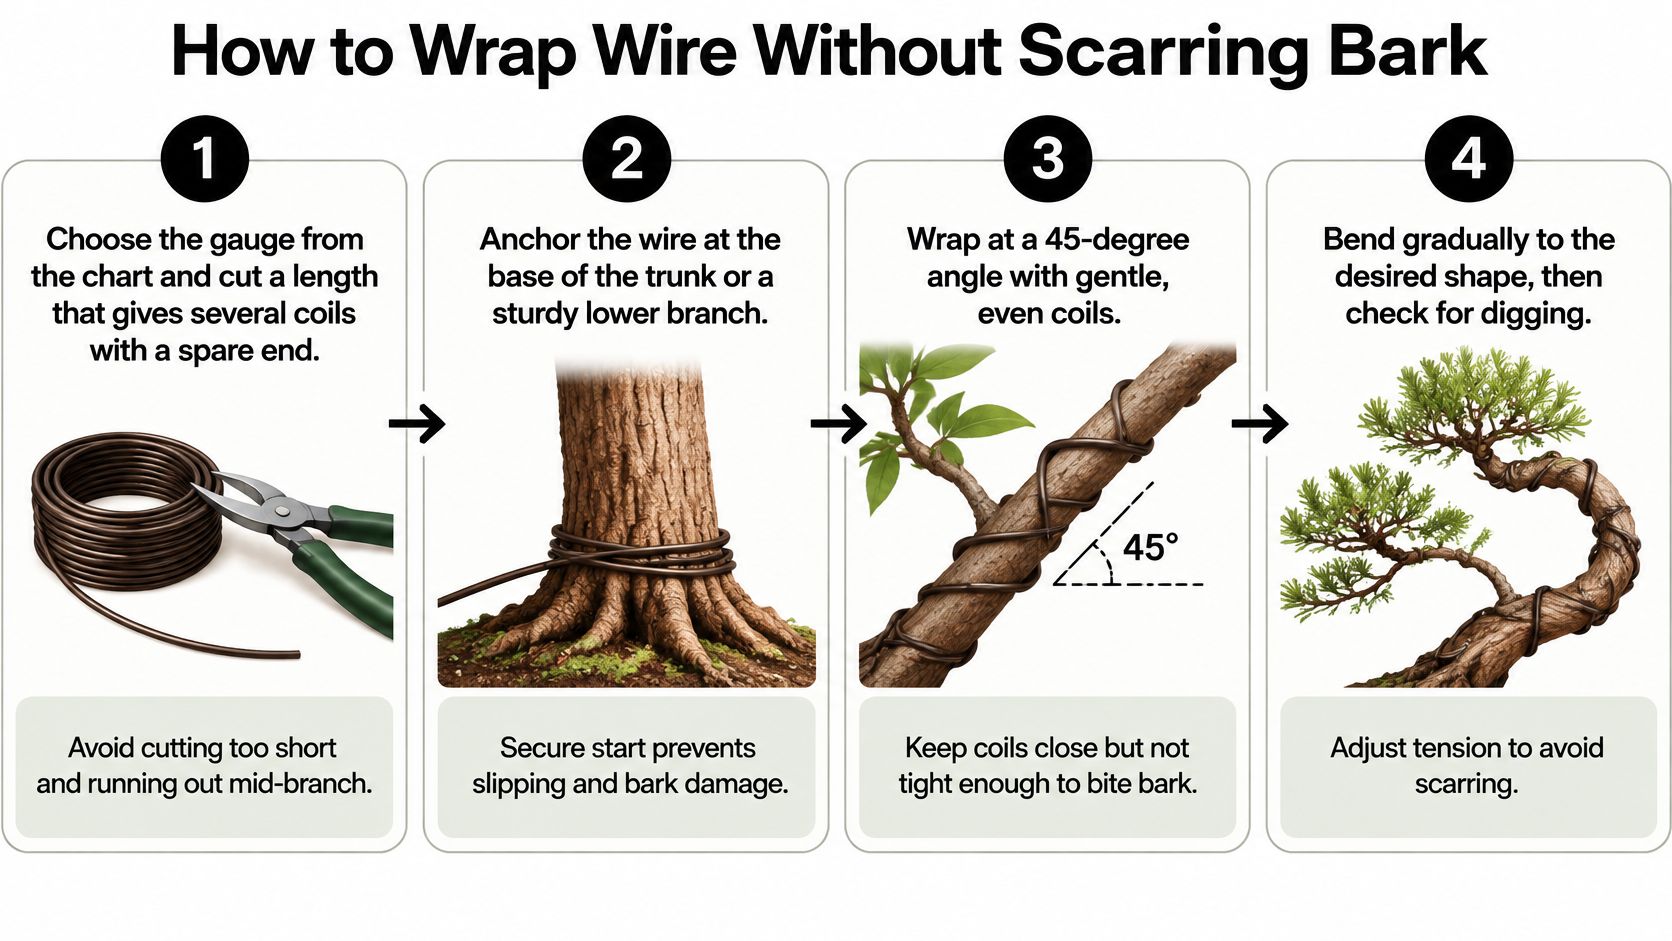
Good wiring looks dull, which is the point. An even, angled spiral holds the branch in its new position with no bark bulging beneath it and no coil standing away from the wood.
Removing Wire and Fixing Problems
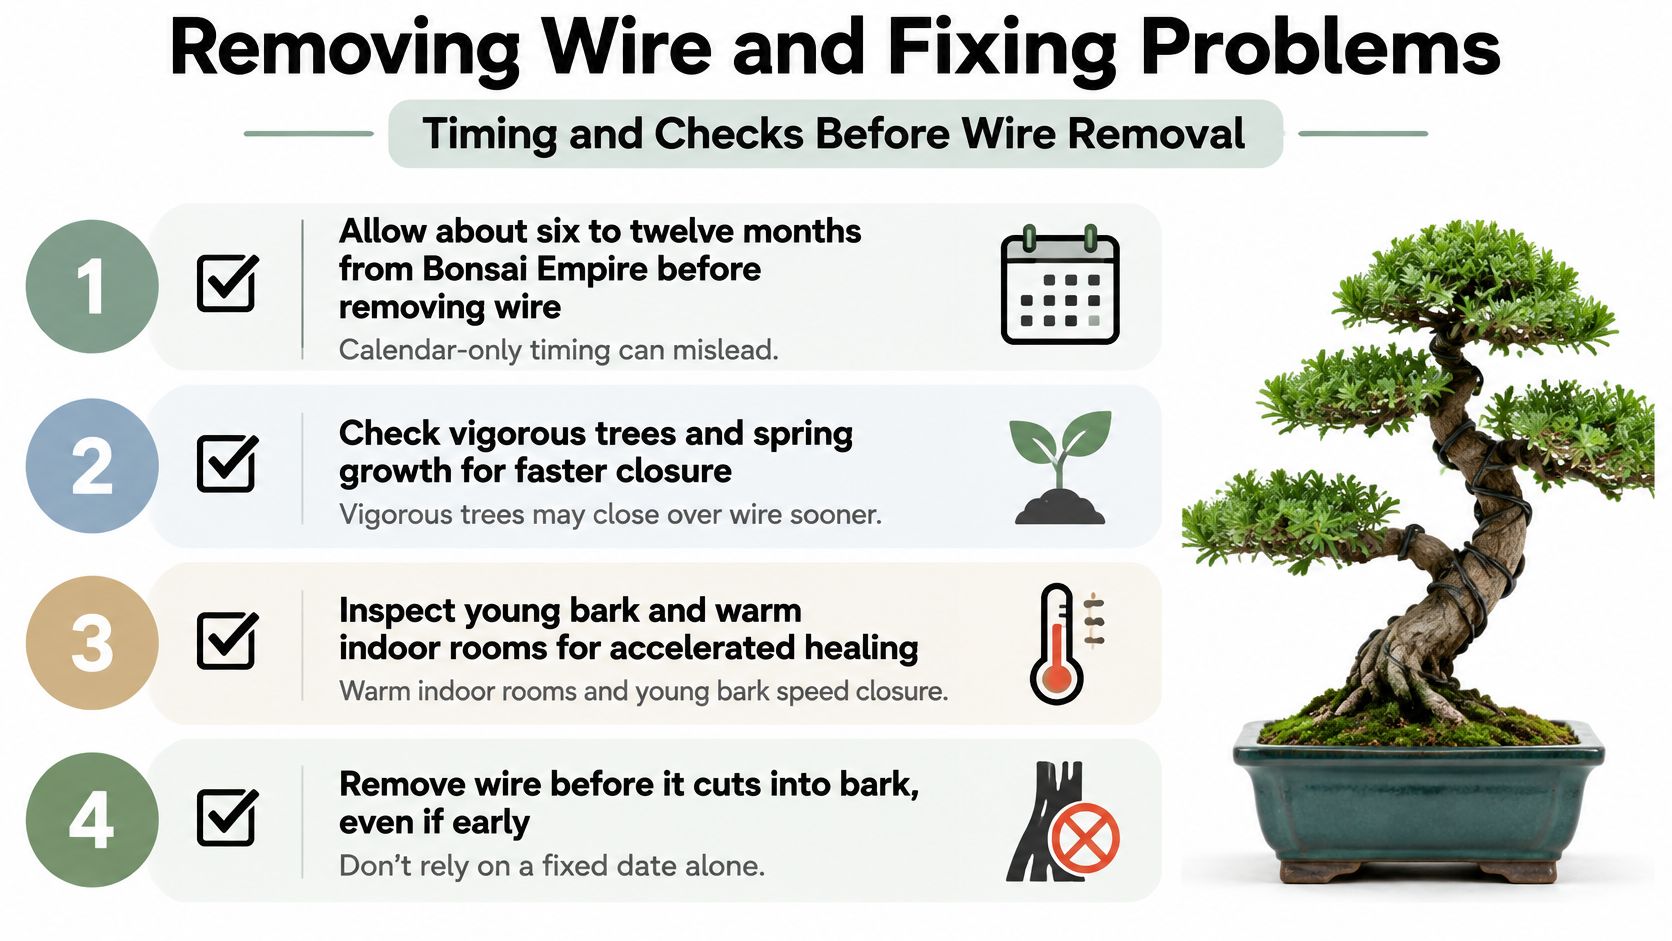
Wiring may stay on for roughly 6 to 12 months depending on growth speed and species, and the Bonsai Empire guide to wiring pairs that window with a firm condition: the wire comes off before it damages the bark. That's a useful starting figure and a poor master. A vigorous tree in a warm room can close over a coil in weeks, while a slow specimen outdoors might sit safely for a full season.
The three signs that override the calendar
- The coil indents the bark. The wire is pressing in and growth is happening under it. Remove it now, regardless of how long it's been on.
- Bark bulges around the wire. Tissue is swelling on both sides of the coil, which means the wire is already constricting. Cut it out the same day.
- The wire disappears. A coil sinking beneath expanding bark is the worst case, because the tree is now growing around a hard ring.
Marks left by a coil that was removed in time usually fade as the branch thickens. A groove that has calloused into a raised ridge does not fade, and on smooth-barked species it may never fully disappear.
Inspect weekly during active growth, and every two to three weeks in slow seasons. Copper and thick aluminum deserve the closest watching because their stiffness lets them bite into expanding branches fastest, as the Virginia Bonsai Society notes.
How to take wire off without losing the bend
Cut each coil with wire cutters and lift the pieces away. Unwinding seems gentler and isn't: it drags the spiral against bark you've just spent months shaping and can tear newly set tissue. When one coil has sunk and the rest are fine, cut that coil in two places on the outside of the bend, lift the segment out, and slip a short fresh piece over the same spot if the branch still needs support.
The timing and checkpoints are worth keeping in view.
| Symptom | Likely cause | Fix |
|---|---|---|
| Branch springs back after bending | Wire too thin for the branch | Use the next gauge up or add a second wire |
| Bark indents under the coil | Wire too thick or wrapped too tight | Remove and rewire at a shallower, looser angle |
| Wire sinks into bark as the trunk thickens | Growth has outpaced the wire | Cut the coil out now |
| Persistent marks on the bark | Wire left on through active growth | Monitor; marks often fade, scarring does not |
| Branch snaps while bending | Bent too fast or in cold, brittle wood | Support the branch, bend gradually and stop at resistance |
| Wire will not come off | Coil has bitten into bark | Cut each coil with wire cutters rather than unwinding |
Springback is the most common of these, and the least serious. Rewiring at the next gauge up costs a few minutes and no bark.
A short wiring period with frequent checks beats any fixed three- or six-month rule, especially on vigorous trees, spring growth, young bark and warm indoor rooms.
Before Your Next Wiring Session
Start with your tree's row in the decision table, then set the gauge from the branch in front of you: one-third of the diameter for aluminum, one-quarter for copper. Everything else follows from those two decisions.
Before you cut a single length, have this on the bench:
- Four wire sizes, about 1, 1.5, 2.5 and 4 mm, which covers a whole tree from structural limbs down to twigs.
- Sharp wire cutters kept for wire alone, because removal means cutting coil by coil.
- A notebook or phone note recording the wiring date and each inspection date, so you can judge how long a coil has been on rather than guessing.
- A clean pair of hands and a steady support, since most damage happens during the bend rather than the wrap.
Cutters are half the toolkit, and this guide to bonsai tools for pruning and shaping care covers the rest of what belongs within reach at the bench.
Then confirm the tree is healthy and hasn't been repotted recently. A weak tree heals slowly and should wait. For a first project, our Complete Bonsai Set | GREEN costs $50.00 USD and includes soil, fertilizer, a green pot and a wire kit.
Set your first inspection for one week after wiring during active growth. Mark the date, then look for the three warning signs rather than watching the calendar.
Everything above works best with materials that match: our Complete Bonsai Set | GREEN at $50.00 USD arrives with soil, fertilizer, a green pot and a wire kit so gauge, pot and feeding are settled from day one, and our glazed ceramic bonsai pots have a firm, solid base that keeps a tree steady while you wrap and bend. Our pots and accessories are made for beginners and experienced growers alike, and our 18-6-8 slow release Bonsai Fertilizer Pellets at $10.38 USD keep a wired tree growing strongly enough to set its new shape. Visit Leaves & Soul to choose a set, a pot and a wiring kit before your next session at the bench.