


Set a round bonsai pot diameter at about two-thirds of the widest branch spread, so a 12-inch canopy pairs with a pot about 8 inches across. Set depth near the trunk thickness just above the nebari, so a 1.5-inch trunk wants about 1.5 inches of pot depth.
What a Round Bonsai Pot Is For
You've set a finished informal-upright juniper or maple on the bench, placed a handsome round bowl beside it, and stepped back. In one glance the bowl either frames the tree or fights it, and you can't yet say why. That first impression matters, but it's only half the decision.
A round bonsai pot is a circular ceramic or stoneware vessel where diameter, depth, feet, and drainage holes work as one system. Think of it as a picture frame. A frame that's too wide swallows the picture, and a frame that's too ornate pulls your eye off the subject. The analogy breaks in one important place. A frame only has to look right, while a pot also holds a limited root zone that must dry and rewet on a predictable rhythm.
Start by measuring two things, the widest branch spread and the trunk thickness just above the surface roots, called the nebari. Those two numbers drive the proportion chart that follows. After that you'll test the tree's stage, since a circle can be a poor training pot, run an empty-pot water test, compare handmade glazed and unglazed price examples, and then repot and feed with the pot's volume in mind.
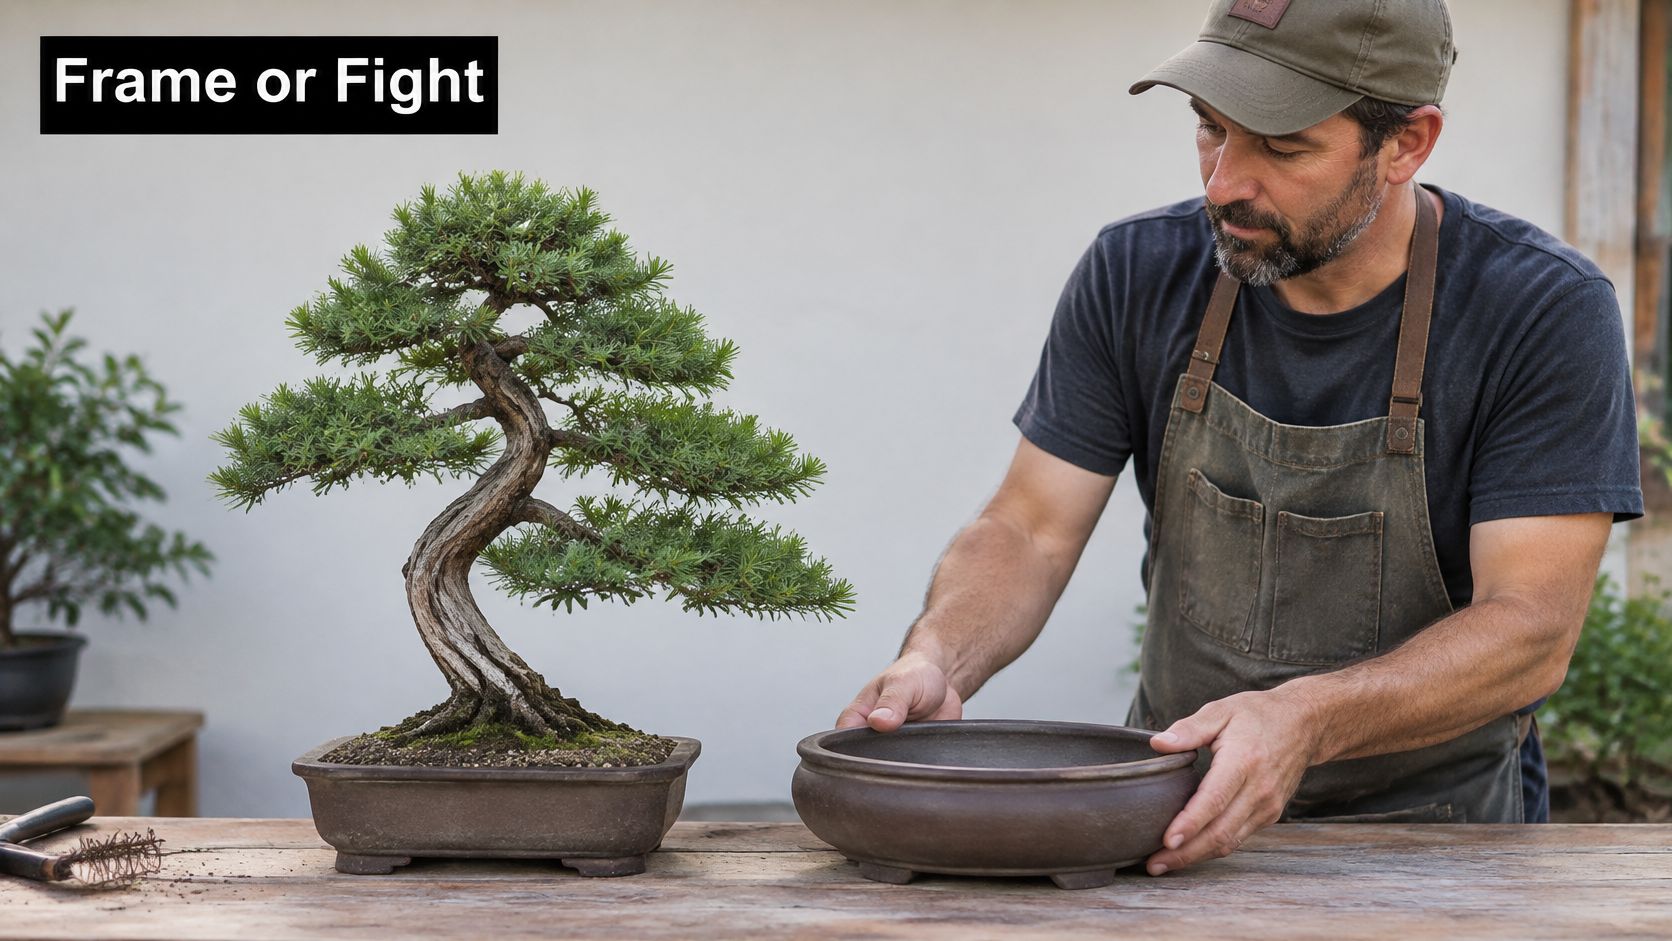
One warning belongs up front. Cascade and semi-cascade trees need height rather than a low bowl, so don't force them into the standard round shape. By the end, you'll be able to look at one specific pot and give it a clear yes, resize, or reject.
Size a Round Pot to the Tree
For an upright tree, a useful starting point is a pot diameter about two-thirds of the widest branch spread. Match the pot's depth to the trunk's thickness just above the nebari, then check that the root mass fits without excess soil around it. These proportions work like a picture frame: the pot should support the tree's outline, not compete with it.
Work One Example in Order
Measure the canopy tip to tip at its widest point, then multiply that measurement by two-thirds. Next, measure the trunk just above the surface roots and use that figure as a starting depth. Finally, compare the pot with the whole composition. The measurements set a baseline; they do not replace checking the root mass and the tree's stage.
For an informal upright with a 12-inch canopy spread and a 1.5-inch trunk, start with a round pot about 8 inches across and 1.5 inches deep, measured inside. If the closest pot is a little deeper, it may be easier to manage than one that is much wider: extra width adds soil the roots may not use, and that soil can stay wet.
| Tree situation | Diameter guide | Depth guide | Why it changes |
|---|---|---|---|
| Upright tree, 12-inch canopy | About 8 inches, or two-thirds of the widest spread | About equal to trunk thickness above the nebari | Keeps the pot in proportion while allowing room for a stable root mass |
| Upright sized by height | About one-third of the tree's height | Near trunk thickness above the nebari | A useful alternative when height reads more strongly than branch spread |
| Literati or bunjin | A modest round that does not add visual mass | Shallow, sometimes slightly irregular | A restrained pot keeps attention on the spare silhouette |
| Cascade or semi-cascade | Do not use the shallow two-thirds bowl as a fixed guide | Taller than a standard shallow bowl | The falling line calls for a pot with more height and stability |
| Just after root pruning | Trimmed radial spread plus a small working margin | Small diameters may need proportionally more depth | Too much empty soil can stay wet; too little volume can dry quickly |
| Hot, dry site or very vigorous species | Keep the visual diameter if the tree is finished | Slightly deeper if the pot dries in a day | Adjust depth or watering rather than choosing an unnecessarily wide pot |
Where the Numbers Move
A literati or bunjin may need a shallow, modest round pot, sometimes with a slightly irregular outline. Its tall, spare trunk and small crown can look overwhelmed by a heavy, symmetrical bowl. Here, visual restraint matters more than matching a standard proportion exactly.
Cascade and semi-cascade trees are a different case. Their falling branches call for a taller container, so the shallow-bowl measurements are not a good fit.
Root pruning also changes the starting measurements. Size the pot to the trimmed radial spread, with only a small margin, rather than to the former root mass. A very small diameter may need extra depth because a shallow circle holds little soil and water. That extra depth can help manage drying, but excess soil around a compact root mass can remain wet.
In a hot, dry spot, consider a little more depth or more frequent watering before increasing the diameter. A wider pot adds soil where the roots may not need it.
Take three measurements to the shop: canopy spread, trunk thickness, and the pot size those suggest. Compare the suggested size with the root mass and the tree's proportions before choosing.
When a Round Shape Works Against the Roots
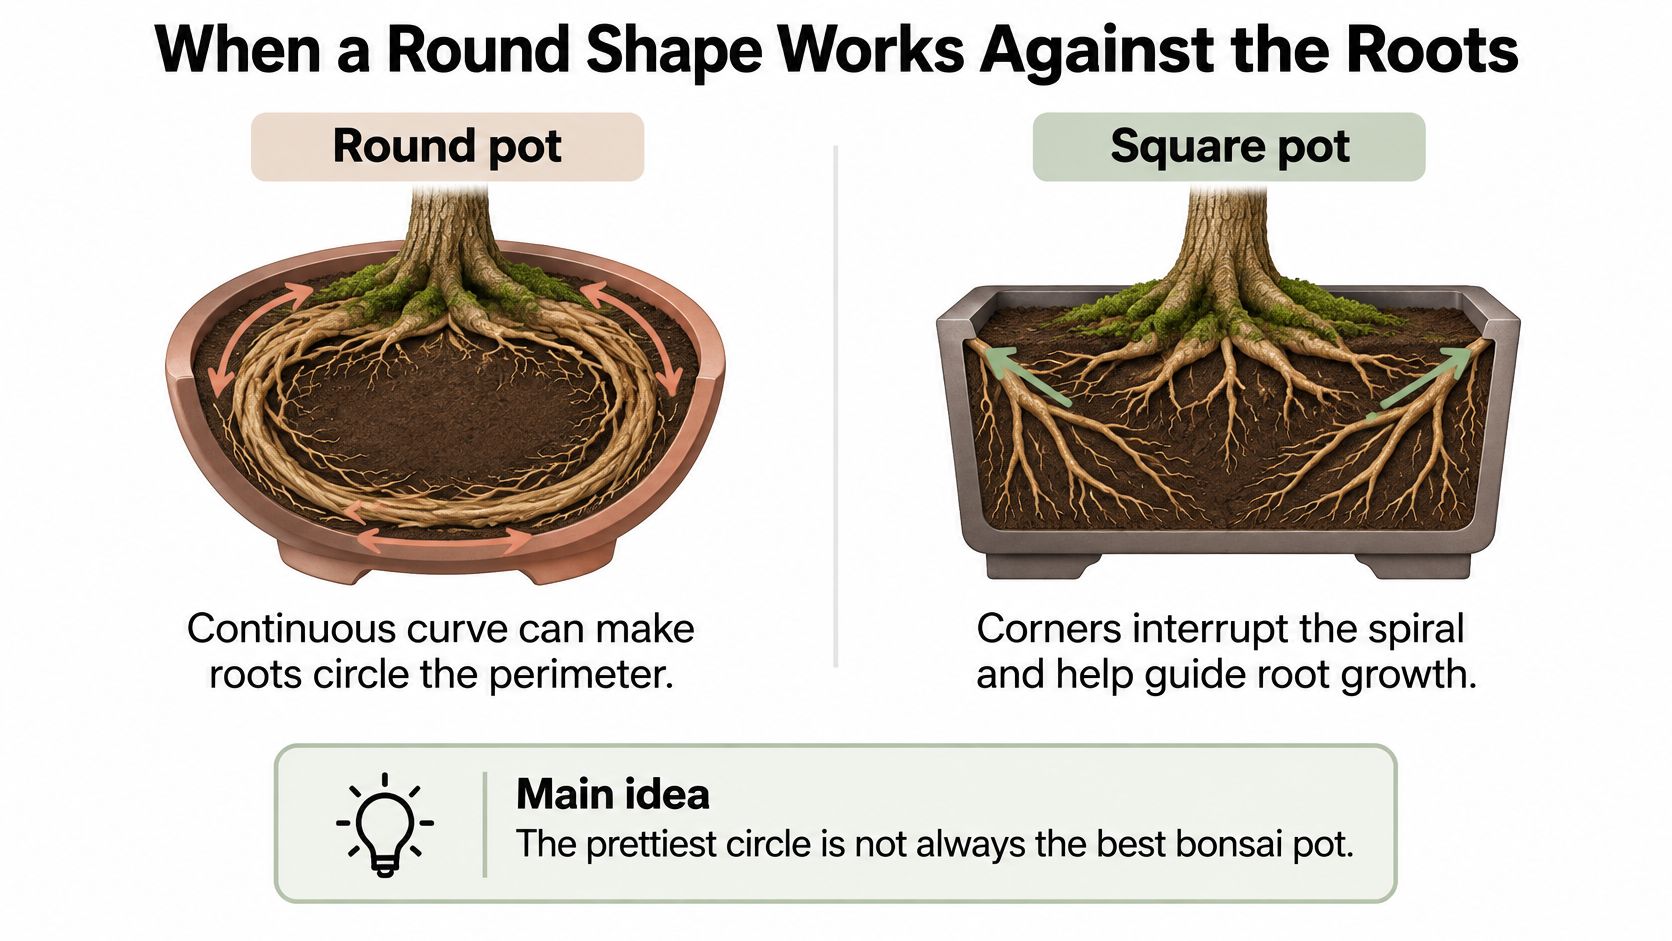
The prettiest circle isn't automatically the best bonsai pot. A round wall gives roots a continuous curve to follow, so an unloosened root mass can circle the perimeter instead of growing outward in a flat, radial plate. The ACS Distance Education bonsai course material notes that round containers can encourage roots to circle more than square containers, while a tapered base can reduce bottom coiling.
The diagram below shows that contrast in one glance.
Finished Tree Versus Training Tree
Separate two jobs. For a finished display tree, appearance, stability, and presentation can win, which is why many upright and literati trees live happily in round pots once you spread and trim roots at each repot. For developing material, root architecture and training efficiency matter more, so a round bonsai pot is often the shape to delay. Put young stock in a training container, build the nebari, and bring the circle back at the refinement stage.
Run four checks before you commit:
- Tree stage: Is it finished, or still building trunk and roots?
- Root-ball shape: Is it already a flat radial plate, or a circling plug from a nursery pot?
- Species vigor: Will fast roots fill and spiral in one season?
- Watering frequency: Can you check a shallow round often enough in summer?
Smaller-diameter rounds generally need to be proportionally deeper to keep a useful water and soil reserve. A tiny shallow circle can be both unstable and fast-drying, which punishes a vigorous species. If you're correcting a circling plug, work through proper bonsai tree root pruning before the tree earns its display pot.
The video below shows root work being handled at repotting time, which is when circling gets fixed or gets locked in.
| Shape | Root behavior | Best use | Drying and stability |
|---|---|---|---|
| Round | Continuous wall encourages perimeter circling if roots aren't spread and trimmed | Finished uprights and literati displays | Shallow rounds dry fast; feet and a centered hole keep the base open |
| Oval | Milder circling than a tight circle and a better fit for a wide asymmetric canopy | Informal uprights whose spread is broader than deep | Moderate drying; visually balances an off-center trunk |
| Rectangle or square | Corners interrupt circling better than a circle | Developing stock and formal displays | Drying depends on depth and hole area; corners often give clearer tie-down points |
| Deep cascade pot | Height matters more than the circular training problem | Cascade and semi-cascade | Holds more water and needs a stable foot plus secure tie-downs |
A visually harmonious round pot is horticulturally inferior when its geometry promotes circling or a root zone that can't stay evenly moist.
Choose Materials and Care for the Pot
Round pots come in fired earthenware, stoneware, and porcelain, and a thick, fully fired body matters more than the name on the label. A well-fired stoneware pot resists chipping and frost better than a thin, underfired piece in a prettier color. Tap the wall and check the weight. It should feel solid, not fragile.
Unglazed interiors and bottoms breathe a little and grip tie-down wire better, so the tree doesn't skate when you wire it down. A glazed exterior adds color, but it never replaces drilled holes. If the inside is slick with glaze right up to the rim, expect the root ball to shift more easily.
In climates with freeze-thaw cycles, a porous or poorly fired pot can crack when water freezes inside the wall. Keep the tree in a sheltered spot over winter and don't leave water standing in a saucer. A pot that survives summer can still split in January.
Each season, check every hole for root or soil clogging, scrub algae off the outside with a stiff brush, and look for hairline cracks in the glaze. Replace or remove tie-down wire once it cuts into bark or rusts. A chip on the rim is cosmetic unless it reaches a drainage hole or the inner wall.
At each repot, run three quick checks before soil goes in:
- Holes open: No roots, soil, or glaze blocking the outlets.
- Wire seat dry: No damp, corroded wire hiding under the base.
- No new cracks: Especially around the feet and rim.
How to Test Drainage Before You Plant
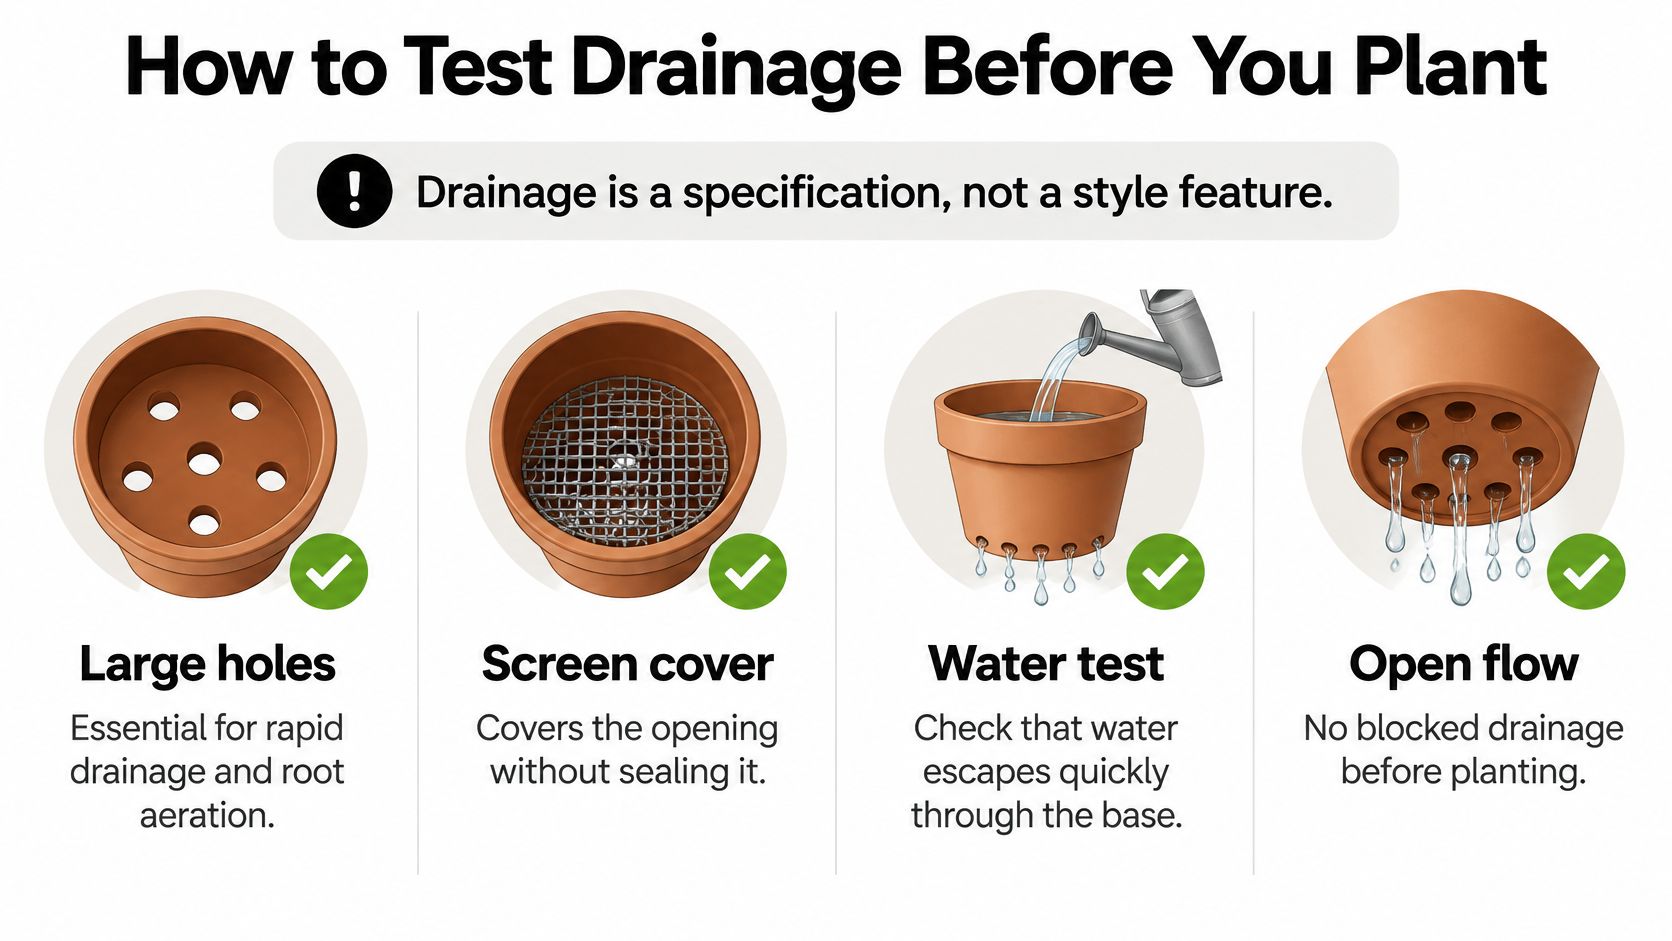
Drainage is a specification, not a style feature. The Virginia Tech bonsai guide identifies large drainage holes as essential for rapid drainage and root health, and recommends interior screening to retain coarse substrate. The screen should cover the opening without sealing it, because blocked holes eliminate the intended hydraulic pathway.
This checklist sums up the pass conditions before you start.
The Empty Pot Water Test
- Turn the pot over. Inspect every hole for glaze that has narrowed or closed it, and for a base so curved that a foot or saucer will plug the outlet.
- Fit mesh or screen over each hole. Fasten it with a short piece of wire so substrate stays in while water still passes freely.
- Pour water through the empty pot. Require an unobstructed stream, not a slow weep. Hesitant flow in an empty pot only gets worse once mix and roots fill it.
- Sit the pot on the actual bench or feet and pour again. A flat surface can seal the underside even when the holes look fine in your hand. If the base sits flush, raise it. Small pot feet and risers keep the outlet open to the air.
- Reject a gravel or shard layer as the fix. That layer doesn't improve drainage and can raise the perched water level, which pushes the wettest zone up into the roots.
- Plan an open, coarse bonsai mix with real air space between particles instead of garden soil. A structurally stable medium with substantial macroporosity does the draining, not a layer of rubble at the bottom.
Why Round Pots Need the Full Test
A round pot's drainage isn't decided by the holes alone. Hole placement, feet, saucer, curved floor, and particle size work together to decide whether the root zone stays oxygenated. A single centered hole under a domed floor can leave a wet ring at the edges, while wide particles over a well-placed hole keep air moving through the whole profile.
Clear drainage has a second job. It lets you flush accumulated fertilizer salts out of the pot, which matters when you're using granular or liquid feeding programs. If water can't run freely, salts build up where roots are densest.
If a decorative round container fails the test, don't drill excuses for it. Use it as an outer cachepot and grow the tree in a drained inner pot.
Pass or fail, no middle ground: free flow on the real surface, or don't plant.
Glazed and Unglazed Pots by Size and Price
Three published listings make useful cost anchors, not a best-buy ranking. In 2025, Bonsai-Shop.com listed a handmade round, unglazed bonsai pot measuring 14.5 × 14.5 × 7 cm at €76, identified as a 2025 work by potter Detlef Goroll. In 2025, Bonsai-Shop.com also listed a handmade round, glazed bonsai pot measuring 23 × 23 × 8.5 cm at €96, also a 2025 Detlef Goroll work. In 2024, Mistral Bonsai listed a round, unglazed Japanese ceramic bonsai pot measuring approximately 31 × 31 × 13 cm at €47.35.
| Listing | Size (cm) | Finish | Price |
|---|---|---|---|
| Detlef Goroll handmade, Bonsai-Shop.com, 2025 | 14.5 x 14.5 x 7 | Round, unglazed | EUR 76 |
| Detlef Goroll handmade, Bonsai-Shop.com, 2025 | 23 x 23 x 8.5 | Round, glazed | EUR 96 |
| Japanese ceramic, Mistral Bonsai, 2024 | About 31 x 31 x 13 | Round, unglazed | EUR 47.35 |
Read the Pattern, Not Just the Price
The smallest pot costs more than the largest one. That's normal in this market. Handmade work follows the potter and the finish as much as the centimeters, so a small signed piece can outprice a larger production Japanese pot. Don't assume price scales with size, and don't assume a higher price means a better fit for your tree.
Finish matters in daily use. Unglazed interiors and bottoms help the pot release water and give tie-down wire a less slippery seat. Exterior glaze is the color decision, and it doesn't replace holes. If you're weighing color against tree type, the background on glazed bonsai pots helps you separate the finish choice from the drainage choice.
Convert the examples into round numbers you can compare with your chart. The 14.5 cm pot is a small shallow round near 5.7 inches across and 2.8 inches deep. The 23 cm pot is about 9 inches across and 3.3 inches deep, and the 31 cm pot is about 12 inches across and 5 inches deep. Match them only after your canopy and trunk math, not because a listing looks attractive.
A price line also leaves things out. Feet, hole count, and whether glaze has crept into the holes aren't fully described, so the empty-pot water test still decides. These euros are 2024 and 2025 examples from those shops, and they'll move with exchange rates and new firings.
Repot Water and Feed a Round Pot
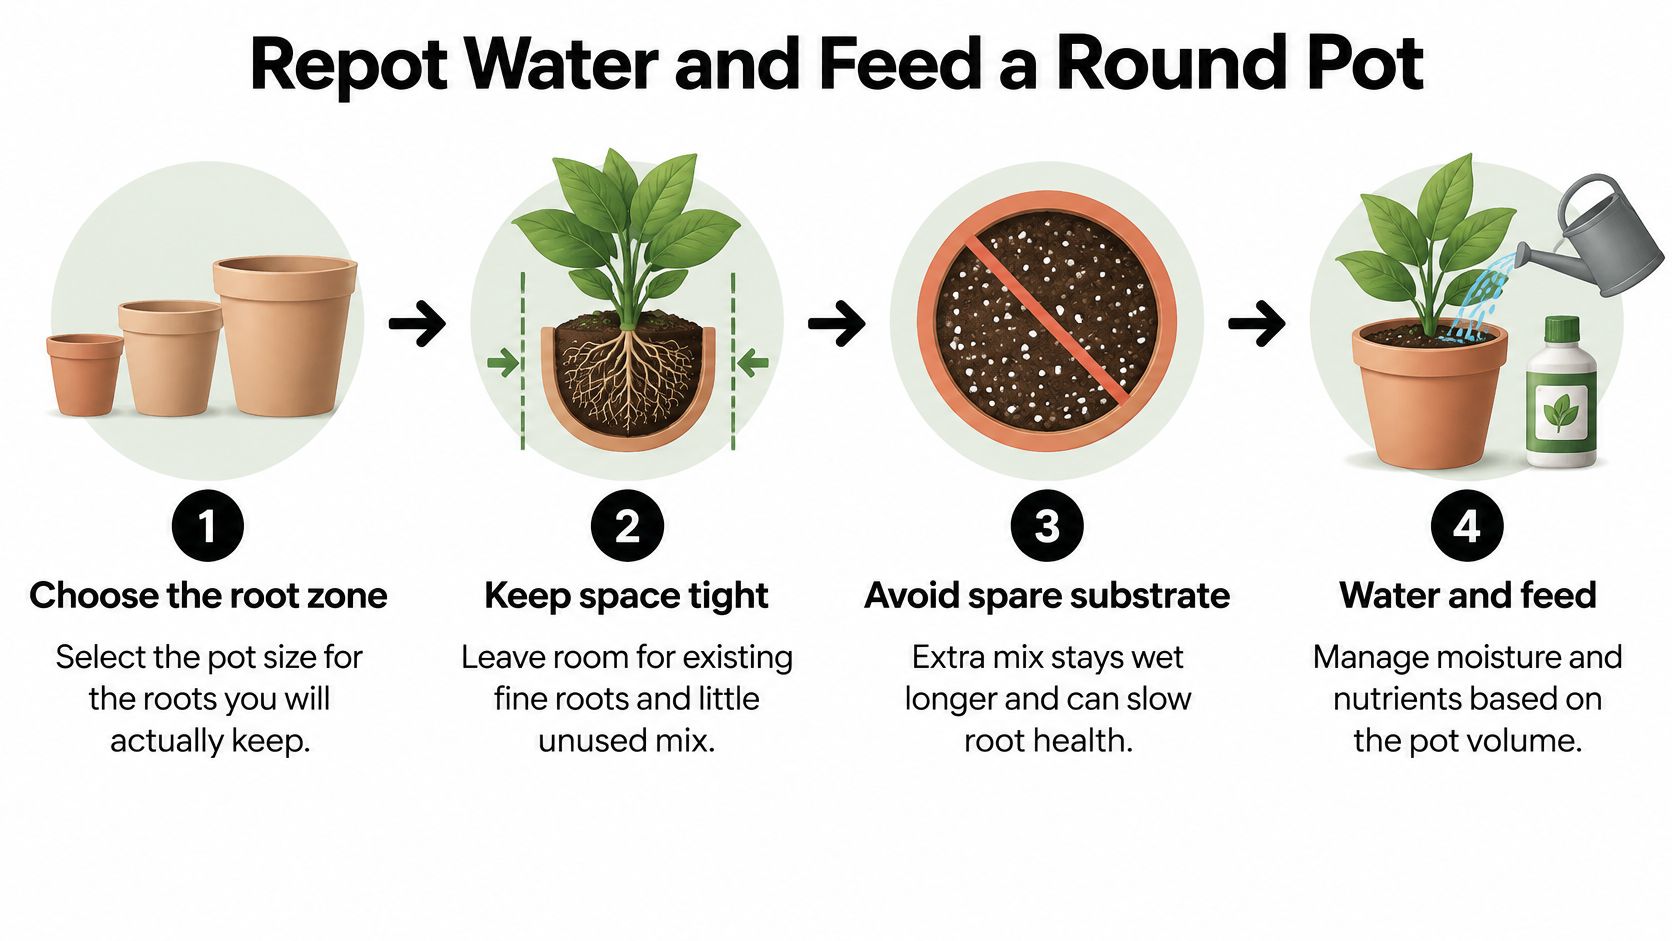
Choose the pot for the root zone you'll keep, not the one the tree arrived with. The Kansas State University Extension bonsai feature recommends a shallow container with enough capacity for the existing root system but little excess space, since excessive unused substrate retains water longer and delays root-zone drying. It also advises preserving and spreading fine, fibrous roots while shortening stiff or circling roots so the radial root plate fits the container.
This four-step flow shows the logic before you pick up the root rake.
Repot in Five Steps
- Take the tree out and comb the root ball with a root rake or chopstick so it's no longer a plug. Work from the outside in, and shake out the old mix as you go.
- Preserve and spread fine fibrous roots. Those thin roots do most of the water and nutrient uptake, so fan them out evenly in every direction.
- Shorten stiff and circling roots with sharp scissors until the radial plate fits the circle with a small working margin. This matters most in a round bonsai pot, because the circular wall encourages roots to follow the perimeter if you leave the mass unloosened.
- Wire the tree down through the drainage holes or tie-down points before backfilling. A round pot tips more easily if the trunk sits off center, and an anchored tree settles faster because new roots aren't torn by movement.
- Work an open, coarse mix through the roots with a chopstick so no empty pocket sits against the curved wall. Air gaps against the wall dry out root tips first.
Don't cut roots hard and walk away from the canopy. Kansas State also advises balancing root and shoot mass, since aggressive root reduction combined with unchanged foliage increases post-repotting water stress. If you remove a lot of root, reduce some foliage or give the tree shade and shelter while it recovers.
Water and Feed to the Volume You Chose
Set watering by depth, particle size, climate, and species, not by a fixed schedule. A shallow round may need a daily check in summer, while a deeper one stays moist longer. Coarse particles dry faster than fine ones, and a thirsty species in wind will empty a small circle quickly.
Water until it runs from the holes, then let the surface approach dry before watering again. Periodically flush the pot thoroughly so fertilizer salts don't accumulate in the center where roots are densest. If water pools on the surface instead of draining, the mix has broken down or a hole is blocked, and both need attention before you feed again.
For feeding, use a light hand. Slow-release pellets such as an 18-6-8 bonsai formula, or a diluted liquid feed, belong on moist mix during the growing season. Leaves & Soul sells 18-6-8 slow-release bonsai fertilizer pellets as one option in that category. Fertilizer isn't a substitute for drainage, and feeding a dry, stressed root zone right after a hard root prune makes recovery slower, not faster.
You'll know the setup is right by what you see at the next repot. Roots should be used across the pot rather than matted in a ring at the wall, and the soil should have dried evenly rather than staying sour in the center. Even drying is the signature of a well-matched round bonsai pot.
Pair the Pot, Decide and Buy
Now match style to shape. Informal uprights settle into a round or soft oval whose diameter follows the two-thirds spread, with an earth-tone glaze for pines and junipers and a softer glaze when flowers or fruit are the show. Formal uprights take a symmetric round only when the trunk sits centered, because an off-center trunk in a perfect circle reads as a mistake rather than a choice.
Literati trees want the shallow, sometimes irregular round, so the pot stays a footnote to the line of the trunk. Cascade and semi-cascade need the taller pot instead. Don't let an attractive low bowl talk you out of the height those styles require.
If the measured pot fits the chart, passes the empty-pot water test and matches the tree's stage, plant it. If it's only beautiful, keep it as a cachepot or wait.
Before ordering, write down canopy spread, trunk thickness at the nebari, and whether the tree is on display or still in training. Then browse round bonsai pot options and bonsai supplies and match the listed dimensions against those three numbers. Feed with a slow-release bonsai fertilizer only after the new pot drains freely.
Measure your canopy spread and trunk, run your numbers against the chart, and then shop with a target size instead of a guess. At Leaves & Soul you'll find glazed ceramic bonsai pots, bonsai soils, and slow-release fertilizer pellets to complete the repot once your chosen pot passes the water test.