


Watering a cactus every week isn't reliable advice, and giving it a little splash whenever you remember is worse. A cactus needs a drying cycle, not a standing appointment with the watering can. Learning how to care for cactus plants means recognizing when that cycle has finished, then adjusting as sunlight and temperature change.
This guide focuses on desert cacti grown in containers. Holiday cacti need a different moisture balance, especially when you're rooting cuttings. Identify which type you have before treating every spiny or segmented plant the same way.
Season-by-Season Light, Water and Temperature Schedule
Most cactus care failures start with the calendar, not the watering can. A routine that works during bright, active growth can leave roots wet when shorter days slow the plant down. Keep the watering principle consistent, but let the season change the interval.
The active-growth temperatures and dormant watering interval below follow Colorado State University's cactus-care guidance, which recommends 70–75°F (21–24°C) days, nights around 60°F (16°C), and cooler dormant conditions around 45–55°F (7–13°C); winter watering may be needed only every two to three weeks, enough to prevent severe shrinking.
Cactus care baseline by season
| Season | Light | Temperature | Watering |
|---|---|---|---|
| Active growth, spring and summer | Strong direct sun, such as a south-facing window in the Northern Hemisphere | Warm days and somewhat cooler nights | Water thoroughly after the upper medium dries and deeper moisture has been checked |
| Autumn transition | Bright light, with any increase introduced gradually | Cool gradually toward suitable winter conditions | Stretch intervals as days shorten |
| Winter dormancy | Keep the plant in a bright location | Cool conditions appropriate to the species, protected from freezing | Water sparingly only to prevent severe shrinking or withering |
Read the season through the plant
In spring, don't resume generous watering just because the month has changed. Look for active growth and check whether the pot is drying faster. A cactus in a sunny window can become ready for water before another plant across the room.
During summer, prioritize usable sunlight rather than room brightness alone. A room can look bright to you while the cactus receives little direct sun. East- or west-facing windows receiving direct sunlight can work when a suitable south-facing position isn't available.
Autumn requires restraint. Keep light strong while allowing longer dry periods, and don't compensate for slower growth with extra water or fertilizer.
Seasonal rule: Schedule a soil check, not an automatic watering.
Winter dormancy isn't permission to put the cactus in a dark cupboard. Keep it bright, reduce irrigation, and avoid forcing growth in warm, dim conditions. Don't assume every cactus tolerates the same cold, either.
The table is a starting point, not a prescription. Pot size, humidity, room warmth, species, and actual sunlight all affect drying. Use the plant and its medium to decide when to act.
Choosing a Pot and Mix That Drains Fast
The pot and medium do much of the watering work. You can pour carefully and still create trouble if water has nowhere to escape or the mix stays packed around the roots.
Start with drainage holes. If your decorative container has none, keep the cactus in a removable nursery pot inside it. Take the inner pot out for watering, let it drain, and check the outer container before putting it back.
You should be able to see excess water leaving the container.
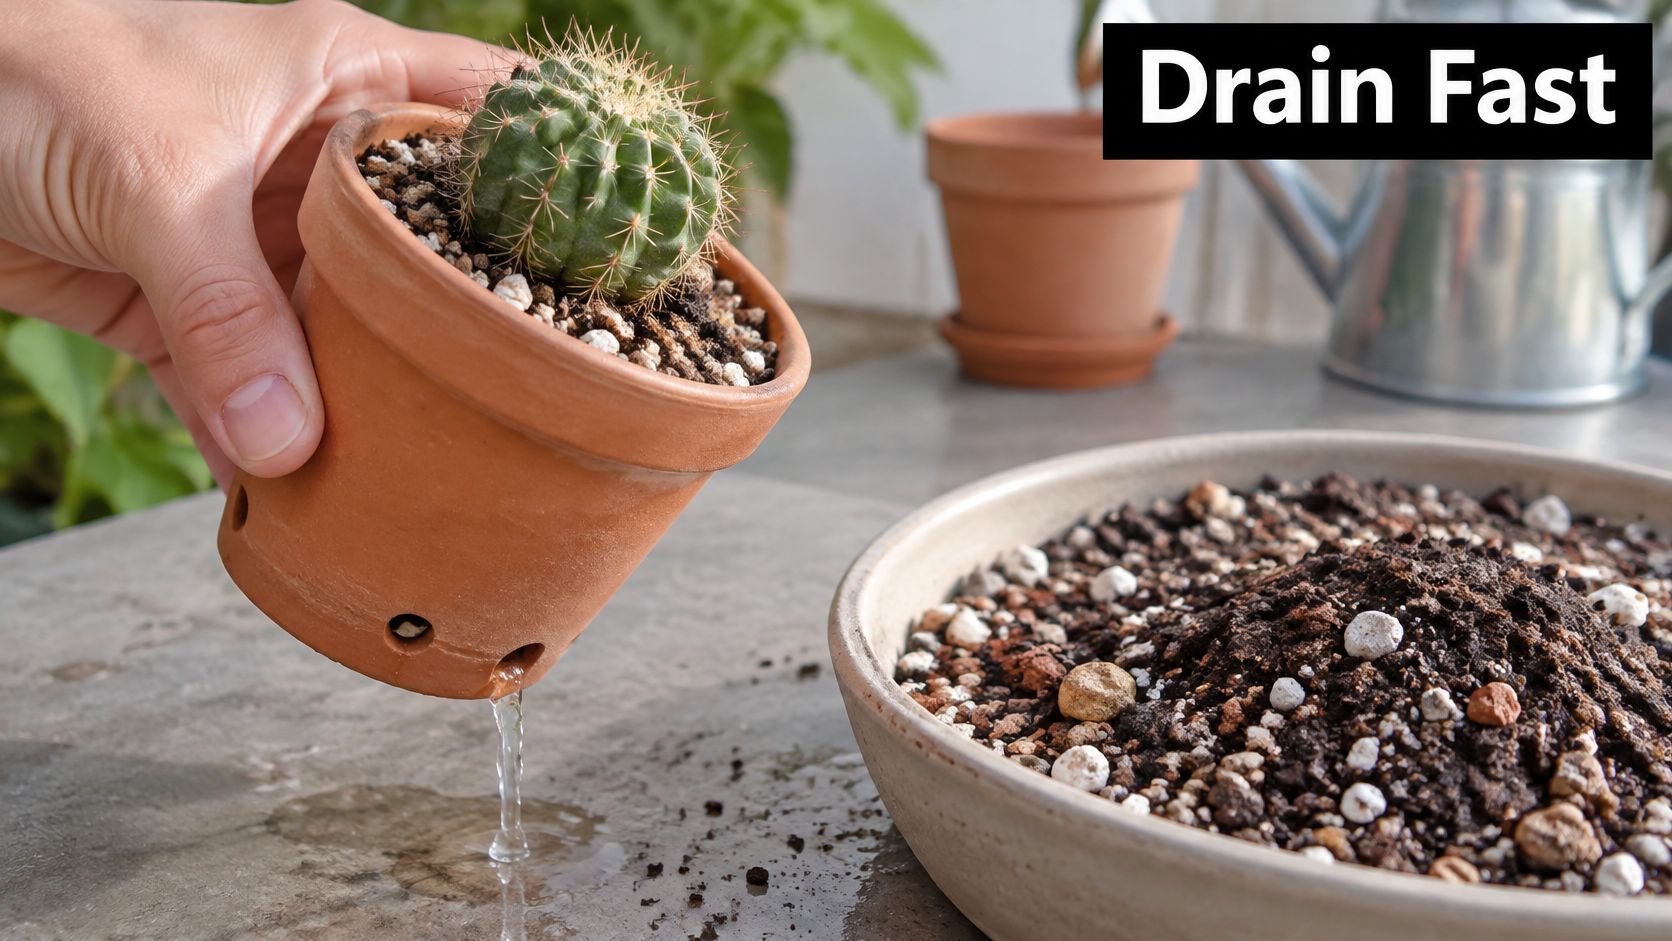
Test the mix before planting
Nebraska Extension's cacti-care guide recommends approximately one part potting soil to one part coarse sand, with a simple texture check: moisten a handful, squeeze it, and release it. The material should break apart rather than remain a persistent clump.
Use coarse horticultural sand rather than fine material that packs tightly. If you're comparing bagged blends with a homemade recipe, the cactus soil mix guide can help you assess the ingredients and drainage characteristics.
- Choose a manageable pot. A container much larger than the root system leaves extra wet medium around a small plant.
- Keep the drainage route open. Don't let a flat saucer or tightly fitting decorative container block runoff.
- Check the whole setup. A porous mix won't solve water collecting beneath the pot.
Match drainage with sensible light
Moving a cactus into stronger sun changes how quickly its pot dries, but sudden exposure can scorch a plant accustomed to indoor conditions. Introduce stronger direct light gradually, watching for pale or bleached patches rather than rushing toward maximum exposure.
If the medium remains heavy and wet between checks, investigate its structure instead of endlessly adjusting the calendar. Check for blocked holes, an oversized container, and compacted material. When the mix is the problem, replace the mix, rather than trying to make a dense substrate behave through tiny waterings.
How to Water a Cactus Without Rot
Watering a cactus well means running one cycle over and over: soak the root zone, drain it, let it dry, wait. Warm bright months spin that cycle faster, and cool dim ones slow it to a crawl. The rule never changes, only the timing.
That timing works because cacti are built for interruption. Their stems store water, and the fibrous roots can absorb moisture quickly when it arrives. Findings reported in a cactus drought-response study describe new roots forming within 24 hours after soil moisture returns, which is why a proper soak revives a thirsty plant so effectively.
Stored water also buys you patience. A cactus drawing on its reserves looks different from one that cannot absorb water because its roots have rotted, and telling those two apart is where most watering decisions go right or wrong.
Use a complete watering cycle
- Check below the surface. Push a finger into an accessible part of the medium, or slide in a wooden skewer without forcing it through roots. If it comes out damp or carrying moist particles, wait, even when the top looks dusty.
- Water thoroughly when the root zone is ready. Pour slowly across the whole surface until water leaves the drainage holes. If water races down a gap beside a shrunken root ball, pause and go slower so the medium becomes fully wet.
- Let the pot finish draining. Wait until the dripping stops before returning the pot to its spot. A shallow tilt helps release water trapped under the rim.
- Allow a real dry-down between waterings. Lift the pot right after watering and again days later so you learn the weight difference. A small splash mid-cycle wets the top without reaching the roots and restarts the clock for nothing.
- Stretch the wait in cool months. The same cycle runs longer when light and temperature drop. If the plant stays firm, hold off even when your usual check day arrives. When real shrinking shows up, confirm the medium is dry and the base is firm before reaching for the can.
Check the result, not just the pour
A cactus watered at the right time has a firm body, characteristic coloration, and no soft or translucent tissue at the base. Press gently near the top with a fingertip rather than squeezing around spines or new growth.
A wrinkled cactus sitting in wet soil needs investigation before it needs another drink.
A dry surface is a useful screening check, though it cannot prove the bottom of a deep pot has dried. Pair it with pot weight or a skewer, especially in cool rooms where the cycle runs long. The soak and the interval are separate decisions: drench an actively growing plant properly, then let the season decide how long the dry-down lasts. I would rather see a grower wait an extra week in winter than water on a fixed calendar.
Repotting and Feeding Without Shocking Your Cactus
Repot for a reason, not just because another growing season has arrived. Roots crowding the container, a plant that repeatedly tips over, or medium that no longer drains properly are useful triggers. A cactus with a stable root system and sound mix doesn't benefit from unnecessary disturbance.
Plan routine repotting as active growth begins. If you find spreading rot, however, deal with it promptly rather than waiting for an ideal season.
Move the roots with minimal damage
- Start with dry medium. It releases more cleanly than a wet, heavy root ball. Support the cactus with folded newspaper or suitable padded handling tools, without crushing the stem or relying on gloves alone.
- Inspect before planting. Loosen old medium gently and trim clearly rotten or mushy roots with clean scissors. Preserve firm roots instead of stripping the plant bare for appearance's sake.
- Choose a modestly larger container only when needed. Keep drainage holes unobstructed and settle fresh porous mix around the roots. Maintain the previous planting depth rather than burying healthy stem tissue.
- Let injuries dry before watering. Keep the plant protected from harsh sun while damaged roots seal. Don't combine root disturbance, soaking, and a sudden move into intense sunlight.
Feed growth, not stress
Fertilizer can support an actively growing cactus, but it won't repair poor light or waterlogged roots. For choosing a suitable formulation, use the cactus fertilizer guide, then match application to the product type.
- Use a diluted liquid feed conservatively. Apply it to a healthy, hydrated root system rather than bone-dry, stressed roots.
- Treat pellets differently. Don't apply a slow-release product on the same schedule as liquid fertilizer or add extra feed because its effect isn't immediately visible.
- Pause during dormancy and recovery. Freshly disturbed roots and inactive plants aren't good candidates for a nutrient push.
Strong fertilizer can injure roots and stall growth. Before feeding, look for visible new growth, sound roots, and a normal drying cycle. If those conditions aren't present, correct the growing conditions first.
Propagating Cactus From Cuttings
Cuttings often fail because the cut stays wet, not because the grower leaves them alone. A fresh wound needs to dry before it enters rooting medium. Start with healthy tissue, and don't use a soft, discolored segment as propagation material.
If you're removing damaged tissue, the remaining cut surface must be firm and sound.
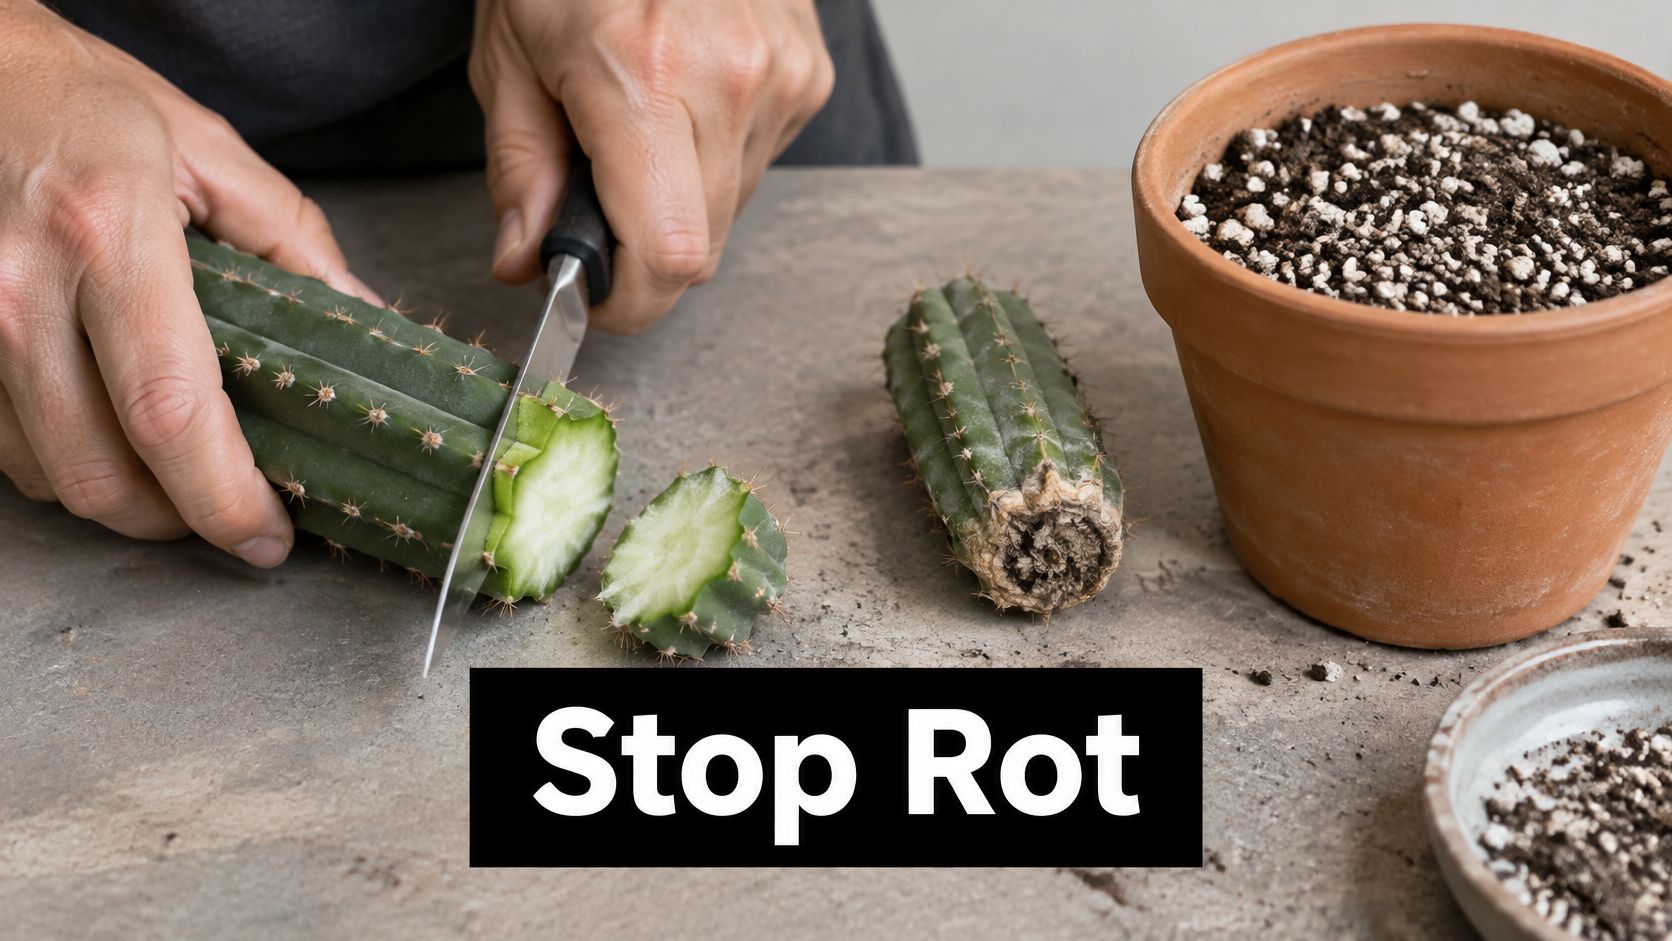
Root a desert cactus cutting
- Remove a healthy segment with a clean, sharp blade, making a neat cut rather than tearing the stem.
- Let the wound air-dry and callus. Judge the sealed surface rather than planting while it still looks fresh and wet.
- Set it in slightly moistened sterile sand or another fast-draining rooting medium. Support it without burying unnecessary stem tissue.
- Provide bright light and sparse watering. Don't keep lifting the cutting to inspect for roots.
- Transplant after a stable root system develops. Use normal porous cactus mix and handle the new roots gently.
Keep the cutting upright while it calluses so you don't lose track of its original orientation.
Use a different method for holiday cacti
The University of Minnesota's cacti and succulents guide recommends two to five stem segments, callused overnight, planted about 1 inch deep in moist perlite or coarse sand under bright indirect light; rooting typically takes six to eight weeks, with transplanting once roots reach at least 1 inch.
Keep holiday-cactus rooting medium moist but not saturated. Don't apply the desert-cutting approach so strictly that these segments remain completely dry.
For a visual demonstration of handling and propagation, watch the accompanying video.
Check orientation before planting. The end that was closest to the parent plant's base belongs downward. Planting a segment upside down can prevent rooting, so mark its orientation before separating or setting aside several cuttings.
Common Problems and How to Fix Them
Similar symptoms can have different causes. A shriveled cactus may need water, or it may have rotten roots that can no longer take water up. Check the medium and base before making a change, and inspect roots when the symptoms don't match the soil conditions.
Cactus symptoms, causes and fixes
| Symptom | Likely cause | Fix |
|---|---|---|
| Soft, mushy or brown base | Overwatering or standing water, with possible rot | Remove affected tissue, let wounds dry, and repot salvageable material in fresh porous mix |
| Shriveled, wrinkled body | Underwatering or damaged roots | Water thoroughly if the medium is dry and roots are sound; inspect roots if wrinkling persists |
| Pale, stretched or leaning growth | Too little light | Move toward a brighter window and increase exposure gradually |
| Brown or bleached scar | Sudden exposure to strong sun | Return to protected light, then reintroduce stronger sun gradually |
| White cottony clusters | Possible mealybugs | Isolate the plant, remove visible insects with an alcohol-dampened swab, and recheck regularly |
| Fine webbing or speckled stems | Possible spider mites | Isolate and rinse the plant carefully; avoid leaving the root zone saturated |
Separate rescue from routine care
For a soft base, stop watering and unpot the plant. The cactus root-rot treatment guide explains the rescue sequence, including removing affected roots, cleaning tools, and allowing wounds to callus. If rot extends into the body, saving a healthy upper cutting may be more realistic than preserving the original roots.
Not every brown area is rot. Firm, dry tissue differs from tissue that collapses under gentle pressure. Take a photograph so you can judge whether the affected area is spreading rather than relying on memory.
Inspect pests and suspicious spots closely
Brown bumps attached to stems may be scale insects. Gently remove confirmed insects with a soft brush or targeted swab, testing rubbing alcohol on a small area before broader treatment. Keep treated plants away from intense sunlight until dry.
Soft spots with grey fuzz warrant isolation and inspection for decay. Cut affected material back to firm tissue with clean tools and let the wound dry. Raising humidity isn't a substitute for controlling mites, and keeping a desert cactus persistently damp creates another problem.
Recovery check: Look for firm new growth and damage that stops spreading. Old sunburn scars and stretched stems won't simply disappear.
Easy Care Checklist for Beginners and Experienced Growers
Build a routine around observation rather than intervention. You don't need to keep improving a cactus that's firm, growing appropriately, and drying predictably. Change something when you can name the problem you're trying to solve.
Use this checklist during a plant inspection.
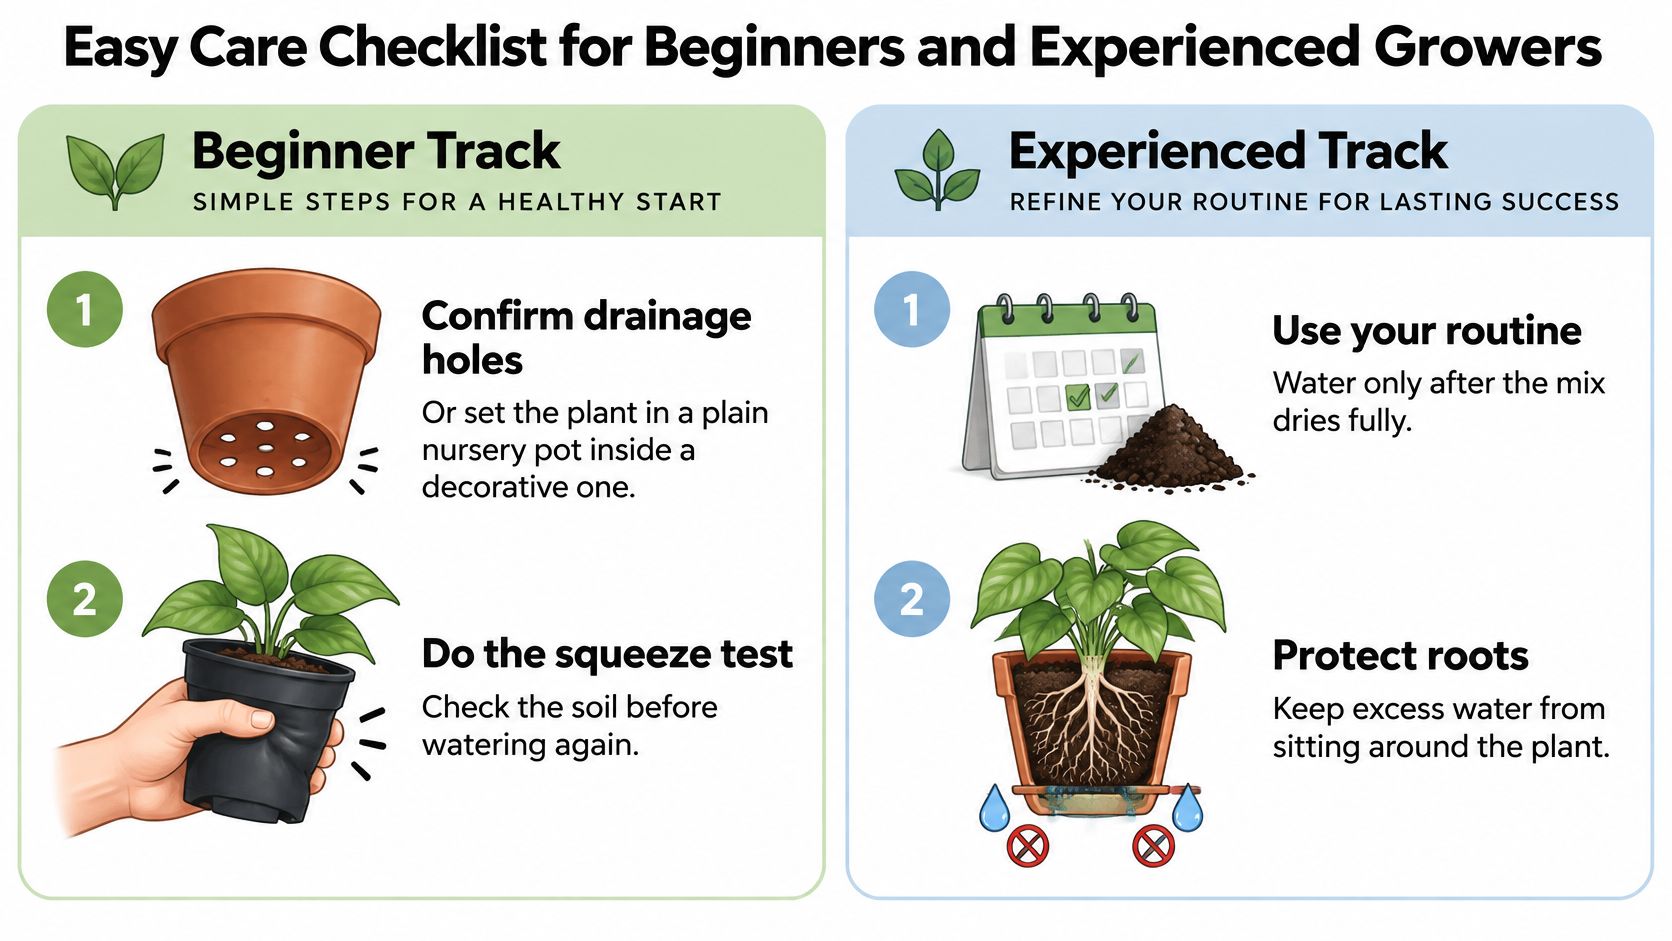
Beginner track
- Confirm drainage. Lift the nursery pot out of its decorative cover and check for trapped water.
- Assess the medium. Test its texture when preparing fresh mix, and replace compacted material when necessary.
- Choose useful light. Find a suitable bright window and introduce stronger sunlight gradually.
- Check before pouring. Use soil condition and pot weight rather than a fixed watering day.
Experienced grower track
- Record seasonal changes. Note when growth slows and how the drying interval changes in your actual room.
- Inspect hidden areas. Examine the base, ribs, and sheltered crevices for pests or soft tissue.
- Propagate selectively. Take a healthy cutting when the parent plant can spare it, and preserve its orientation while it calluses.
A ready-to-use cactus blend can replace the homemade sand-and-soil mixture when convenience matters. Our Professional Cactus Soil is a ready-to-use soil for cactus plants, offered in a large 2.2 quart size for $16.47 USD.
The target is straightforward: a stable plant with roots that don't remain wet. Patience beats frequency, especially when shorter days slow the drying cycle.
We offer purpose-built soils and fertilizers for home gardeners, including cactus and succulent growers. Visit Leaves & Soul to choose cactus-care supplies that fit your container setup, then check your pot's drainage and medium before your next watering.