


You water your orchid, place it in a bright window, and wait for the flower spike that never comes. The leaves may look reasonably healthy, yet they can turn pale, growth can slow, or new buds can fail before opening. Often, the missing piece isn't more water or more light. It's a feeding routine matched to the plant's roots, potting medium, and growth stage.
Introduction Why Orchids Need a Different Feeding Approach
Orchids don't grow like typical houseplants. Many popular orchids are epiphytes, meaning they grow attached to trees rather than rooted in rich ground soil. Their roots receive moisture, air, and small amounts of dissolved nutrients from rain, plant debris, and the surrounding environment. A dense potting mix and strong, occasional fertilizer dose create the opposite conditions: poor airflow, concentrated salts, and roots under stress.
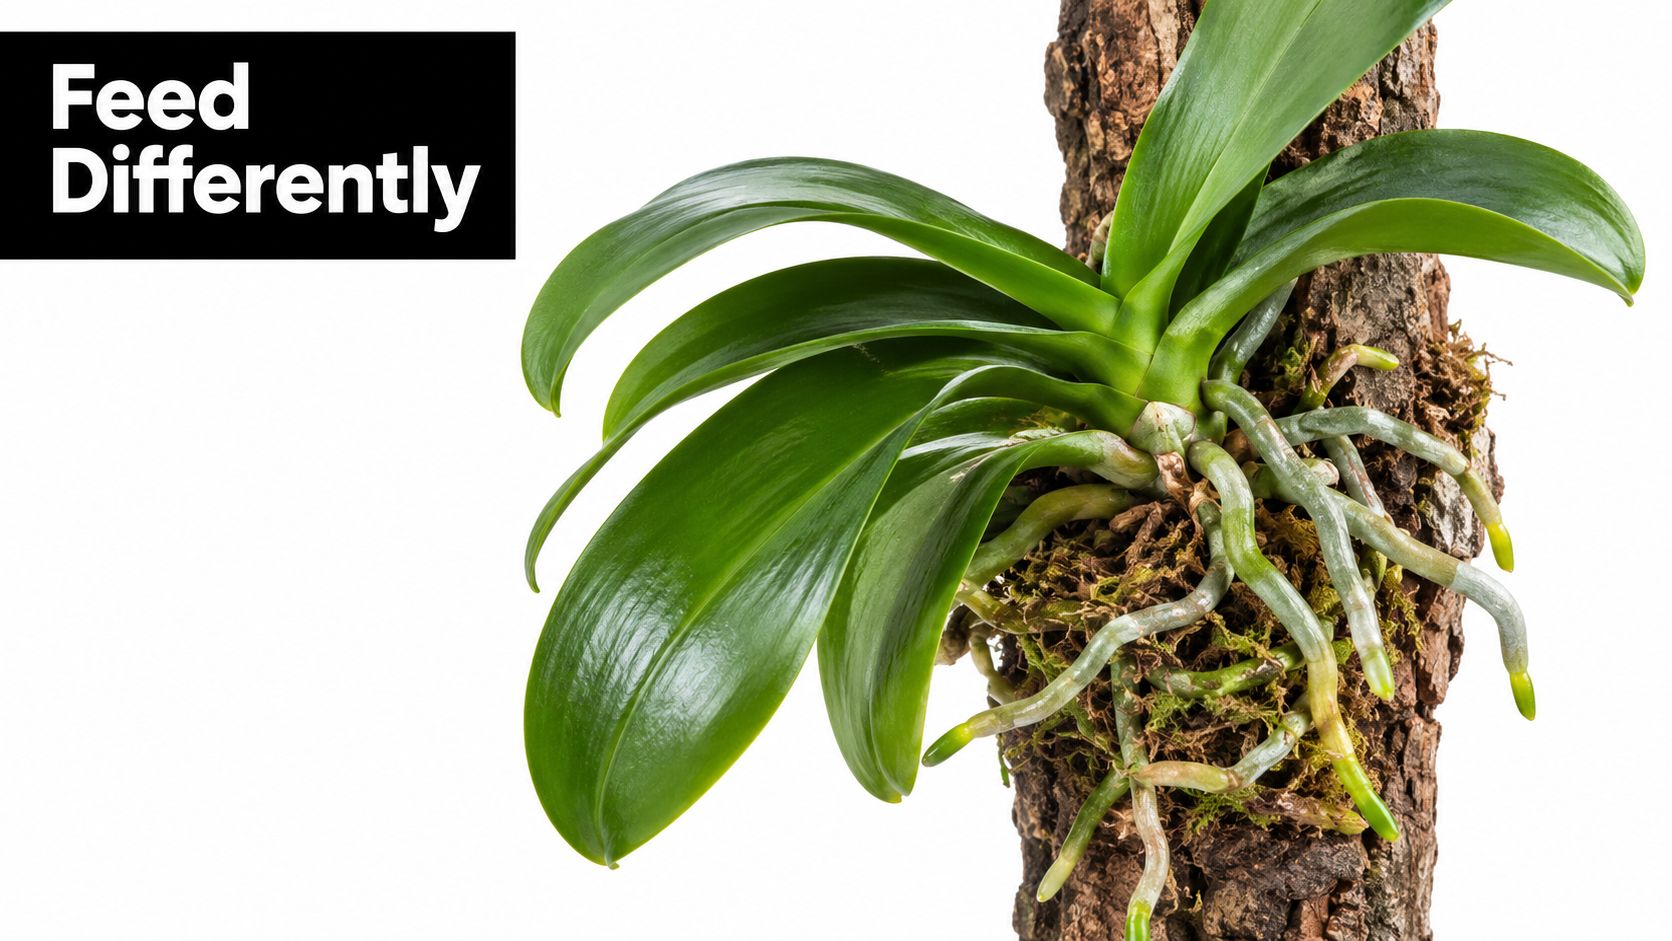
That natural history explains why orchid plant fertilizer works best as part of a measured care system. The right product can't compensate for rotting roots, inadequate light, or a medium that stays wet for too long. It can, however, supply nutrients in a form and concentration the plant can use without burning delicate roots.
The central idea: Orchids usually need lighter, more regular feeding, not a heavy dose given whenever the leaves look tired.
Research into orchid fertilization has a long history. The University of Florida describes orchid fertilizer studies dating back to 1957, when Tom Sheehan began testing feeding methods for orchids grown in bark, helping shape modern practices for epiphytic orchids. The University of Florida's orchid fertilizer history also shows why a single universal formula can't tell the whole story.
A beginner-friendly approach starts with four questions:
- What nutrients does the label provide?
- Which form of nitrogen does it contain?
- What medium surrounds the roots?
- How will the fertilizer reach the plant?
Answer those questions, then adjust the dose by observing new leaves, roots, and flower spikes. You won't need to chase a magic bloom formula. You'll be able to choose a sensible fertilizer, dilute it carefully, and change the routine when your orchid's conditions change.
How Orchid Nutrition Works and What NPK Really Means
Think of fertilizer as an orchid's meal, not a stimulant. The three large numbers on the front of a package represent nitrogen, phosphorus, and potassium, commonly abbreviated as N-P-K. Each nutrient performs a different job, and orchids need all three in a usable balance.
The three main nutrients
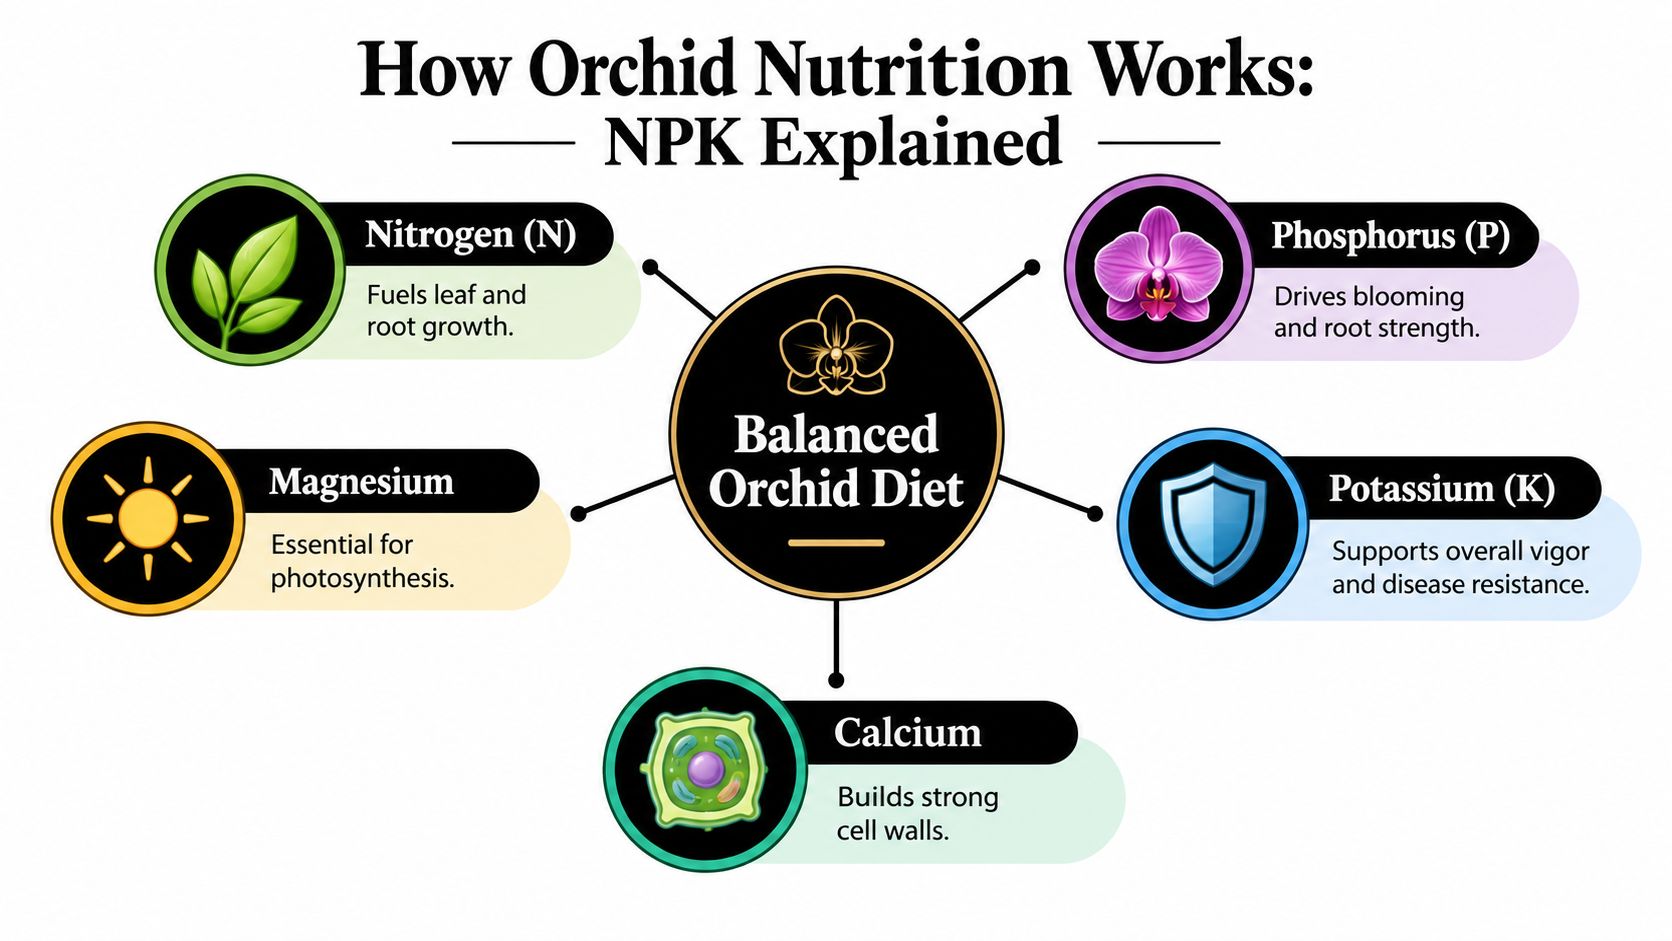
Nitrogen, or N, supports leafy growth. It helps an orchid produce chlorophyll and develop new leaves, roots, and stems. If nitrogen is insufficient, new growth may be weak or pale. Too much, especially in a concentrated application, can create lush foliage while placing unnecessary pressure on sensitive roots.
Phosphorus, or P, supports root development and reproductive growth. It contributes to energy transfer inside the plant and helps support flower production. More phosphorus doesn't automatically force an orchid to bloom. A plant still needs suitable light, mature growth, healthy roots, and the right environmental cues.
Potassium, or K, helps the plant regulate water and maintain general vigor. It supports internal transport and helps tissues handle ordinary environmental stress. It isn't a direct flowering switch, but a plant with stronger overall function is better positioned to sustain leaves, roots, and blooms.
A fertilizer label may show a formula such as 12-1-15. Those figures describe the relative analysis of the product, not a promise that the plant needs those exact proportions in every situation. A review summarized by the University of Florida's orchid nutrient management resource reports that Phalaenopsis performed best with an N:P:K ratio of 12:1:15:3, while Dendrobium ‘Red Emperor' was optimized at 100 mg/L nitrogen, 25 mg/L phosphorus, and 100 mg/L potassium. The same review reports production ranges of 1.3% to 2.1% nitrogen, 0.15% to 2.4% phosphorus, and 1.3% to 2.5% potassium.
The supporting nutrients
NPK gets the large print, but orchids also use micronutrients and secondary nutrients. Calcium contributes to cell structure, while magnesium forms part of the chlorophyll molecule and supports photosynthesis. Iron and other trace elements help with enzyme activity and new growth.
This is why a balanced orchid fertilizer can be more useful than a product marketed only as a “bloom booster.” The plant needs a complete nutritional supply, and the best choice depends on water quality, medium, species, and growth stage. Feed a rooted Phalaenopsis in bark the same way you'd feed an orchid in water-retentive moss, and the results may differ because the roots experience different nutrient availability.
Start by reading NPK as a functional guide:
- Higher nitrogen emphasis can suit active leaf and root development, especially in a nitrogen-poor medium.
- Balanced formulas can support general maintenance when the plant is growing steadily.
- Moderate, complete nutrition is usually safer than repeatedly applying a strong product.
Fertilizer supports the plant's diet. Light supplies the energy that lets the plant use that diet, so feeding can't replace a dim growing location.
How to Read an Orchid Fertilizer Label With Confidence
A fertilizer label becomes much less confusing when you read it in a fixed order. Ignore the flower photograph and phrases such as “instant blooms” at first. Look for the chemistry, the nitrogen sources, the micronutrients, and the directions.
Start with the analysis
The NPK line gives the product's nitrogen, phosphorus, and potassium analysis. Treat it as a comparison tool, not a feeding instruction. A product with larger numbers isn't automatically stronger in a useful way for your orchid. The dilution directions determine how much nutrient reaches the roots.
Next, find the guaranteed analysis. This panel lists nutrient percentages by weight and may identify secondary nutrients such as calcium and magnesium. A short ingredient list isn't necessarily a problem, but a complete label gives you more information for comparing products.
Look for the form of nitrogen
Nitrogen may appear as nitrate, ammoniacal nitrogen, urea, or a combination. This detail matters because orchid roots respond to nitrogen forms differently. A controlled study of two epiphytic orchids found that 40% ammonium nitrogen suited Phalaenopsis, while 50% suited Dendrobium. The same study found that ammonium shares above 75% over 12 months caused toxicity in both genera. The controlled nitrogen-form study provides the evidence behind this distinction.
Research summarized by the American Orchid Society also found better Phalaenopsis growth and flowering when the nitrate-to-ammoniacal nitrogen ratio was at least 1:1, and ideally about 3:1, according to that same study summary. This doesn't mean every home grower must calculate a laboratory-perfect ratio. It means you shouldn't judge a fertilizer by the NPK numbers alone.
Use this store-shelf checklist
- NPK numbers: Identify the relative amounts of nitrogen, phosphorus, and potassium.
- Guaranteed analysis: Check which nutrients are listed and at what concentration.
- Nitrogen form: Look for nitrate, ammoniacal, and urea sources rather than relying on the front label.
- Micronutrients: Check whether calcium, magnesium, and trace elements are included.
- Orchid directions: Confirm the dilution guidance applies to orchids and epiphytic growing conditions.
The word “organic,” a leaf graphic, or a bloom photograph can describe the product's positioning, but none replaces the guaranteed analysis. Compare labels by nutrient profile and directions, then begin with a cautious dilution.
Comparing Liquid Slow Release and Spray Fertilizers for Orchids
The delivery method changes how much control you have over feeding. A liquid fertilizer mixes into water and reaches the roots quickly. Slow-release pellets release nutrients gradually as moisture and temperature affect them. A foliar spray lands on leaves and roots, making it convenient for light supplementation, but it shouldn't be treated as a complete substitute for root feeding.
| Fertilizer Type | Best For | Feeding Control | Salt Risk |
|---|---|---|---|
| Liquid | Growers who want to adjust feeding by season and plant response | High, because you control dilution and timing | Manageable when diluted and flushed |
| Slow release | Busy growers who prefer a longer interval between applications | Moderate, because release continues after placement | Can rise if pellets are overused or the medium dries unevenly |
| Spray | Supplemental feeding during routine plant care | Limited, because coverage and uptake vary | Lower at the root zone, but repeated residue can still accumulate |
Liquid fertilizer
Liquid feeding suits a beginner who wants to understand cause and effect. You can use a lighter solution for a resting plant, apply more consistently during active growth, or stop feeding while diagnosing root damage. The main risk is measuring by guesswork. A capful that seems small can still be too concentrated if the label expects a much larger volume of water.
For a practical explanation of liquid application, see this guide to liquid fertilizer for orchids. Mix the product in clean water, apply it to an already-moistened root system when appropriate, and avoid leaving concentrated fertilizer pooled in the crown.
Slow-release pellets
Pellets can work well for growers who forget weekly feeding. They place nutrients in the medium, where moisture gradually dissolves them. That convenience comes with less flexibility. If the orchid suddenly loses roots, enters dormancy, or needs repotting, you can't remove the previous feed from the root zone as easily as you can discard a mixed liquid solution.
Pellets also need careful placement. Keep them distributed according to the product directions rather than creating a concentrated pocket beside one root. A bark mix that dries quickly may release nutrients differently from moss that stays damp.
Foliar sprays
Sprays are easy to apply and useful when you want a light supplement without saturating the pot. They shouldn't replace a sound root-feeding routine, especially for an orchid that needs complete nutrition. Spray early enough for foliage to dry, keep liquid out of the crown, and stop if you see spotting or residue.
Choose the method that matches your attention and setup. Liquid gives the most control, pellets reduce routine effort, and sprays offer convenience with more limited nutritional coverage.
When and How Much to Feed Timing Dilution and Flushing
A reliable orchid feeding routine is deliberately uneventful. You don't want dramatic swings between drought, heavy fertilizer, and long neglect. You want a mild solution applied when the plant is actively making roots, leaves, or a flower spike, with plain water used regularly to move residue out of the pot.
Build the weekly rhythm
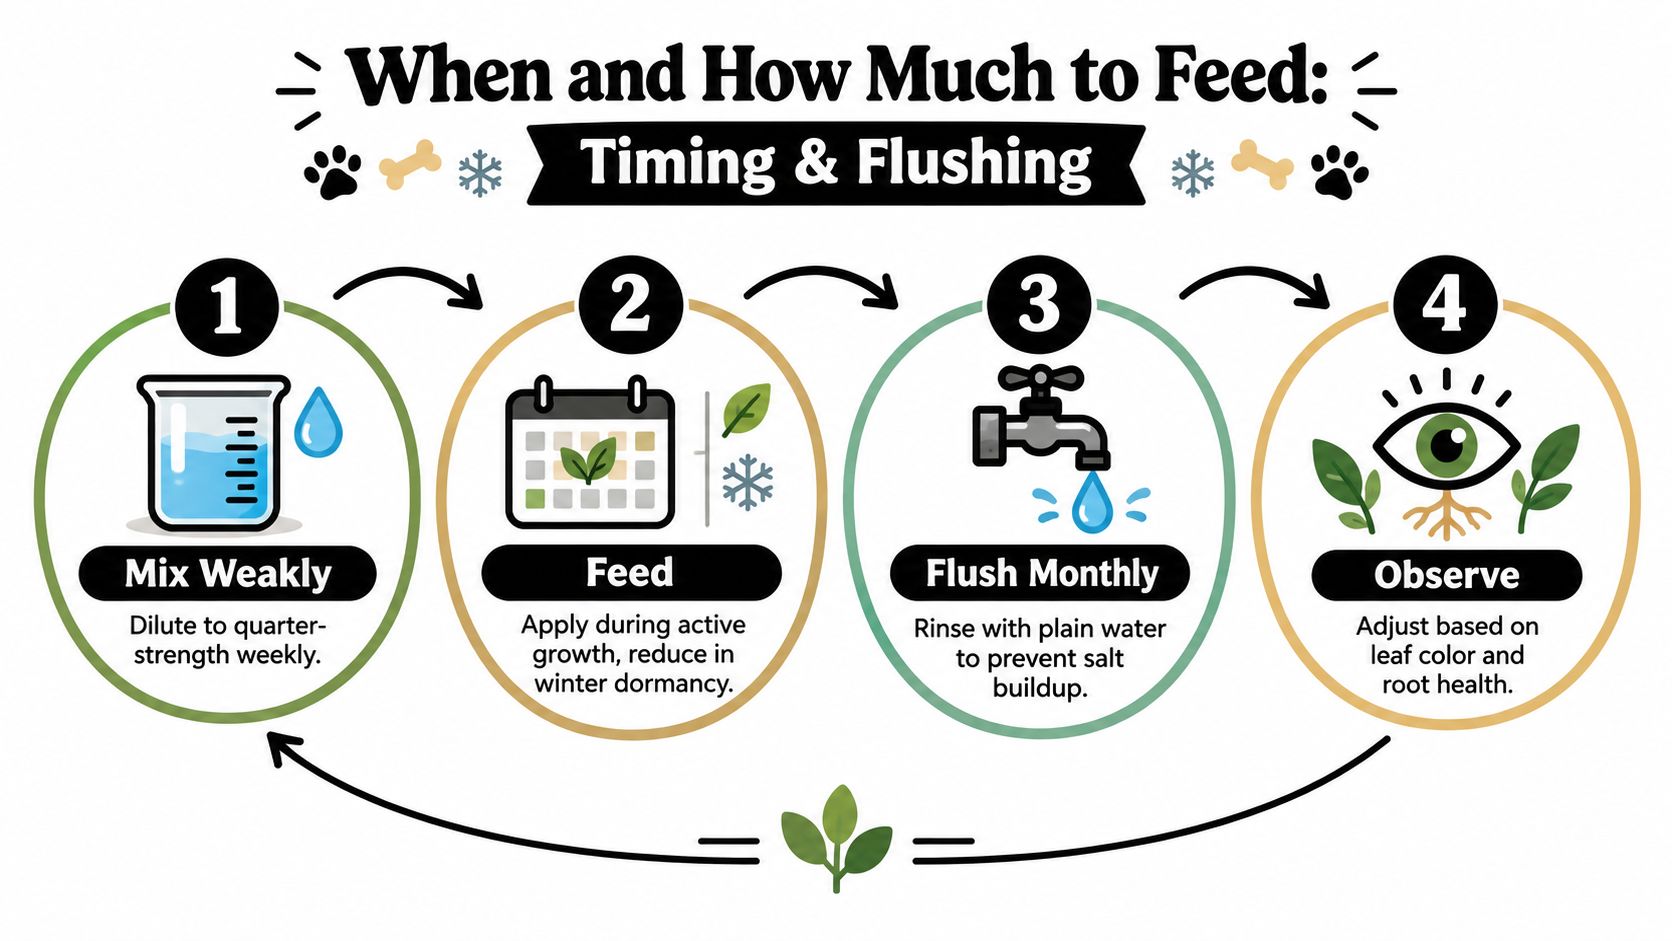
The American Orchid Society recommends a low-dose, frequent approach. One expert guideline recommends using fertilizer at quarter strength once weekly during active growth, followed by a plain-water flush about monthly to limit salt buildup. The American Orchid Society's fertilizer guidance explains why orchids often benefit from small, regular amounts rather than heavy feeding.
Use this sequence:
- Mix weakly. Follow the bottle's orchid directions, then use a quarter-strength solution if that matches the product guidance.
- Feed during active growth. Apply when the orchid is producing new roots or leaves. Reduce or pause feeding if the plant is clearly resting, recently repotted, or suffering root damage.
- Flush with plain water. About monthly, water thoroughly with plain water so accumulated salts can drain from the pot.
- Observe the plant. Watch new growth, leaf color, root condition, and the medium's drying pattern before changing the routine.
Why flushing matters
Fertilizer salts can remain in bark, moss, or other media after water evaporates. Orchids may show root damage before the leaves reveal an obvious problem. Brown or shriveled roots, a crust on the medium or pot, and declining growth can all justify reviewing both concentration and flushing.
Don't fertilize a severely dehydrated orchid with a strong solution. Water reaches dry roots unevenly, and concentrated fertilizer can increase stress. Moisten the plant appropriately, let excess water drain, and keep the root zone ventilated.
For a routine you can adapt to your home conditions, use this orchid fertilizer schedule as a practical reference. Your calendar should follow the plant, not the date alone. A warm, bright orchid actively growing in a ventilated bark mix may need a different rhythm from a cool orchid sitting in damp moss.
Choosing the Right Fertilizer for Your Orchid Type and Potting Mix
A bark-grown orchid may need a different feeding approach from one planted in moss or a semi-hydro setup. The medium controls how quickly water, nutrients, and oxygen move around the roots, so choosing fertilizer starts with the pot, not only the NPK numbers.
Match the formula to the medium
Bark drains quickly and contributes little nitrogen. During active leaf and root growth, a nitrogen-forward formula such as 30-10-10 can suit bark-grown orchids, where nutrients may wash through before roots absorb enough. This bark-focused fertilizer guidance links the formula to the substrate instead of presenting 30-10-10 as a universal choice.
Moss holds moisture and dissolved fertilizer for longer. A dose that seems mild in bark can remain concentrated around moss-grown roots. Use a weaker solution, wait until the medium reaches the appropriate dryness, and avoid feeding just because the surface appears dry.
Semi-hydroponic systems behave differently again. Mineral components and a reservoir can keep nutrients available between applications, making an open-bark schedule too strong. Monitor root color and new growth, and include plain-water flushing to limit residue.
Consider the orchid's identity
Phalaenopsis often performs well with moderate, balanced feeding while roots are healthy and growth is active. Nitrogen form still matters, because two fertilizers with similar NPK numbers can supply nitrogen in different chemical forms.
Dendrobium can respond differently. Research on Dendrobium ‘Red Emperor' optimized a solution at 100 mg/L nitrogen, 25 mg/L phosphorus, and 100 mg/L potassium, along with a particular ammonium share. Since the UFL orchid nutrient review has already been cited earlier, use its findings as background rather than repeating that source here. The practical lesson is simple: species can influence the formula and nitrogen balance that work best.
Cymbidium and other orchids may also respond to combinations of liquid fertilizer and biological amendments. Do not transfer a research or greenhouse program directly to a home pot. Water quality, airflow, container size, growth stage, and the medium all change the result.
Delivery method can alter the effective dose as much as formula choice. A 2026 study on Phalaenopsis reported that a capillary fertigation system used 25% of the water and fertilizer required by conventional overhead fertigation while improving efficiency. Before choosing a longer-interval option, compare the reservoir, medium, and application pattern with guidance on slow-release fertilizer for orchids.
Your Simple Year Round Orchid Feeding Plan
A good year-round plan has fewer rules than most labels suggest. Begin with a complete orchid fertilizer, check the nitrogen sources, and match the delivery method to the medium. Then keep the dose light enough that you can observe the plant without constantly correcting problems.
During active growth, feed at a cautious dilution on the watering days your orchid needs. Bark-grown plants may need more nitrogen support than orchids in a nutrient-retentive medium. Moss and semi-hydro setups call for closer attention to lingering moisture and fertilizer residue.
When growth slows, reduce feeding rather than continuing automatically. A plant with damaged roots should recover before receiving regular fertilizer, and a recently repotted orchid may need time to establish contact with the new medium.
Use these signals as troubleshooting clues:
- Pale new growth and slow leaf development: Review light, roots, and whether the medium supplies enough nitrogen.
- Brown roots or fertilizer residue: Reduce concentration and flush more thoroughly.
- Healthy roots but no flowers: Check light, maturity, temperature, and seasonal growth before adding more fertilizer.
- Rapidly worsening leaves: Stop feeding while you inspect roots, watering, airflow, and the crown.
Leaves & Soul offers orchid-focused options including 13-11-11 slow-release orchid and bromeliad pellets, a professional orchid fertilizer spray, and liquid orchid fertilizer. Choose the format that fits your medium and the amount of control you want, then follow its directions rather than combining several products at once.
Start this week by checking the roots and potting mix, photographing the fertilizer label, and writing down your dilution. Feed lightly during active growth, flush with plain water on a regular monthly interval, and change only one part of the routine at a time.
Visit Leaves & Soul to compare liquid, spray, and slow-release orchid fertilizer options for your growing setup. Choose a formula and delivery method that match your orchid's medium, then use it as part of a steady care routine focused on healthy roots and dependable growth.